How To Automate User Provisioning in GoodData
3 min read | Published
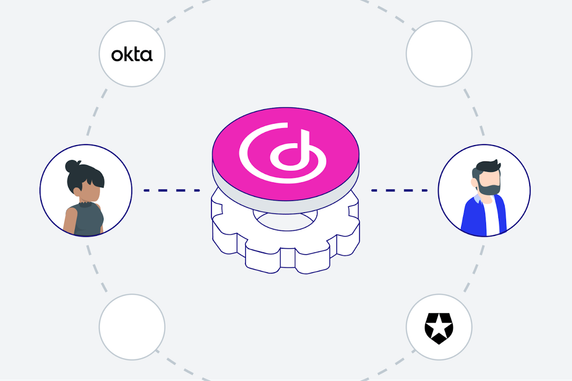

As businesses expand their analytical capabilities, the need for task automation, such as user provisioning, becomes increasingly evident. Manual processes consume valuable time and introduce the possibility of errors. This article delves into automating user provisioning in GoodData, using the GoodData Python SDK. While our example employs Auth0 as the OIDC provider, the core principles remain applicable to other providers like Okta.
Prerequisites:
Before we dive into the automation process, ensure you have the following:
- A GoodData Cloud account without the ManagedOIDC entitlement If you wish to change the OIDC IdP that your trial environment is using, contact us on our community portal.
- An OIDC provider (we use Auth0 in this article but the concepts apply to other providers like Okta, Cloud IAM, Keycloak, etc.).
- Configured authentication application with Callback URLs and Secrets. In the case of Auth0, see the documentation for details.
- Configured OIDC authentication in GoodData. See the documentation for details.
- Installed gooddata-sdk and auth0-python. Preferably, you should have configured a virtual environment.
Tip: The code repository is open-sourced.
Step 1: Users and Roles in OIDC
Begin by populating your OIDC provider with users. On the following screen, you can see users in Auth0.

Defining user roles is essential to control access. For instance, "Admin" and "User" roles can be set up.

You can now move to the next step, which will configure all the required environment variables for the solution.
Step 2: Configure Environment Variables
For Auth0, you will need to define the following three environment variables:
AUTH0_DOMAINAUTH0_CLIENT_IDAUTH0_SECRET
You can find all of these in the Auth0 application.

Then copy & paste their values into the following code snippet.
export AUTH0_DOMAIN='<auth0-domain>'
export AUTH0_CLIENT_ID='<auth0-client-id>'
export AUTH0_SECRET='<auth0-secret>'
The last step in this section is to configure GoodData environment variables. If you do now know how to get a GoodData API token, see our documentation for details.
export GOODDATA_HOST='<gooddata-host>'
export GOODDATA_TOKEN='<gooddata-token>'
export GOODDATA_WORKSPACE_ID='<gooddata-workspace-id>'
Tip: You can find the GoodData host and GoodData workspace ID in the URL <GOODDATA_HOST>/dashboards/#/workspace/<GOODDATA_WORKSPACE_ID>.
Step 3: Create User Groups in GoodData
Organize users in GoodData using user groups. In this example, we use "adminGroup" for users with Admin roles and "userGroup" for those with User roles.
def create_user_groups():
    # adminGroup already exists, it means that only userGroup needs to be created
    user_group = CatalogUserGroup.init(user_group_id="userGroup")
    gooddata_sdk.catalog_user.create_or_update_user_group(user_group=user_group)
You can see in the script above that you do not need to create the adminGroup because it already exists in GoodData.
Step 4: Create Permissions in GoodData
Define permissions to regulate user access within GoodData. The "MANAGE" permission allows users (who are in the adminGroup in the example below) to create and edit visualizations and dashboards. In contrast, the "VIEW" permission grants users (who are in the userGroup in the example below) read-only access.
def create_permissions():
    declarative_permissions = gooddata_sdk.catalog_permission
        .get_declarative_permissions(gooddata_workspace_id)
    admin_group_permissions = {
        "name": "MANAGE",
        "assignee": {
             "id": "adminGroup",
             "type": "userGroup"
        }
    }
    user_group_permissions = {
        "name": "VIEW",
        "assignee": {
            "id": "userGroup",
            "type": "userGroup"
        }
    }

    declarative_permissions.permissions = [admin_group_permissions, user_group_permissions]
    gooddata_sdk.catalog_permission
        .put_declarative_permissions(gooddata_workspace_id, declarative_permissions)
Tip: Check the Manage Permissions section of our documentation for more information.
Step 5: Provision Users From Auth0 to GoodData
The most important part is correctly mapping users from the OIDC provider (in our case Auth0) to GoodData. First, retrieve user data and roles from Auth0:
def get_auth0_users():
    return auth0.users.list()


def get_auth0_user_role(auth_id: str):
    return auth0.users.list_roles(auth_id)
With users and roles from Auth0, it is easy to map users to GoodData and assign them the appropriate permissions.
def create_or_update_user(user_id: str, authentication_id: str, user_group_ids: List[str]):
    gooddata_sdk.catalog_user.create_or_update_user(
        CatalogUser.init(
            user_id,
            authentication_id,
            user_group_ids
        )
    )


def provision_users():
    users = get_auth0_users()

    for user in users["users"]:
        # user_id is the authentication_id in this case, it is auth0|<user_id>
        auth_id = user["user_id"]
        user_id = auth_id.replace("auth0|", "")
        # user can have assigned more roles, I assigned just one
        role = get_auth0_user_role(auth_id)["roles"][0]
        role_name = role["name"]


        # if user has an admin role, it is assigned to adminGroup
        if role_name == "Admin":
            create_or_update_user(user_id, auth_id, ["adminGroup"])
        else:
            create_or_update_user(user_id, auth_id, ["userGroup"])
After this step, all users from the OIDC provider are provisioned to GoodData. For seamless user provisioning, automate the entire process.
Step 6: Automation of User Provisioning
Schedule regular execution of the provisioning script, which checks for new users and maintains synchronization. You can use Auth0 Actions (or similar tools from other OIDC providers) for advanced use cases. In our example, running a simple cron job is enough:
def run_provisioning():
    print("Checking new users...")
    create_user_groups()
    create_permissions()
    provision_users()
    print("Done")


schedule.every(1).hour.do(run_provisioning)

while True:
    schedule.run_pending()
    time.sleep(1)
The script above ensures that the provisioning of new users runs every hour.
A Known Limitation
The outlined user provisioning approach lacks change management logic. In the scenario provided, even if we remove users from the OIDC provider, they will remain inactive in GoodData. While integrating change management logic is feasible, we have omitted its implementation in this context for the sake of article simplicity.
Final Thoughts
Automating user provisioning is a pivotal step in scaling your analytics endeavors. By integrating the GoodData Python SDK and Auth0, you can efficiently manage user access and permissions, ensuring accurate data analysis and reporting. If you have any queries or require assistance, don't hesitate to reach out on the GoodData Slack channel. Ready to get started? Explore the possibilities by signing up for our free trial today!
Experience GoodData in Action
Discover how our platform brings data, analytics, and AI together — through interactive product walkthroughs.
Explore product tours