How to Develop Your First GoodData Dashboard Plugin
5 min read | Published

If you want to build your first GoodData Dashboard Plugin, this article will guide you step-by-step through the whole process.
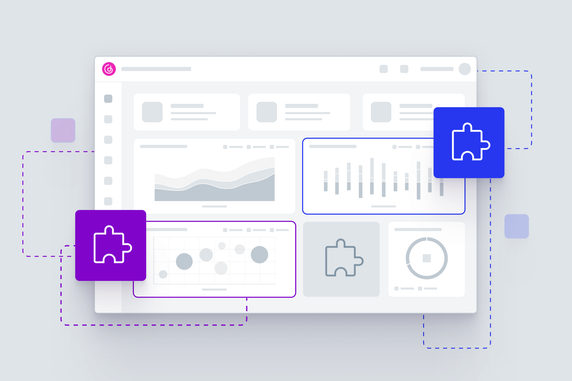
What is a GoodData Dashboard Plugin?
GoodData Dashboard Plugins offer developers the unique opportunity to unleash their creativity and customize GoodData Dashboards according to their individual needs or business goals. For example, our Grouping Insights plugin allows developers to cluster relevant insights and smoothly transition between them using a simple dropdown menu. This enhances not only the visual organization of data but also the speed and convenience with which users can navigate between different data points.

Our Dashboard Description plugin is another shining example of possible customizations. Not only does it allow developers to incorporate detailed descriptions into their dashboards, but it also supports dynamic attribute values and metrics. This introduces an unparalleled level of context to your data interpretation, allowing users to easily understand complex datasets and make informed decisions.

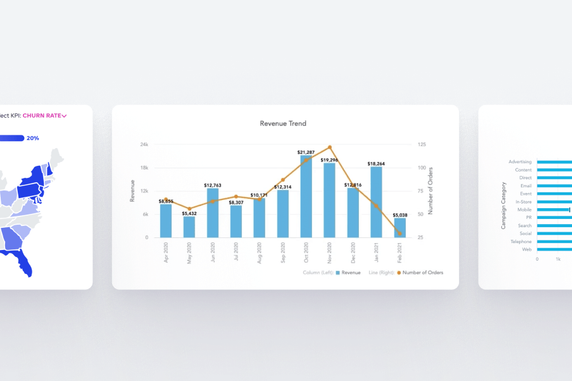
The potential for advanced visualization cannot be overstated either. With visualizations plugins, developers can now showcase data in intuitive ways that were previously impossible. These tools help translate intricate data into digestible visual narratives, driving home key insights and findings with far more impact.
From a technical perspective, the plugins are loaded as build time dependency using Webpack Module Federation and they interact with the dashboard engine. At the time of registration, the plugin can access several customization APIs to deliver new custom widgets, modify the rendering of insights, and listen to events occurring on the dashboard.
These plugins are designed to be registered to a workspace, after which they can be used on any number of dashboards. This allows for scalable reusability across different dashboards, and for further customization, the link between the dashboard and the plugin can be parameterized.
So, whether it's about refining data navigation, enhancing comprehension, or telling compelling data stories, GoodData Dashboard Plugins truly open up a world of possibilities for developers. Because they use a thoughtful architecture and modern technologies, GoodData Dashboard Plugins are designed with developers in mind, enabling them to reimagine and reinvent the way we interact with data.
Getting Started with Dashboard Plugins
Step 1: Install the Plugin Development Toolkit
To quickly start developing your plugin, we offer a Toolkit that makes the setup easy and smooth. It comes with a Command Line Interface that guides you in naming the plugin, selecting the GoodData backend type, setting the Hostname, and opting between JavaScript and TypeScript. While the Workspace and Dashboard ID are optional at this stage, they can be configured in the subsequent step.
To initialize a new plugin, run:
npx @gooddata/plugin-toolkit dashboard-plugin init
Step 2: Start the Development Server
Once the toolkit has created your new plugin, go to the generated folder. Ensure your .env and .env.secrets files are set up correctly. The CLI should have already populated the .env file values during the installation process. However, in the .env.secrets file, you need to uncomment and fill the line containing TIGER_API_TOKEN if you are using GoodData.CN/GoodData Cloud, or GDC_USERNAME with GDC_PASSWORD if you are using GoodData Platform. The backend type was selected in the first step, so your plugin is already configured to operate with it.
With everything set, you're ready to start the development server with npm start. Verify everything is functioning properly by opening https://127.0.0.1:3001. If successful, you should see your existing dashboard with an added empty section titled 'Added from a plugin'.
Experience GoodData in Action
Discover how our platform brings data, analytics, and AI together — through interactive product walkthroughs.
Explore product toursStep 3: Develop Your Plugin Code
Your main plugin file will be located at src/dp_<your_plugin_name>_plugin/Plugin.tsx. This is where you'll register all your custom content. Feel free to create as many new files and folders as you wish, but note that renaming generated folders and files could break the plugin's functionality.
Within this file, you'll observe the Register method, which is the main function called after the plugin mounts to the Dashboard's DOM. The core code for your plugin should be called here. The onPluginLoaded and onPluginUnload methods can be used to perform specific initialization and cleanup tasks, respectively.
A good starting point is to select the Customize parameter from the Register method and explore all the possible methods using TypeScript's autosuggestion and IDE Description. Frequently used methods include customize.customWidgets().addCustomWidget() for adding a new widget, customize.insightWidgets().withCustomProvider() for modifying an existing widget (e.g., introducing new visualizations and using data from an existing one), and customize.layout().customizeFluidLayout() for adding a new item or section to the dashboard layout.
When modifying an existing widget, it's crucial to determine how the plugin should identify which widget to change. This can be achieved in several ways - via parameters, tags, suffixes/prefixes on widget titles, or visualization types. The best choice will depend on your specific use case. We recommend going through open-sourced dashboard plugins to understand our approach in different scenarios.
Lastly, remember that you can access the entire dashboard state using the useDashboardSelector hook. However, this is a more advanced topic beyond the scope of this article.
Step 4: Build the Plugin
Next, build the plugin by running npm run build-plugin. This will create plugin artifacts under dist/dashboardPlugin.
Note that you can use dashboard plugins directly with React Dashboard Component as Local Plugins when you are building a custom FE application on top of GoodData.
Step 5: Upload Plugin Artifacts to Your Hosting
Upload all files from dist/dashboardPlugin to your hosting. Remember, GoodData currently doesn't offer hosting for your plugin artifacts. Also, ensure that your hosting supports HTTPS and your GoodData domain includes the hosting location in the list of allowed hosts.
Step 6: Add Plugin to Workspaces
After your plugin is publicly hosted, integrate it into your workspace using the CLI to add the plugin to your default workspace (defined in .env) or to a different workspace you specify.
Run the following command to create a new dashboard plugin object in the workspace, pointing to the URL of your plugin:
npm run add-plugin -- "https://your.hosting/pluginDirOfYourChoice/dp_test.js"
Once the plugin object is created, the last line of the terminal response should look something like this: “Created new plugin object with ID a8682044-3c57-4daf-9b00-05b082a3450”, you'll need this identifier later to link the plugin with the dashboard.
Step 7: Use the Plugin on a Dashboard
Having created a plugin object in your workspace, you're now ready to link it with one or more dashboards. The link-plugin script in package.json makes this simple by linking the plugin with the dashboard specified in your .env file or you can override the .env with CLI options.
npm run link-plugin -- <plugin-object-id>`
If you want to reuse a plugin across different dashboards and customize its behavior (e.g. correctly display dashboard-specific text), specify additional parameters in each dashboard-plugin link. When specified, the parameters are sent as the second argument to the onPluginLoad function by the loader.
If your plugin supports parameterization and you want to specify parameters for the dashboard-plugin link, use: npm run link-plugin -- <plugin-object-id> --with-parameters
An editor will open for you to define the input parameters. Keep in mind that the CLI tool can link the plugin to different backends or workspaces. Use npm run gdc-plugins -- --help to learn more.
If you intend to use the plugin in production across multiple dashboards or workspaces, we recommend utilizing the REST API during the provisioning automation process. This will assist you in distributing the plugin to all tenants.
Step 8 (Optional): Update Plugin Parameters on a Dashboard
To update or add parameters into an already linked plugin, use npm run update-plugin-params -- <plugin-object-id>.
Step 9 (Optional): Remove Plugin Parameters on a Dashboard
To remove the parameters from an already linked plugin, use npm run remove-plugin-params -- <plugin-object-id>.
Ensuring Security
When developing your plugin, keep in mind that it does not need to handle authentication against the GoodData backend. However, during development, the harness needs to provide an authenticated environment to the plugin. Therefore, ensure that your credentials are secure and never include them in your plugin source code or other assets.
Happy coding! 🚀
References
- GoodData Dashboard Plugins
- GoodData Dashboard Plugin Toolkit Source Code
- GoodData.UI Plugins Documentation
Experience GoodData in Action
Discover how our platform brings data, analytics, and AI together — through interactive product walkthroughs.
Explore product toursIf you are interested in GoodData.CN, please contact us. Alternatively, sign up for a trial version of GoodData Cloud: https://www.gooddata.com/trial/