Create a Logical Data Model
Before you can start analyzing and visualizing your data, you need to first create a logical data model (LDM) for the said data. Follow the instructions in this article to create a LDM.
To generate the the logical data model (LDM) automatically in the LDM Modeler, follow these steps:
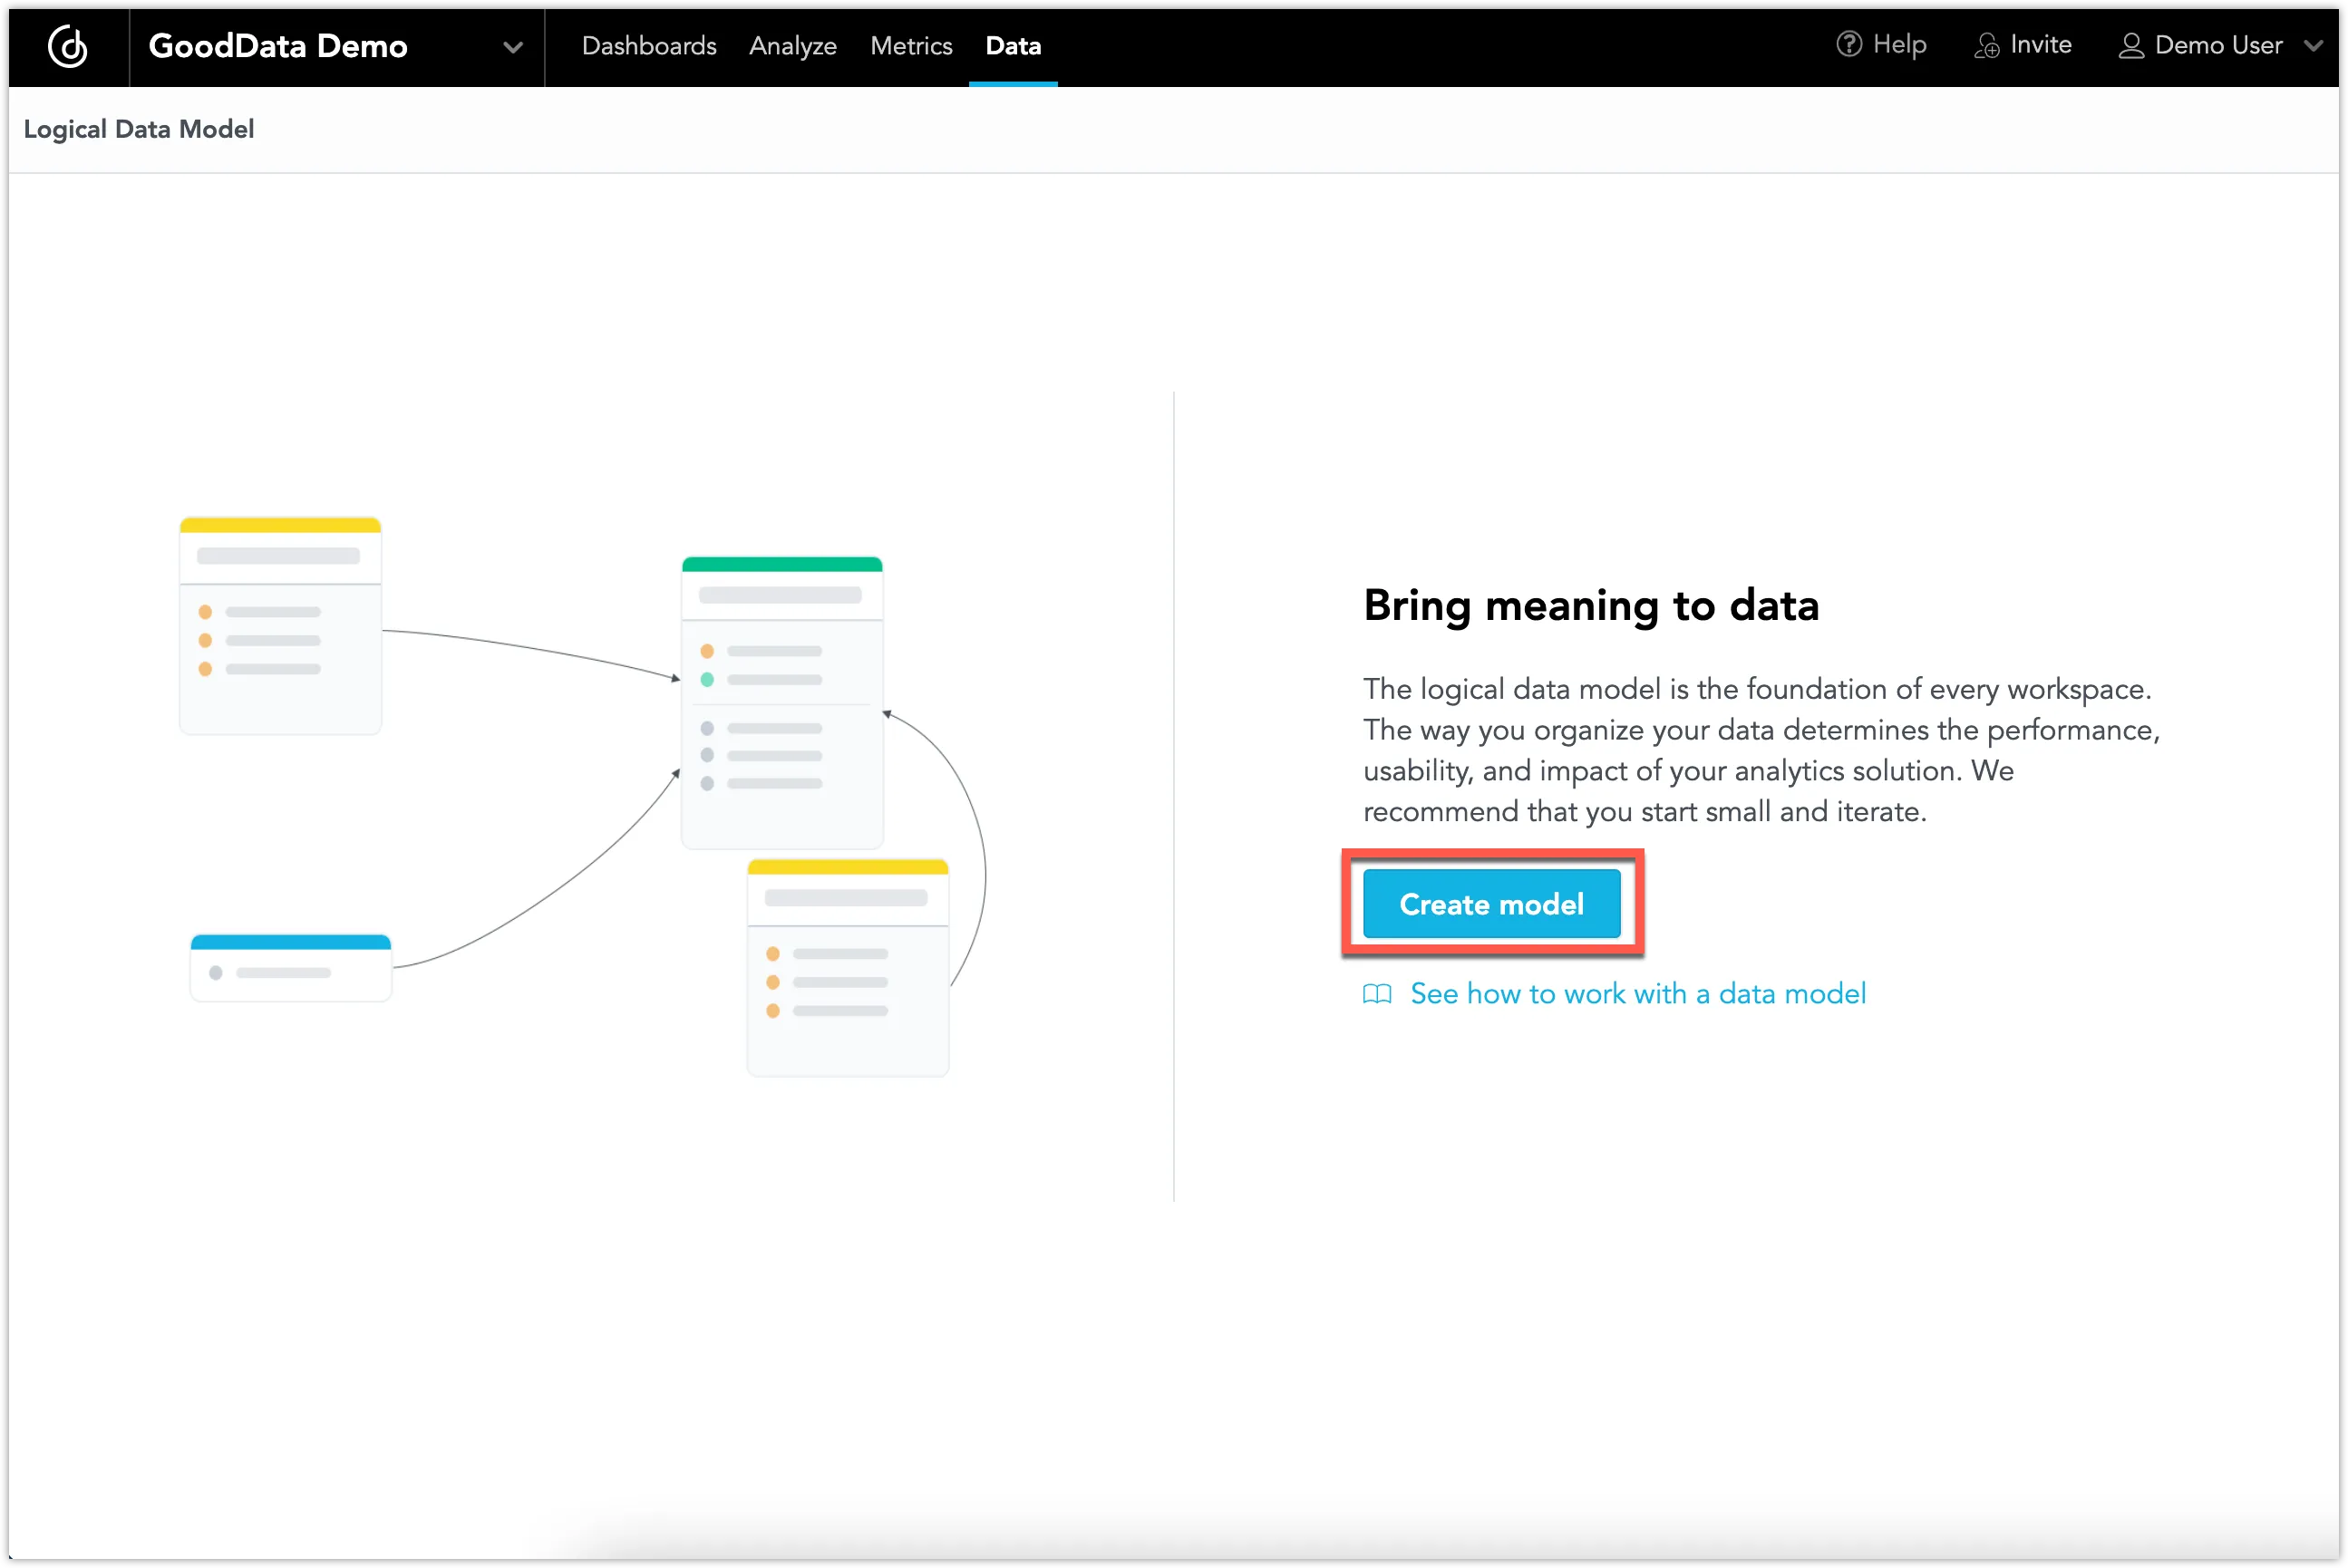
Open the demo workspace and ensure you are in the Data tab.
Click Create model.
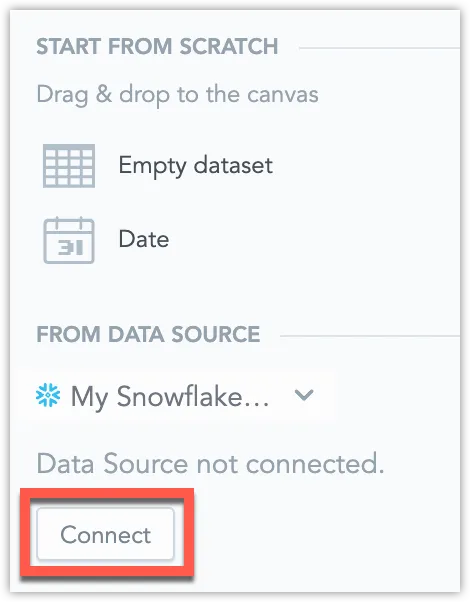
Click the Connect button on the left panel to connect your data source to your LDM.
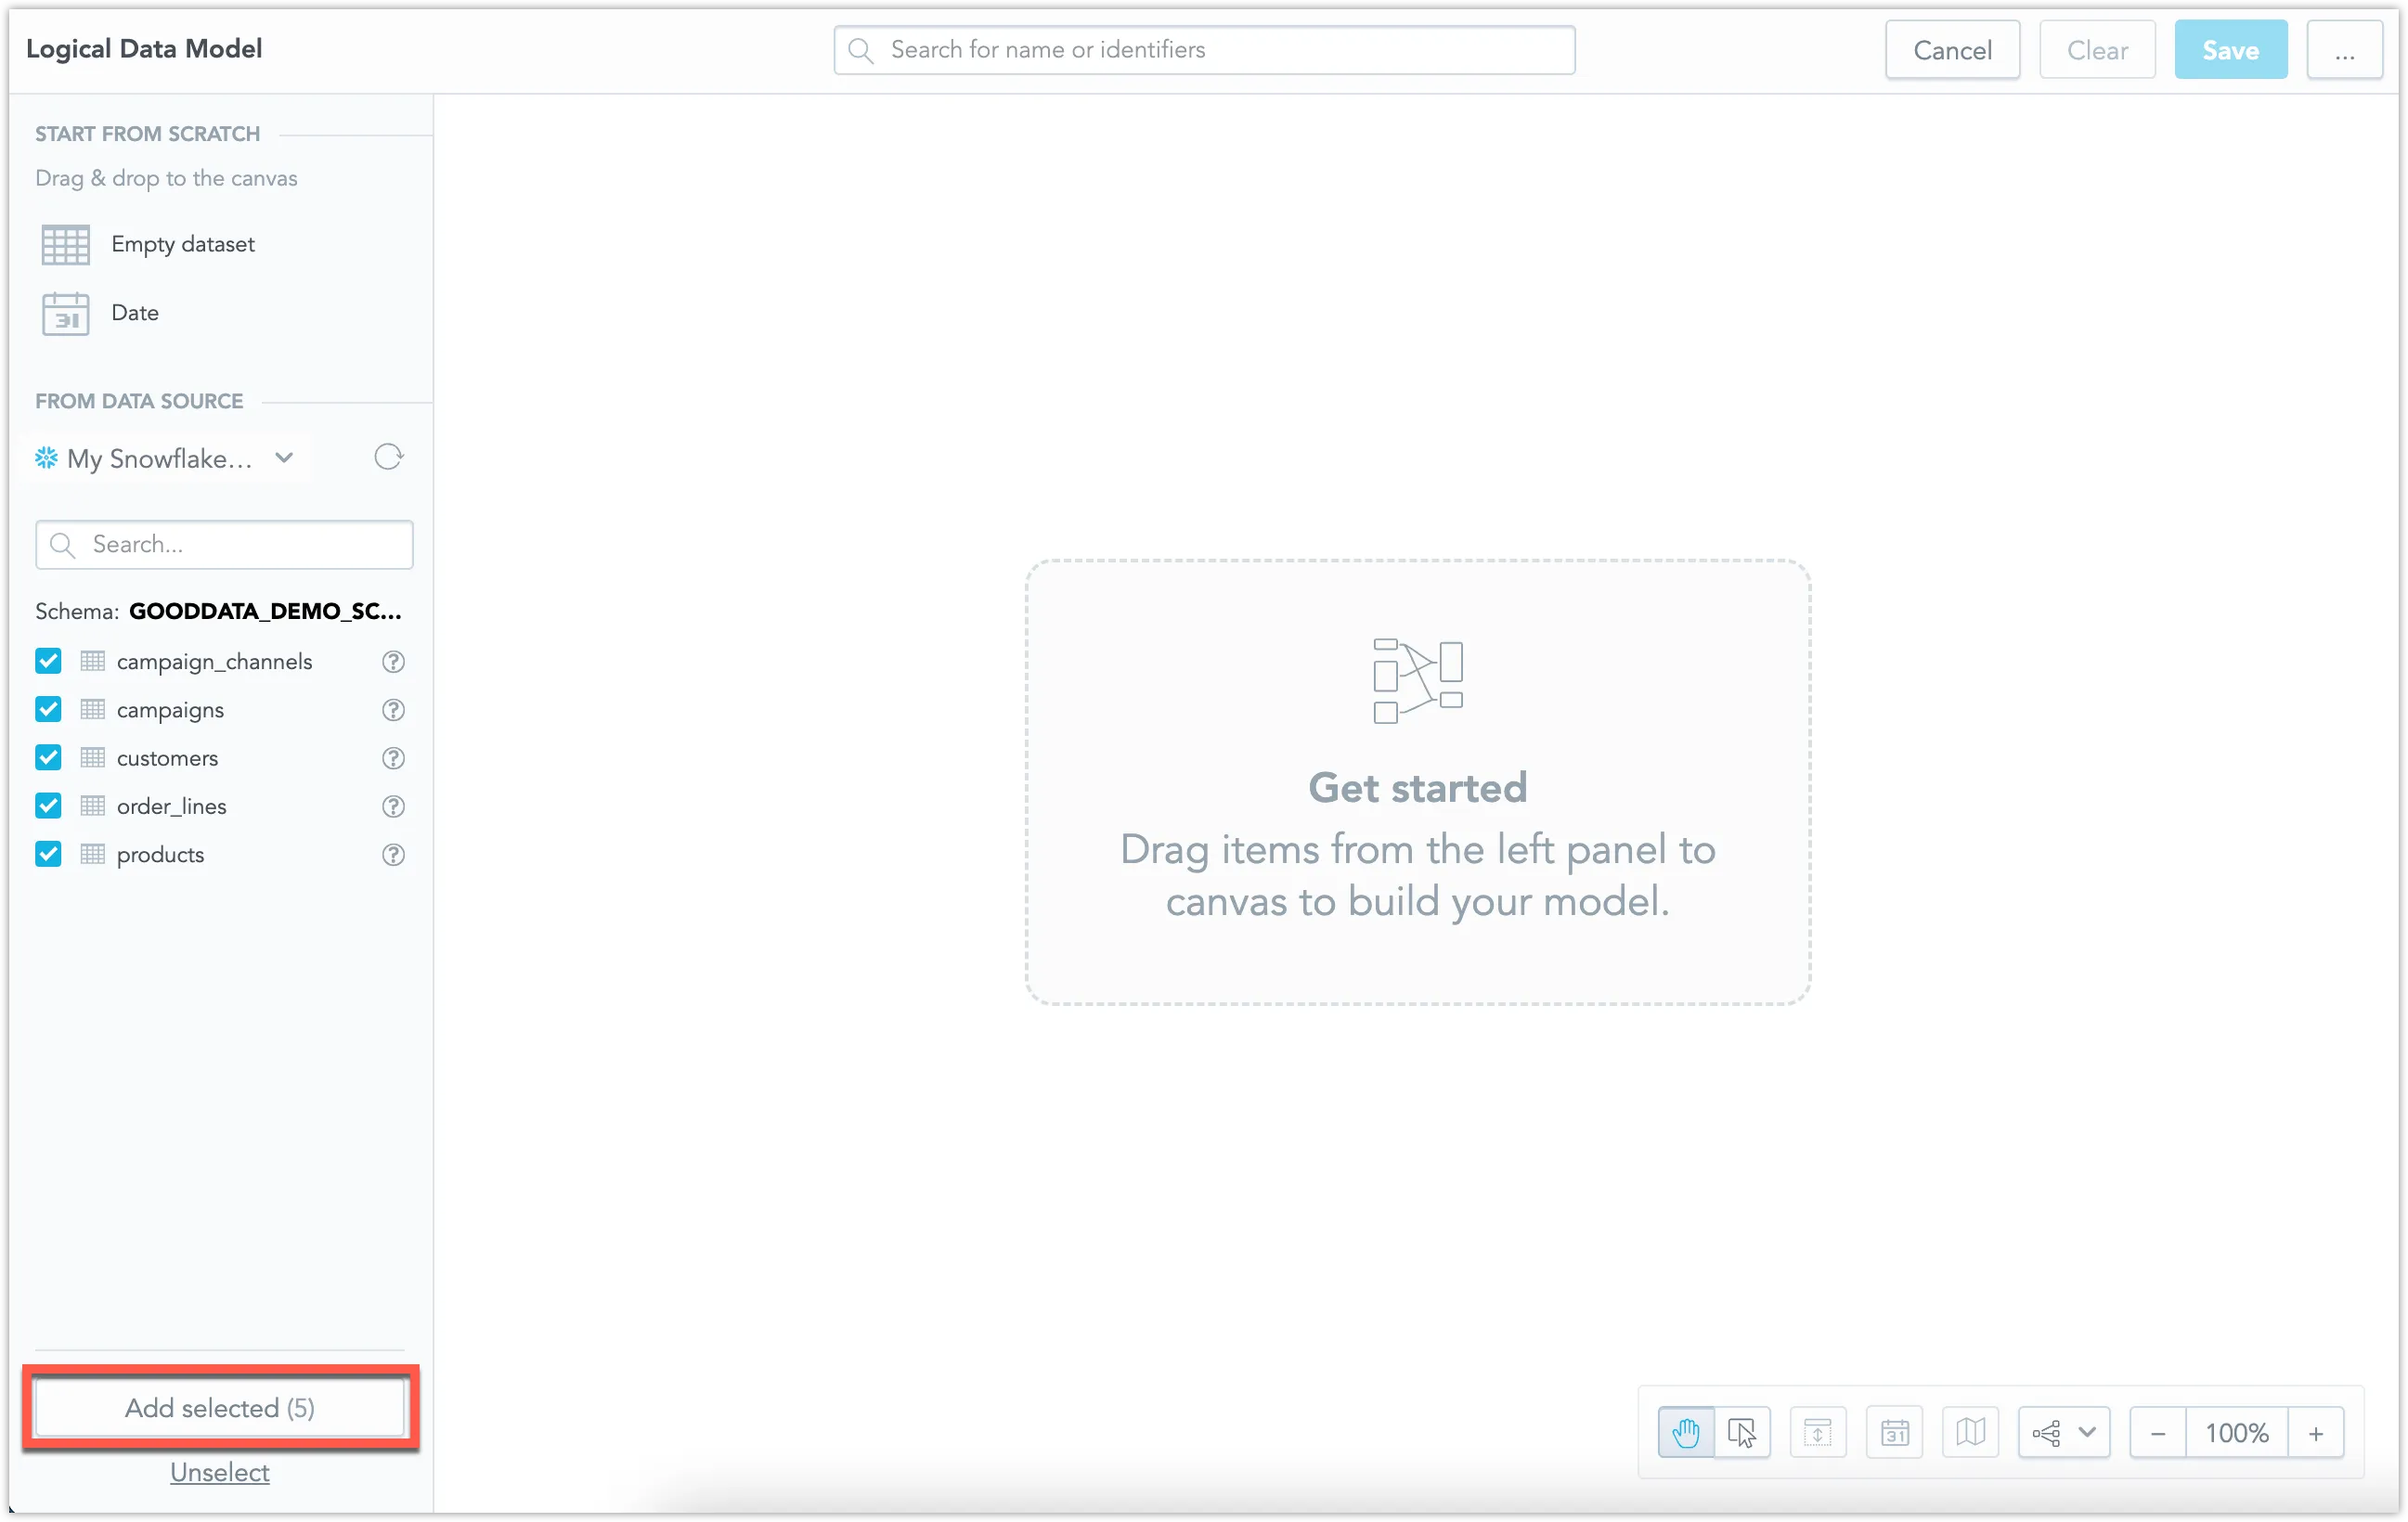
Select your tables and click Add selected to add your tables as data sets to the LDM.
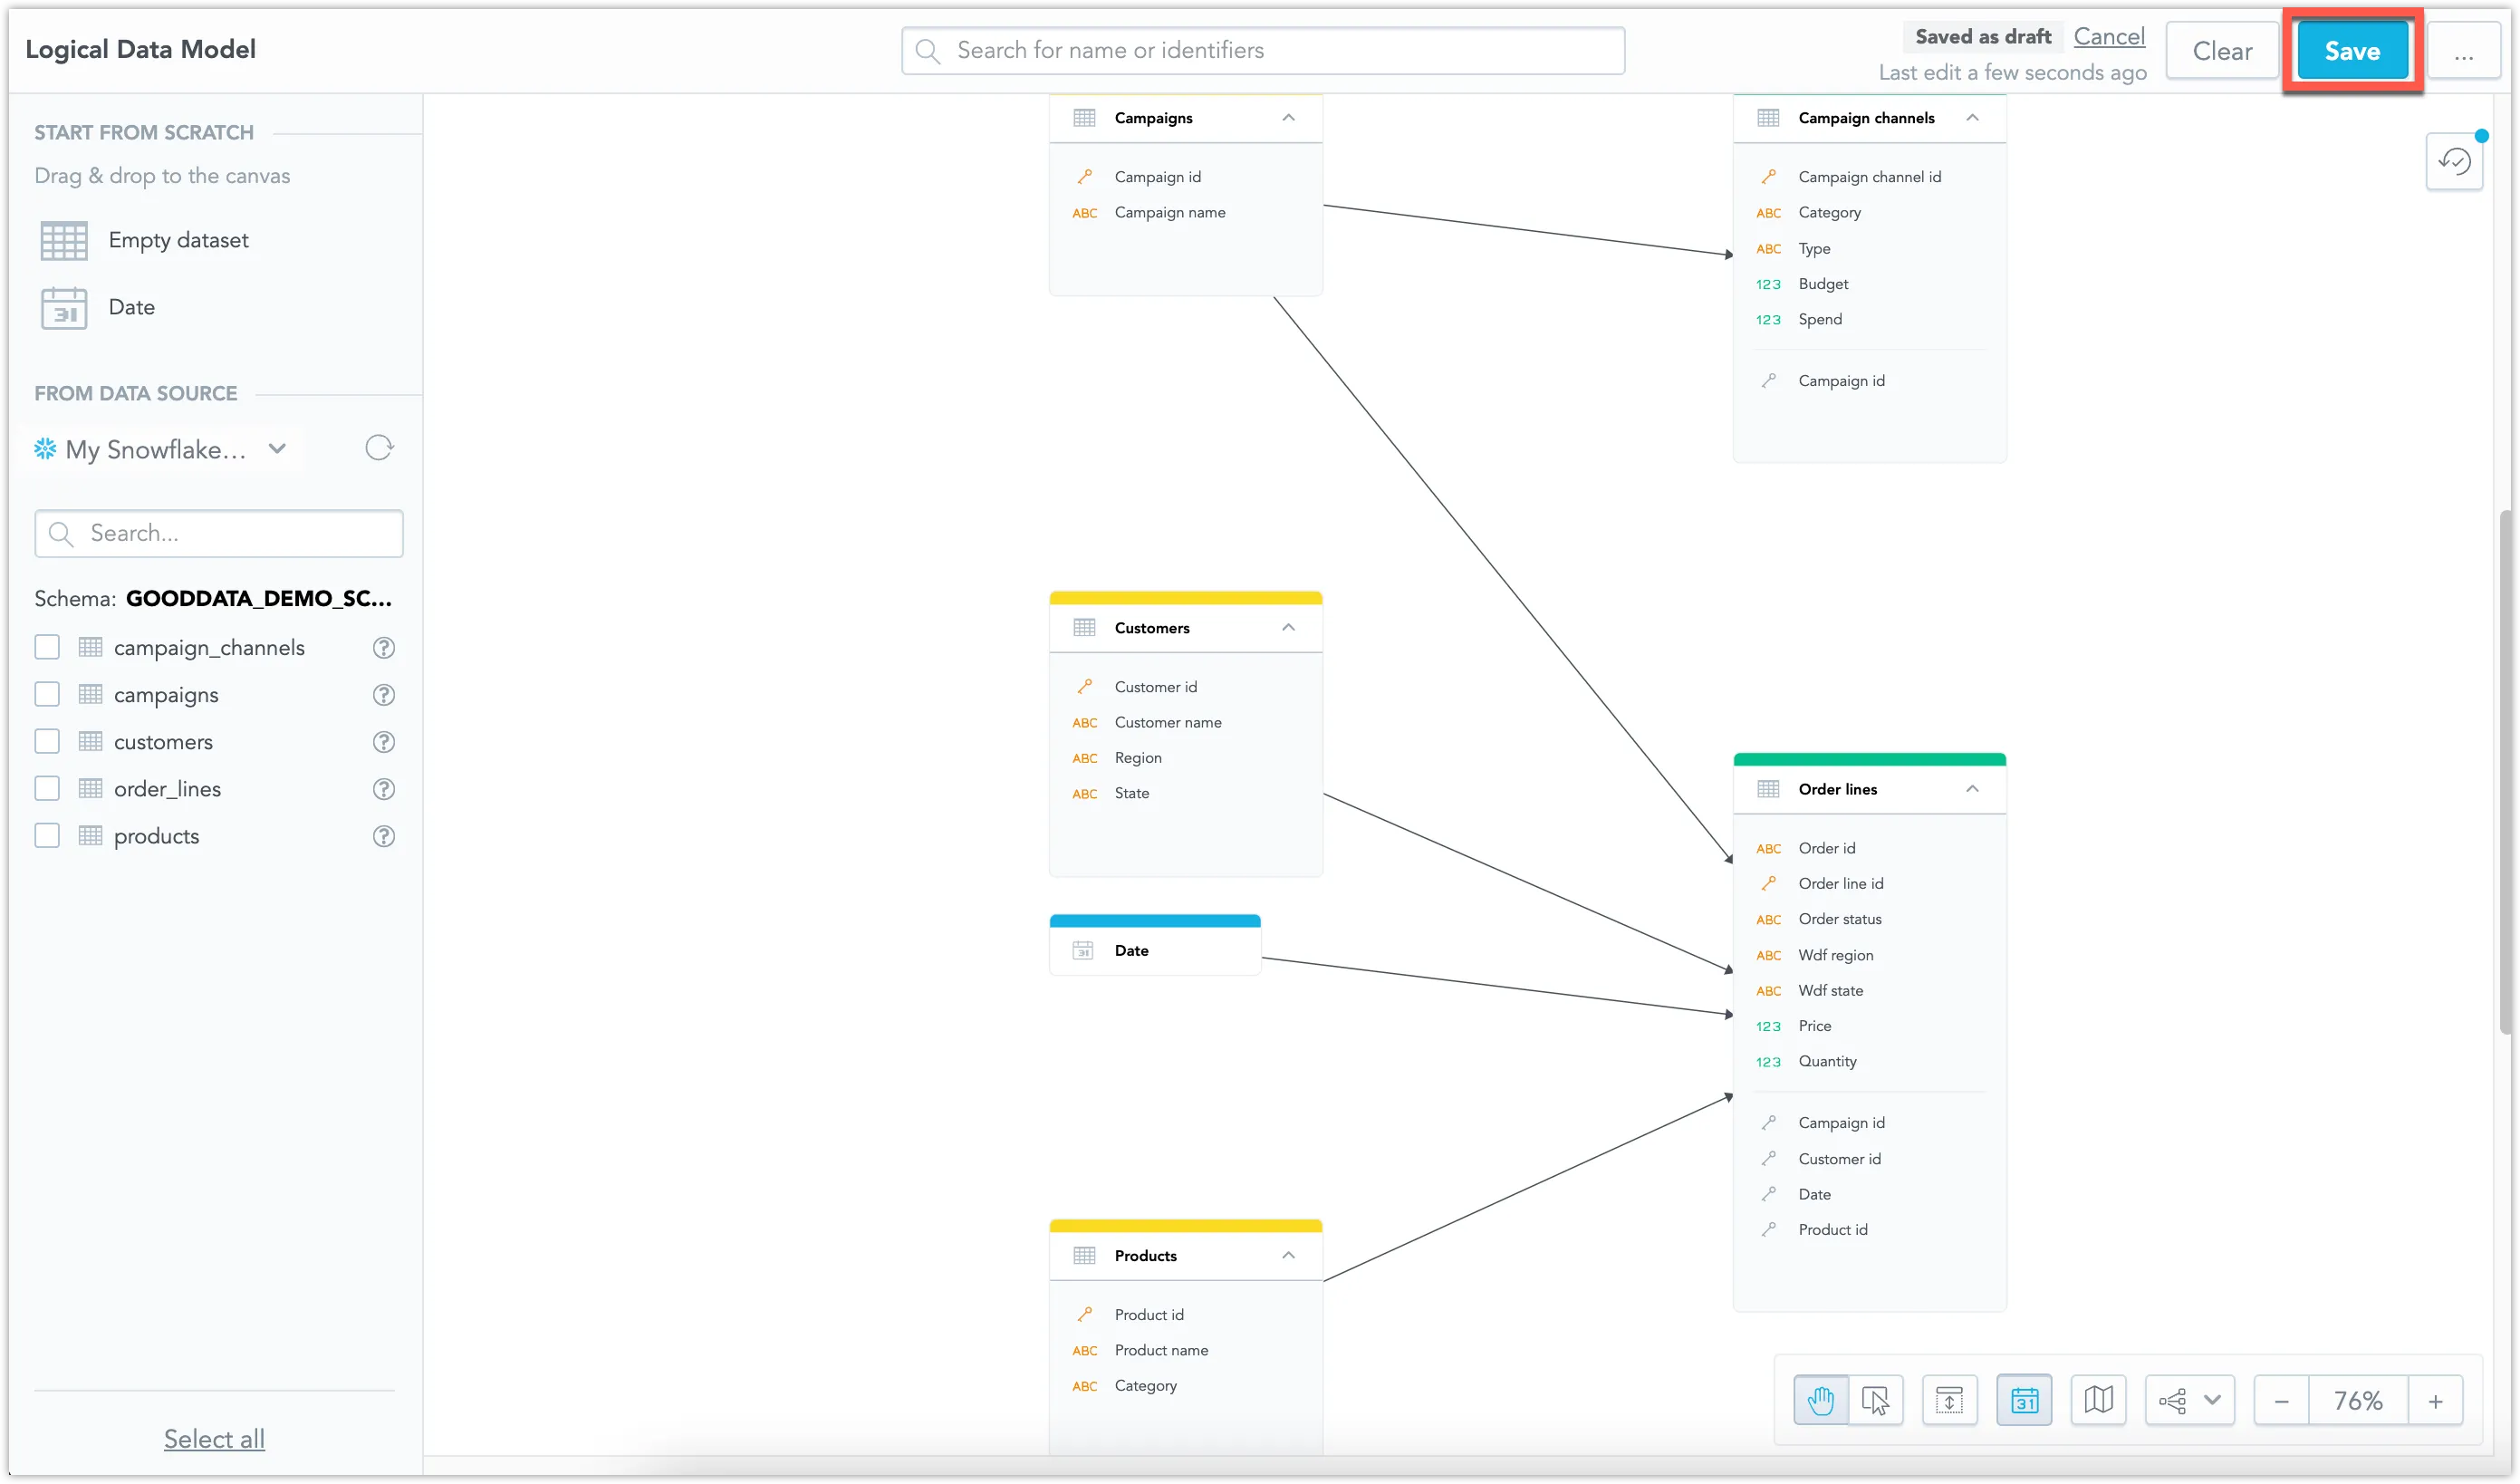
The LDM is automatically created.
Click the Save button to save your LDM.
We recommend using the web UI to create the LDM, however it is possible to copy an existing LDM from one workspace to another workspace:
from gooddata_sdk import GoodDataSdk, CatalogWorkspace

# GoodData host in the form of uri eg. "https://*.gooddata.com" (GoodData Cloud),
# or "http://localhost:3000" (GoodData Cloud Native)
host = "<HOST_URL>"
# GoodData API token
token = "<API_TOKEN>"
source_workspace_id = "<WORKSPACE_ID>"
target_workspace_id = "<DIFFERENT_WORKSPACE_ID>"
sdk = GoodDataSdk.create(host, token)

# Get LDM from GoodData
declarative_ldm = sdk.catalog_workspace_content.get_declarative_ldm(source_workspace_id)

# You can put LDM in a different workspace
sdk.catalog_workspace_content.put_declarative_ldm(target_workspace_id, declarative_ldm)

# Save LDM to file and version in git
sdk.catalog_workspace_content.store_declarative_ldm(source_workspace_id)
We recommend using the web UI to create the LDM. However, it is also possible to create the LDM using the API.
To create the LDM using the API, you need to:
- Scan the data source to generate the Physical Data Model (PDM)
- Generate the LDM from the PDM
- Load the generated LDM definition into the workspace
Follow these steps:
Scan the data source to generate the PDM. Submit a POST request to
/api/v1/actions/dataSources/<data-source-id>/scan.<data-source-id>is the ID of the data source.curl "$HOST_URL/api/v1/actions/dataSources/$DATA_SOURCE_ID/scan" \ -H "Content-Type: application/json" \ -H "Accept: application/json" \ -H "Authorization: Bearer $API_TOKEN" \ -X POST \ -d '{}' \ | jq . > pdm.jsonAs a result, a
pdm.jsonfile with the Physical Data Model definition is generated.Generate the LDM from the scanned PDM. Submit a POST request to
/api/v1/actions/dataSources/<data-source-id>/generateLogicalModeland pass the PDM in thepdmfield.curl "$HOST_URL/api/v1/actions/dataSources/$DATA_SOURCE_ID/generateLogicalModel" \ -H "Content-Type: application/json" \ -H "Accept: application/json" \ -H "Authorization: Bearer $API_TOKEN" \ -X POST \ -d "{ \"separator\": \"__\", \"viewPrefix\": \"mtt\", \"grainPrefix\": \"gr\", \"secondaryLabelPrefix\": \"ls\", \"referencePrefix\": \"r\", \"pdm\": $(cat pdm.json) }" \ | jq . > ldm.jsonAs a result, an
ldm.jsonfile with a declarative definition of the LDM is generated.Load the LDM definition into the workspace. Submit a PUT request to
/api/v1/actions/workspaces/<workspace-id>/logicalModel.<workspace-id>is the ID of the workspace where you want to load the LDM.curl "$HOST_URL/api/v1/layout/workspaces/$WORKSPACE_ID/logicalModel" \ -H "Authorization: Bearer $API_TOKEN" \ -H "Content-Type: application/json" \ -X PUT -d @ldm.json
Once you have created the LDM, you can start building dashboards and visualizations.