Create Custom Themes
To customize the look of Dashboards and Analytical Designer, you can define a theme for your workspace.
Themes are JSON structures with CSS properties. You can use these properties to customize the visual elements, such as buttons, headings, dashboard content, and navigation.
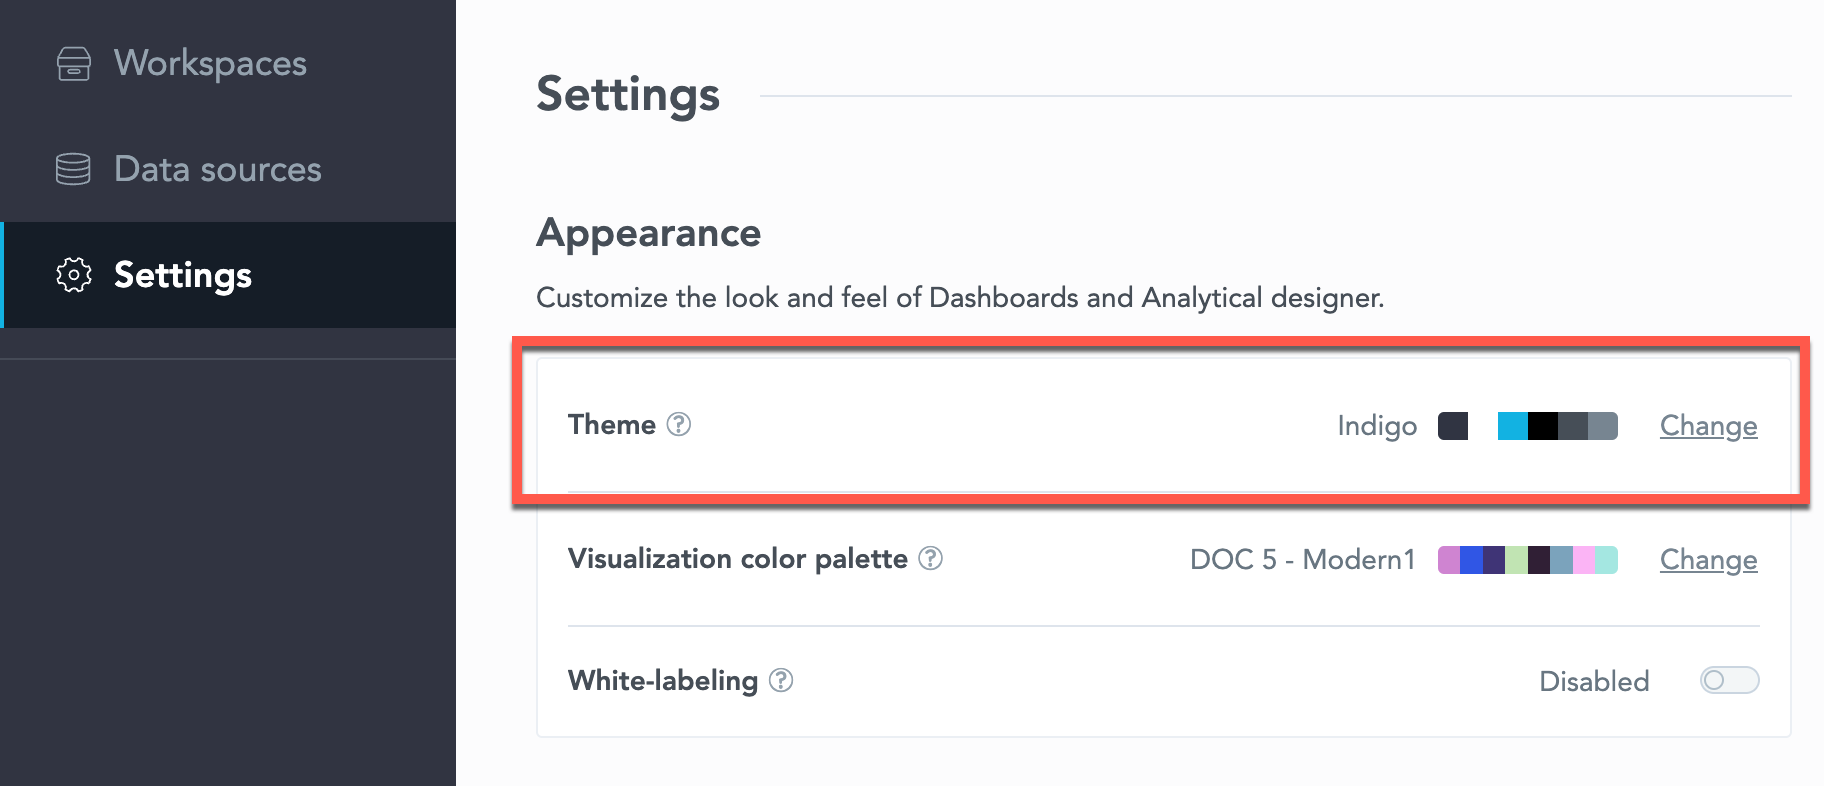
You can apply a theme for the whole organization through the user interface in the Appearance section. All workspaces in this organization then inherit the theme.
Note
You can apply different themes to individual workspaces via API.
To use a custom theme, you must:
- Define the JSON structure.
- Create a theme in the Appearance section of your organization with this JSON.You can create multiple themes and then apply the one theme you want to use.
- Apply the theme.
Note
Apart from the custom themes, you can also define a custom visualization color palette to use in charts in Analytical Designer. For details, see Create Custom Color Palettes.
For additional white-labeling options, see White-label Your Organization.
Define Themes
Based on your requirements, define the properties that you want to update.
You can update any number of the properties (only one, or a subset, or all of them). The properties that you do not define in the JSON structure remain intact.
If you have the structure prepared, proceed to create.
Tip
For details about individual properties, see Theme Properties.
For details about templates in the Appearance section, see Create Themes below.
For exemplary JSON definitions, see Theme Examples.
Create Themes
To create a custom theme:
- Go to the Appearance section in your workspace.
- In the Theme section, click + Create.
- Type a name for your themes.
- In the Definition, paste the JSON structure that you created.
- Click Save.
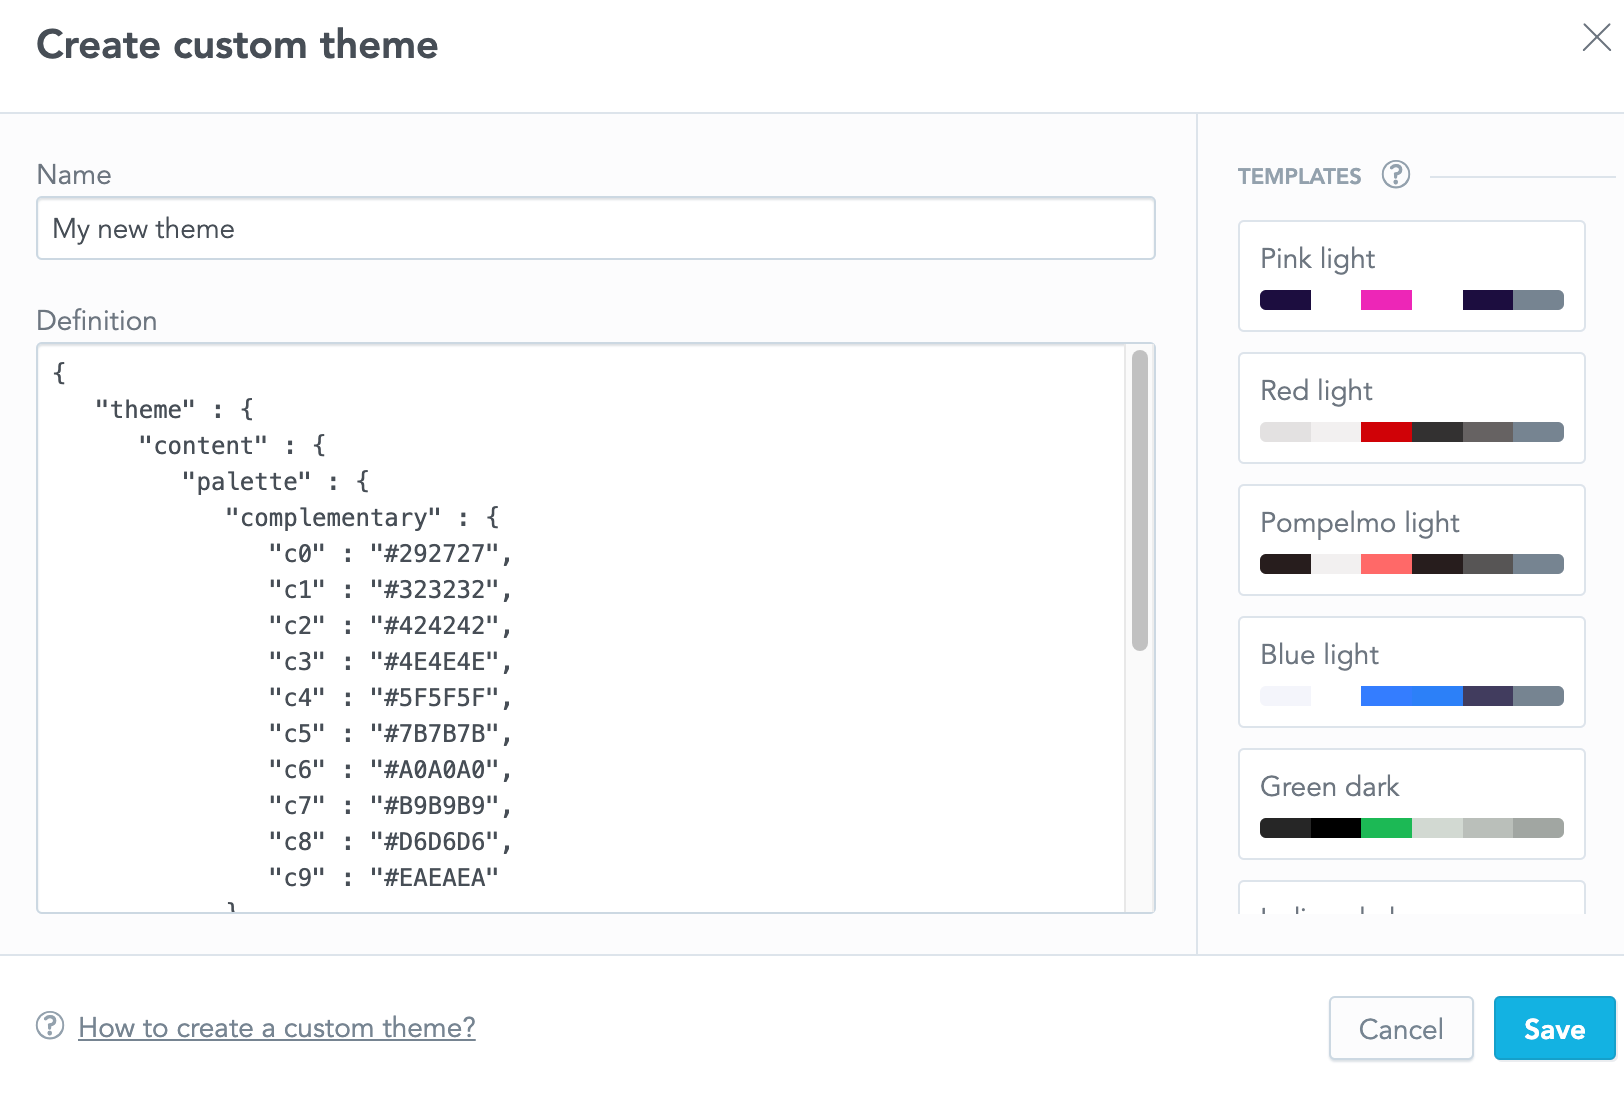
On the right side of the dialog window, you can find example templates - hover over the template and click Paste to paste the JSON directly in the Definition section. See Theme Examples for details.
Apply Themes
The theme that you apply in the Appearance section is applied to all workspaces in your organization. However, you can enable a different theme for individual workspaces via API.
The following image shows the hierarchy and how themes are inherited.
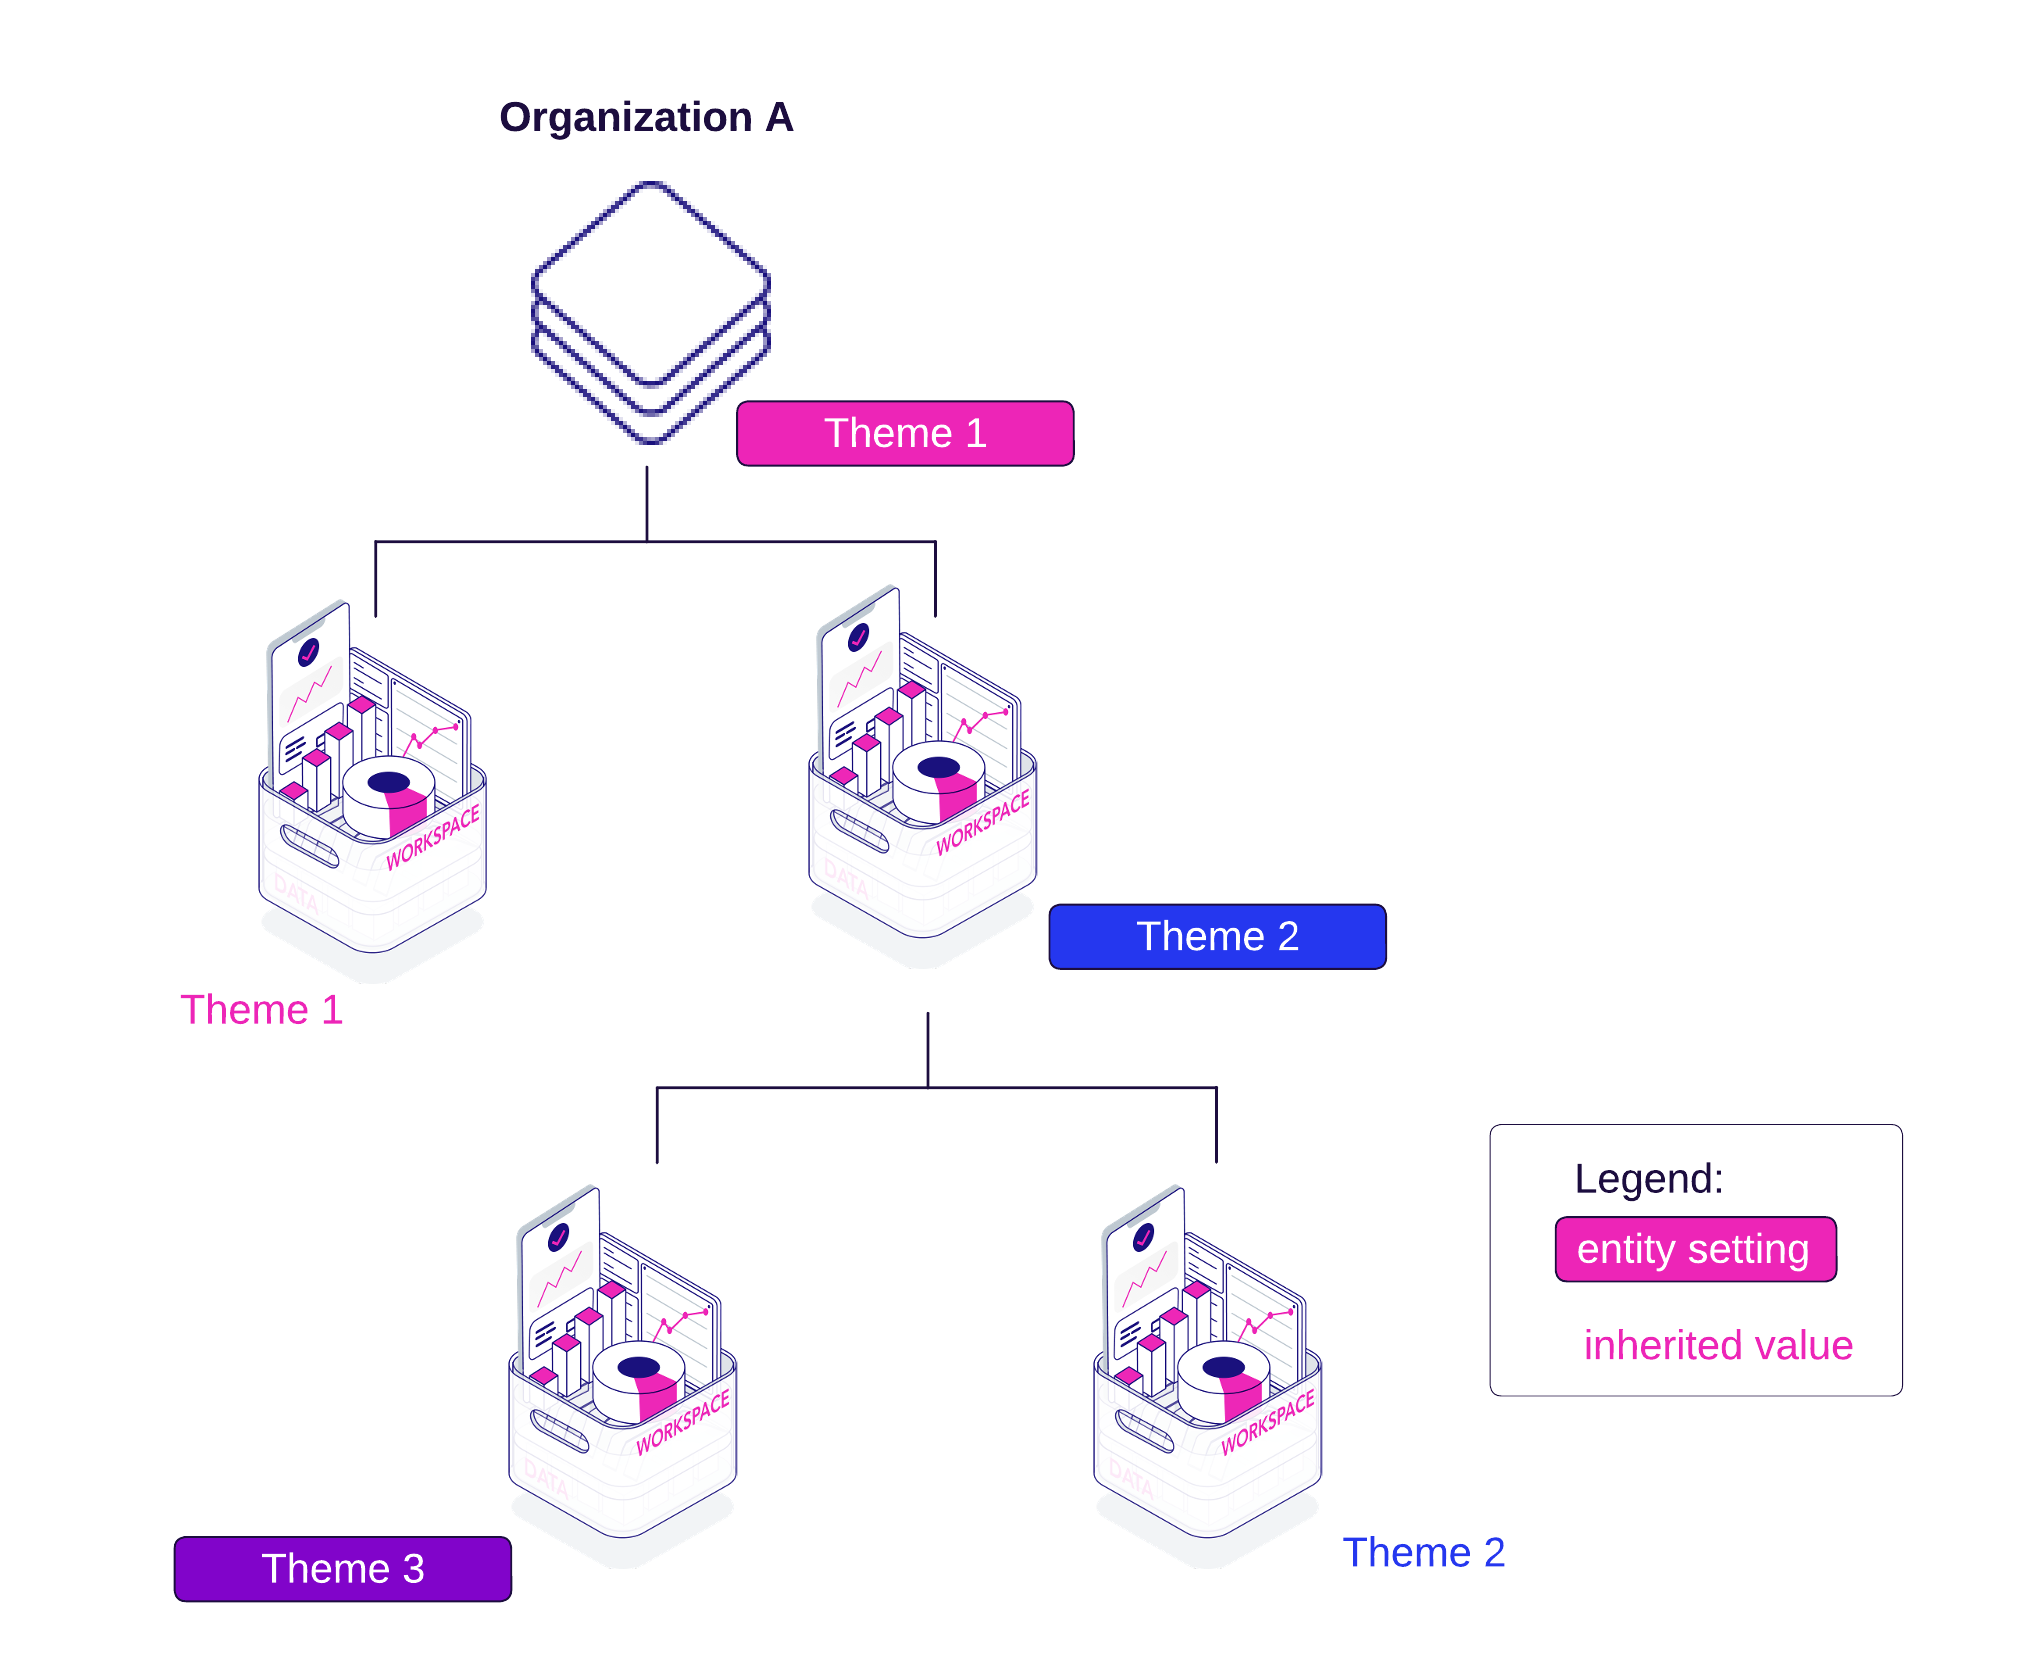
Whole Organization
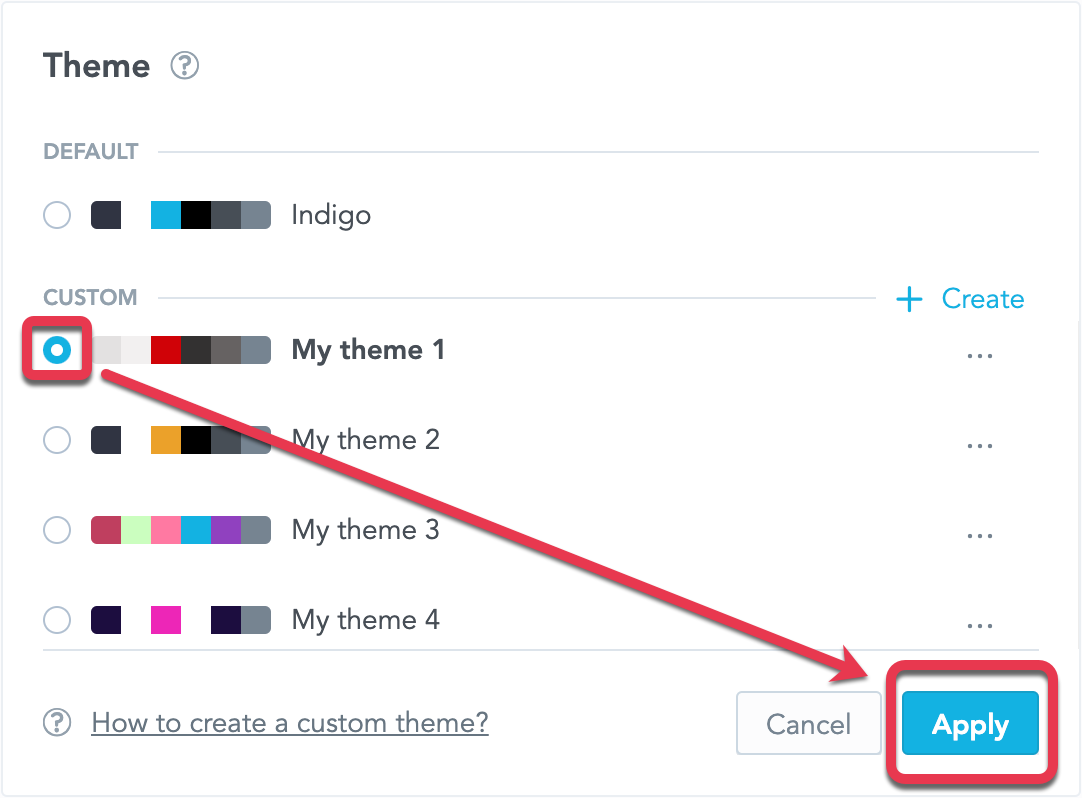
To apply a theme for the whole organization:
- Select the theme in the Appearance section.
- Click Apply.
- Confirm.
From now on, all the workspaces in your organization will use this theme.
Workspaces with individually specified themes via API are not affected by these settings.
Individual Workspaces
To apply a theme for individual workspaces:
- List all the themes in your organization.
GET $HOST_URL/api/v1/entities/themes?sort=name&size=250&page=0
- Select the theme that you want to use and copy its
id(identifier). - Apply the theme with the following :
POST $HOST_URL/api/v1/entities/workspaces/{workspaceId}/workspaceSettings{ "data": { "type": "workspaceSetting", "id": "{settingsId}", "attributes": { "content": { "id": "{themeId}", "type": "theme" }, "type": "ACTIVE_THEME" } } }
Individual Users
To apply a theme for individual users:
- List all the themes in your organization.
GET $HOST_URL/api/v1/entities/themes?sort=name&size=250&page=0
- Select the theme that you want to use and copy its
id(identifier). - Create the theme user settings:
POST $HOST_URL/api/v1/entities/users/{userId}/userSettings{ "data": { "type": "userSetting", "id": "{settingId}", "attributes": { "content": { "id": "{themeId}", "type": "theme" }, "type": "ACTIVE_THEME" } } }
From now on, this user will use this theme that you applied regardless of the organization or workspace settings in the Apperance section.
Edit Themes
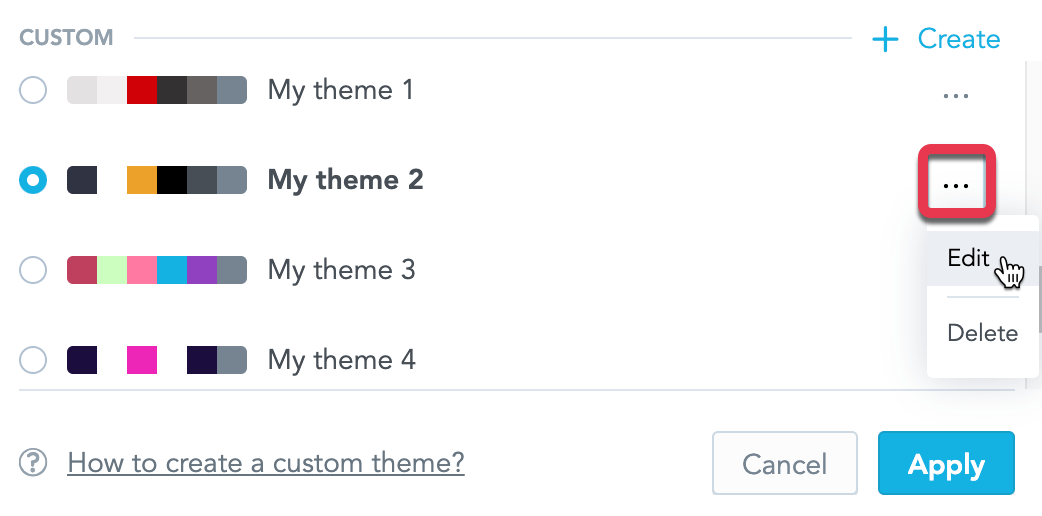
- In the Appearance section, click the three dots next to the theme name.
- Select Edit.
- Make your changes.
- Click Save.
Delete Themes
You can delete only themes that are not applied on the organization level.
Individual workspaces that use the deleted themes will be changed to the default Indigo theme.
To delete a custom theme:
- In the Appearance section, click the three dots next to the theme name.
- Select Delete.
- Confirm.