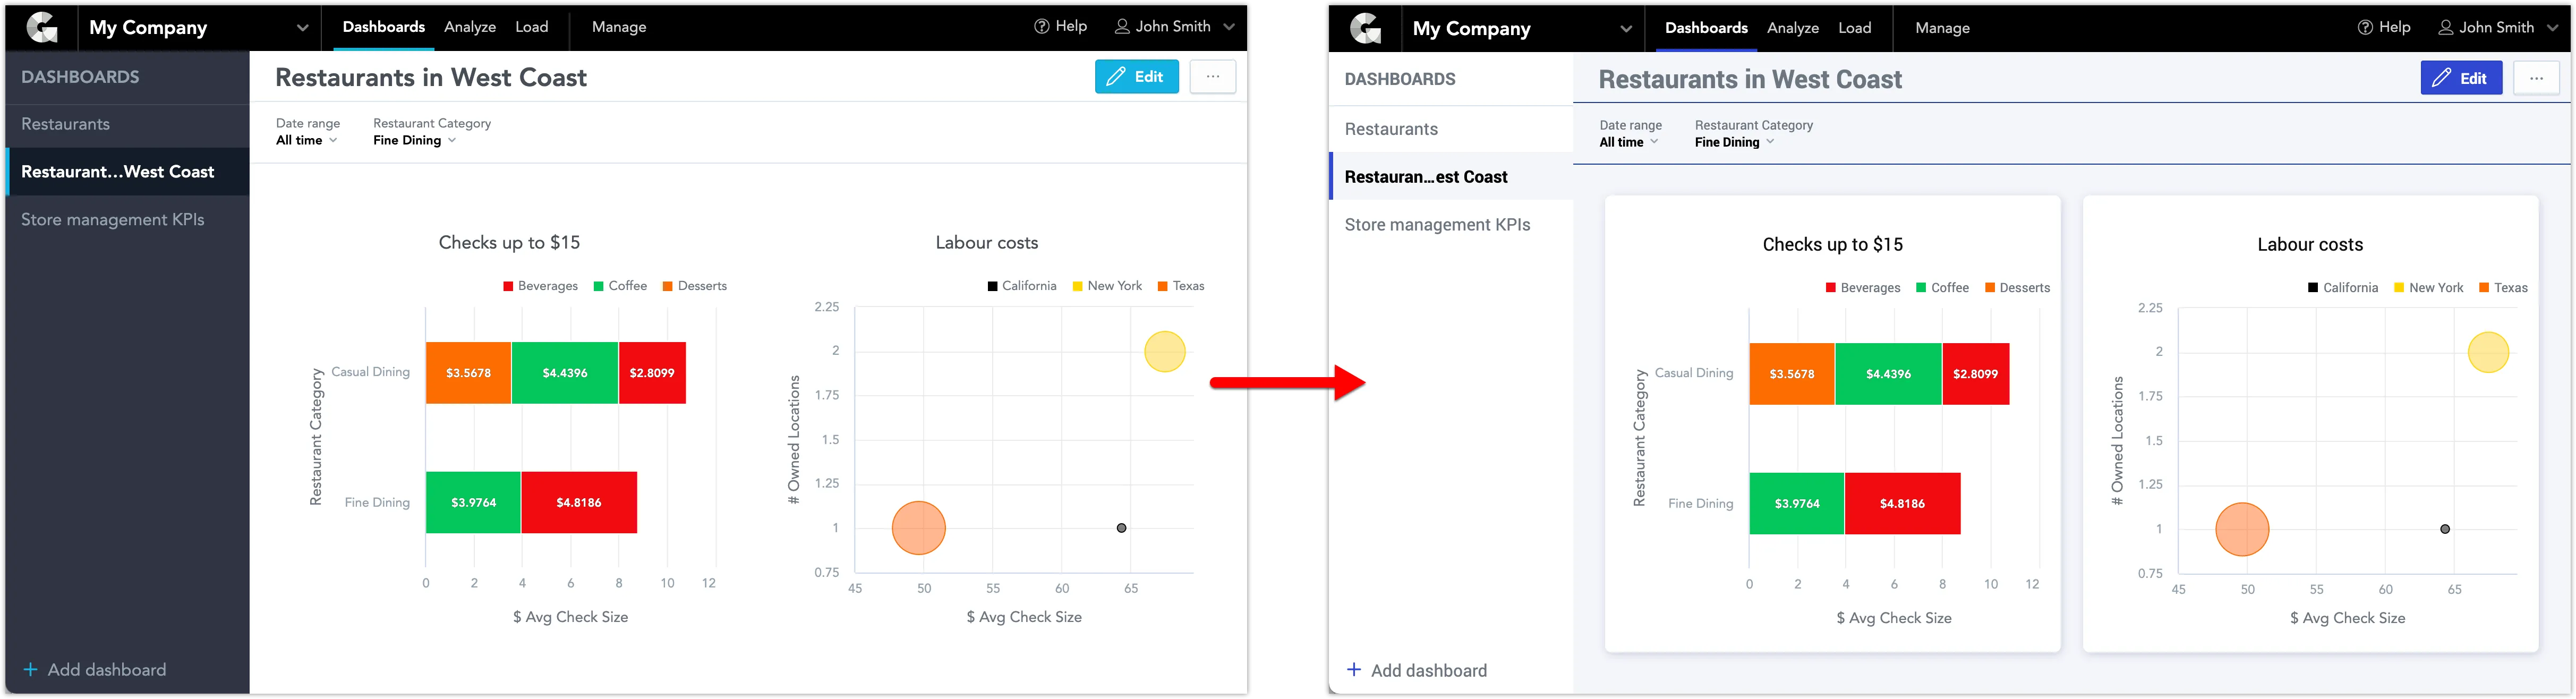
Create Custom Themes
Themes let you customize the look of Dashboards and Analytical Designer. You can change visual aspects such as fonts, font colors, background colors, buttons, headings, dashboard elements, and navigation.
Themes are specified by JSON structures with CSS properties. This lets you define exactly which parts of the interface you want to change.
Specifics of GoodData Themes
GoodData themes don’t replace every style option. Instead, they override just the styles you specify and leave the rest unchanged from the built-in default.
- Base theme: The built-in styles (cannot be edited)
- Theme definition: JSON object that lists your style changes
- Any properties not included in your theme automatically use the default styles
Example
{
  "palette": {
    "primary": { "base": "#14B2E2" }
  },
  "dashboards": {
    "content": {
      "widget": {
        "backgroundColor": "#122330"
      }
    }
  }
}
In this example:
- The primary color changes throughout the UI
- Dashboard widgets have a new background color
- Everything else stays as default
You only need to define what you want to change, making themes easy and flexible to manage.
Note
You can also set custom colors for charts in Analytical Designer. For more details, see Create Custom Color Palettes.
For more ways to customize your organization’s branding, see White-label Your Organization.
Define Themes
Decide what properties you want to change. You can update any number of properties, from just one to all of them. Properties not defined in your JSON will keep their default styles.
The easiest way to get started is to use one of the built-in theme templates. These templates provide ready-made styles and serve as a starting point for customization. You can copy a template and modify only the properties you care about.
Once your JSON structure is ready, you can proceed to create your theme.
Tip
- For details about individual properties, see Theme Properties.
- To use pre-made templates, refer to Theme Settings Reference.
- For examples of JSON themes, visit Theme Examples.
Create Themes
Follow these steps to create a theme:
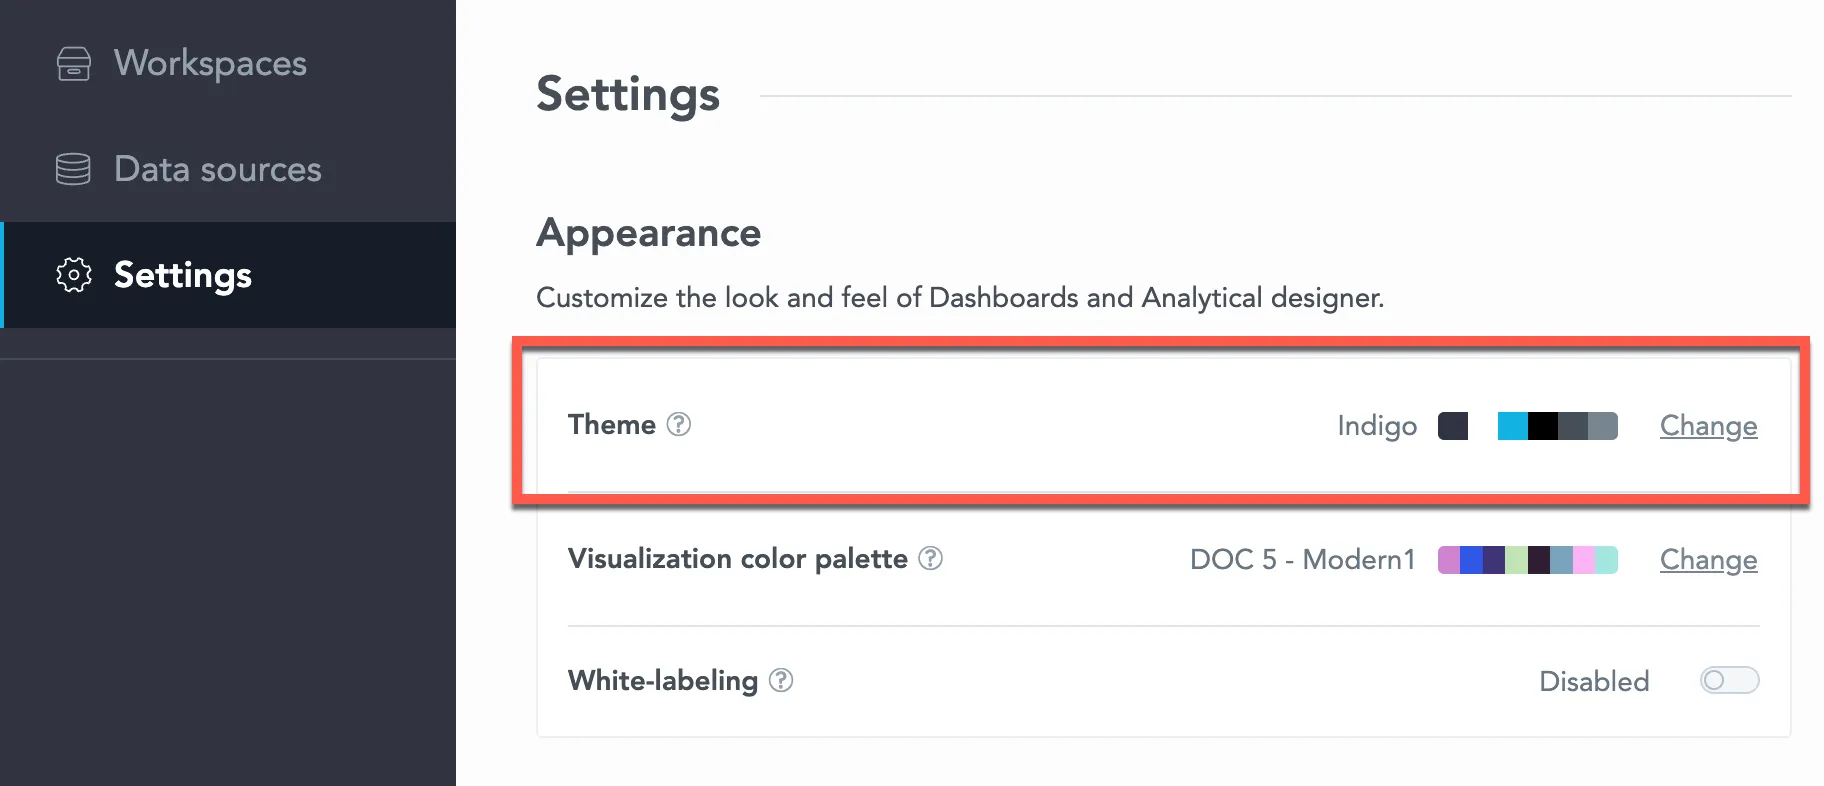
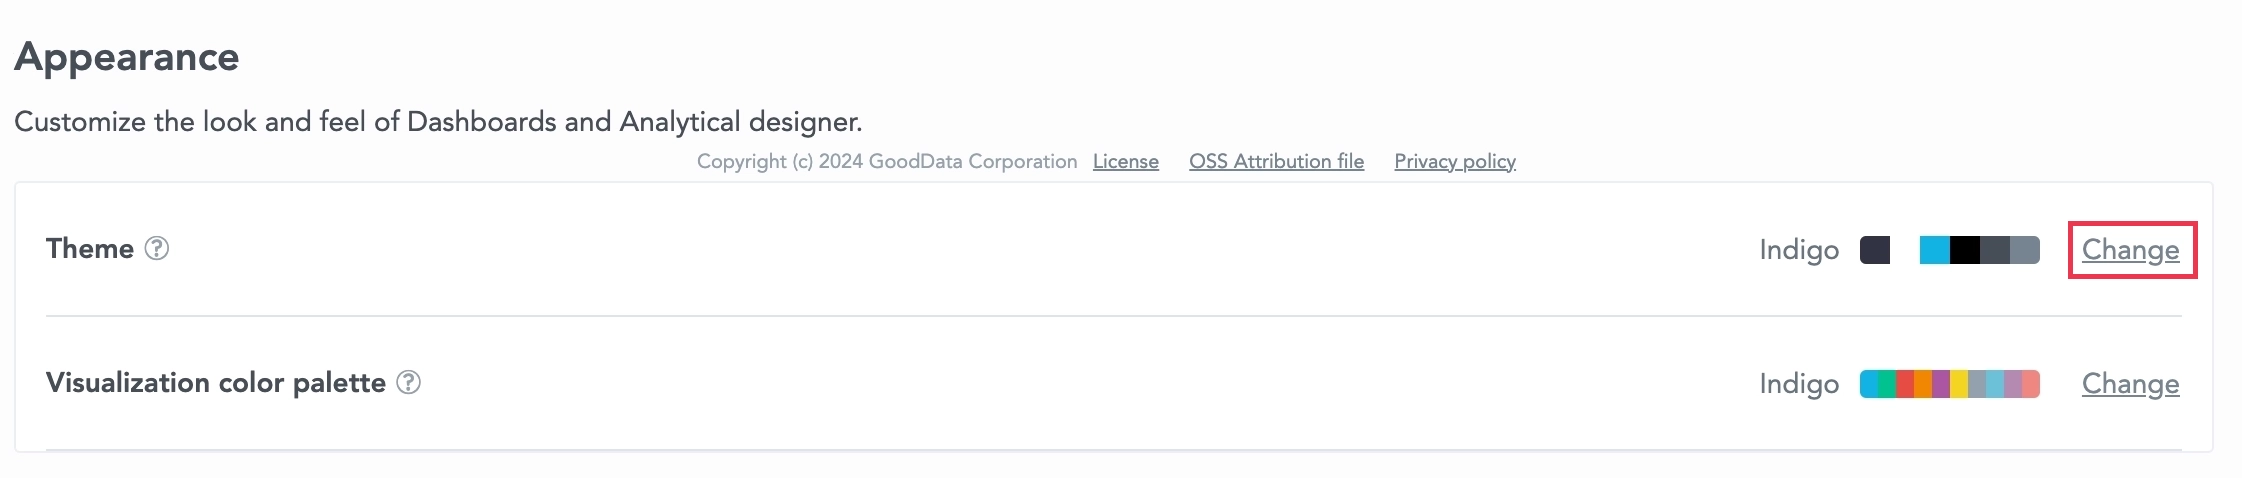
- Go to Settings | Appearance.
- In the Theme section, click + Create.
- Type a name for your theme.
- Paste your JSON into the Definition field.
- Click Save.
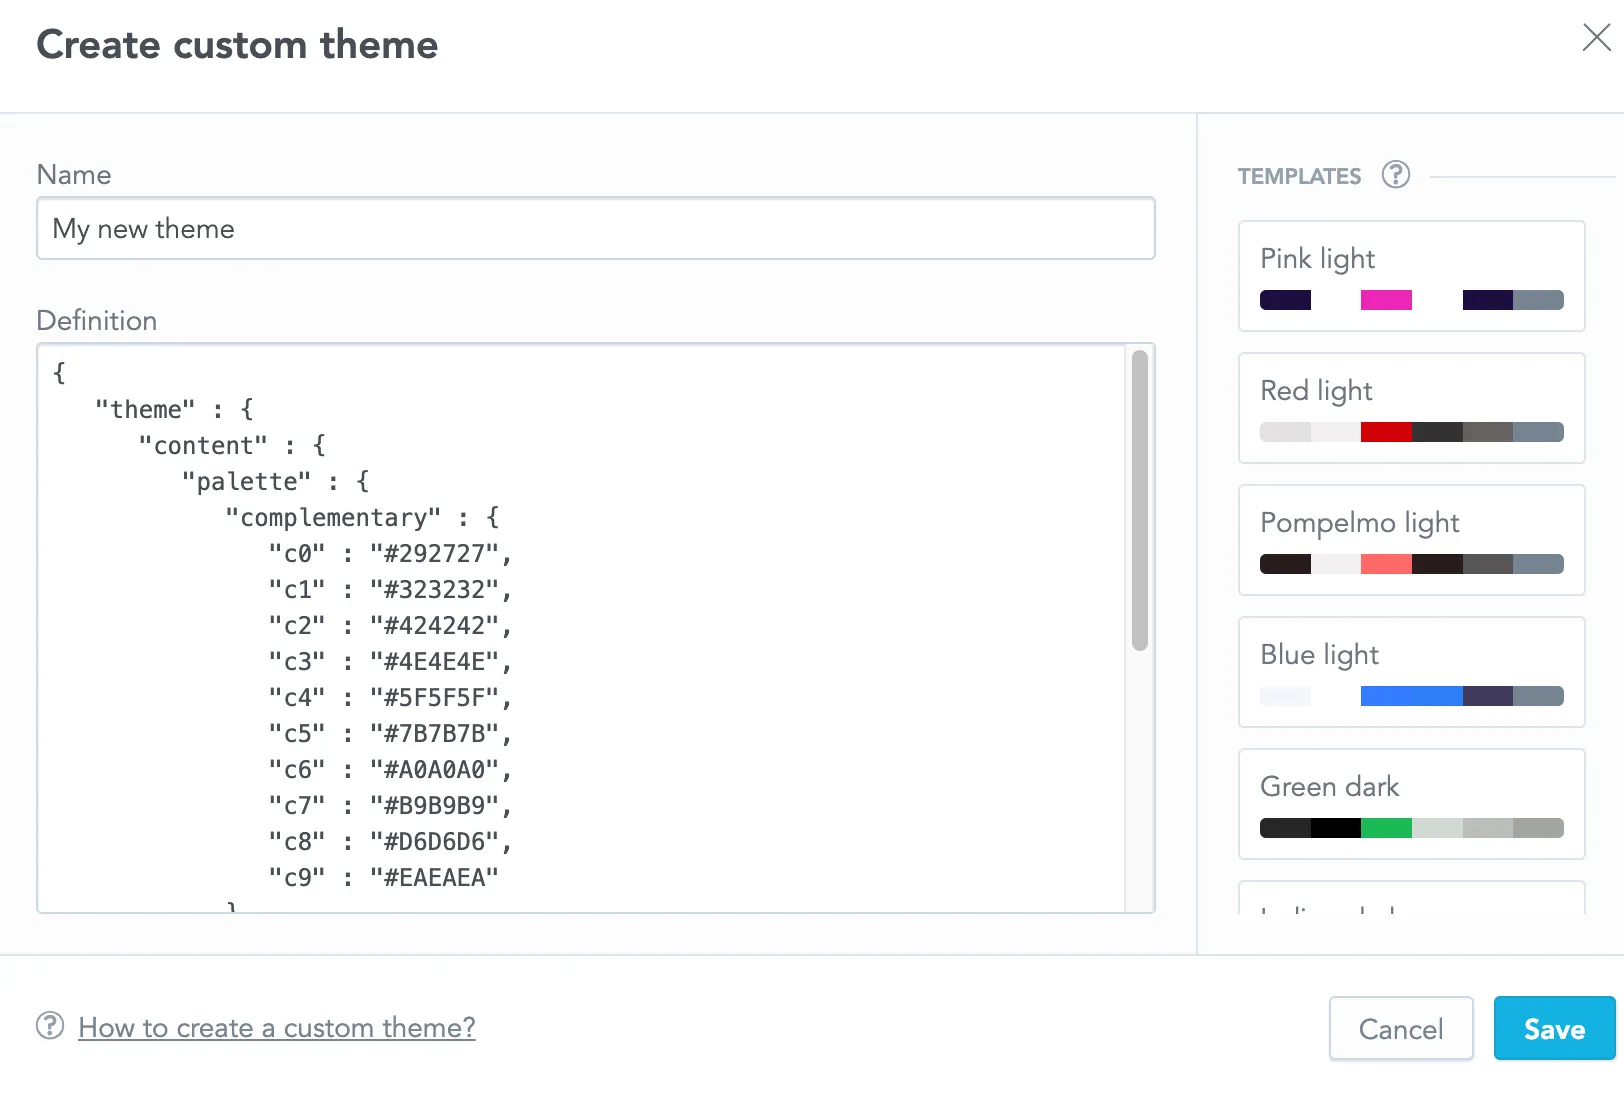
You can select example templates from the right side. Hover over a template and click Paste. See Theme Examples for more details.
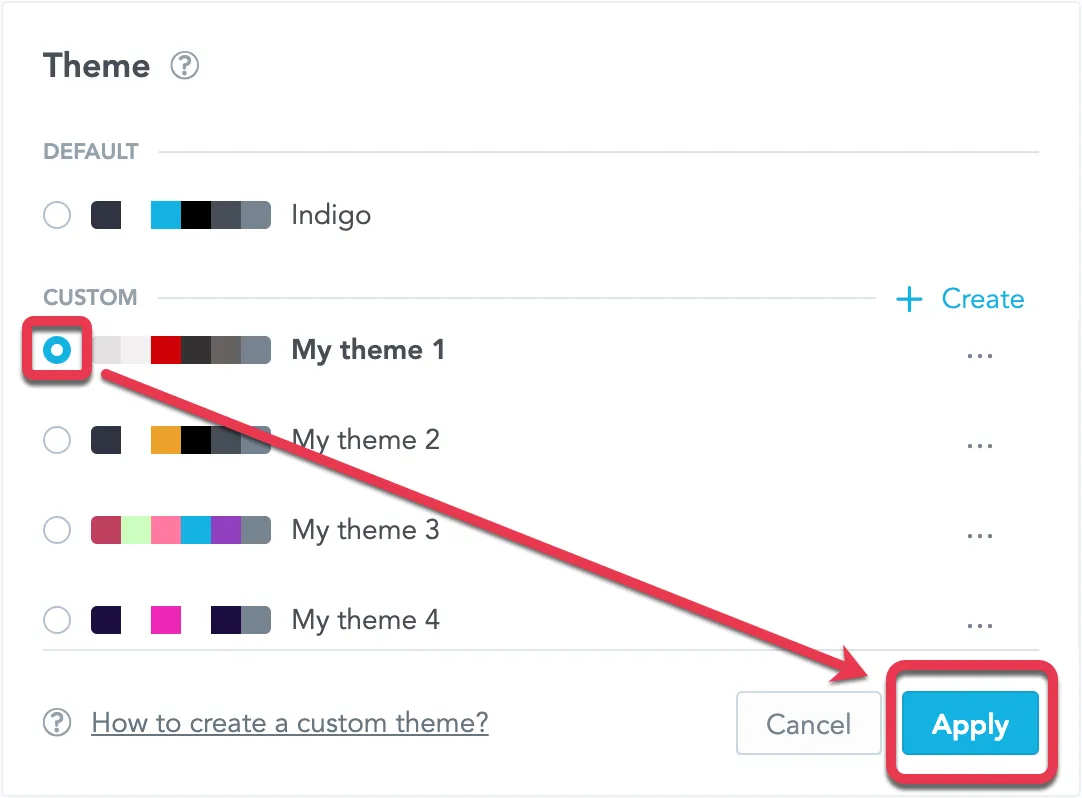
Apply Themes
Once you have created a theme, you can apply it at the organization, workspace, or user level. The theme set in Appearance applies to all workspaces in your organization unless overridden by workspace-specific (or user-specific) themes.
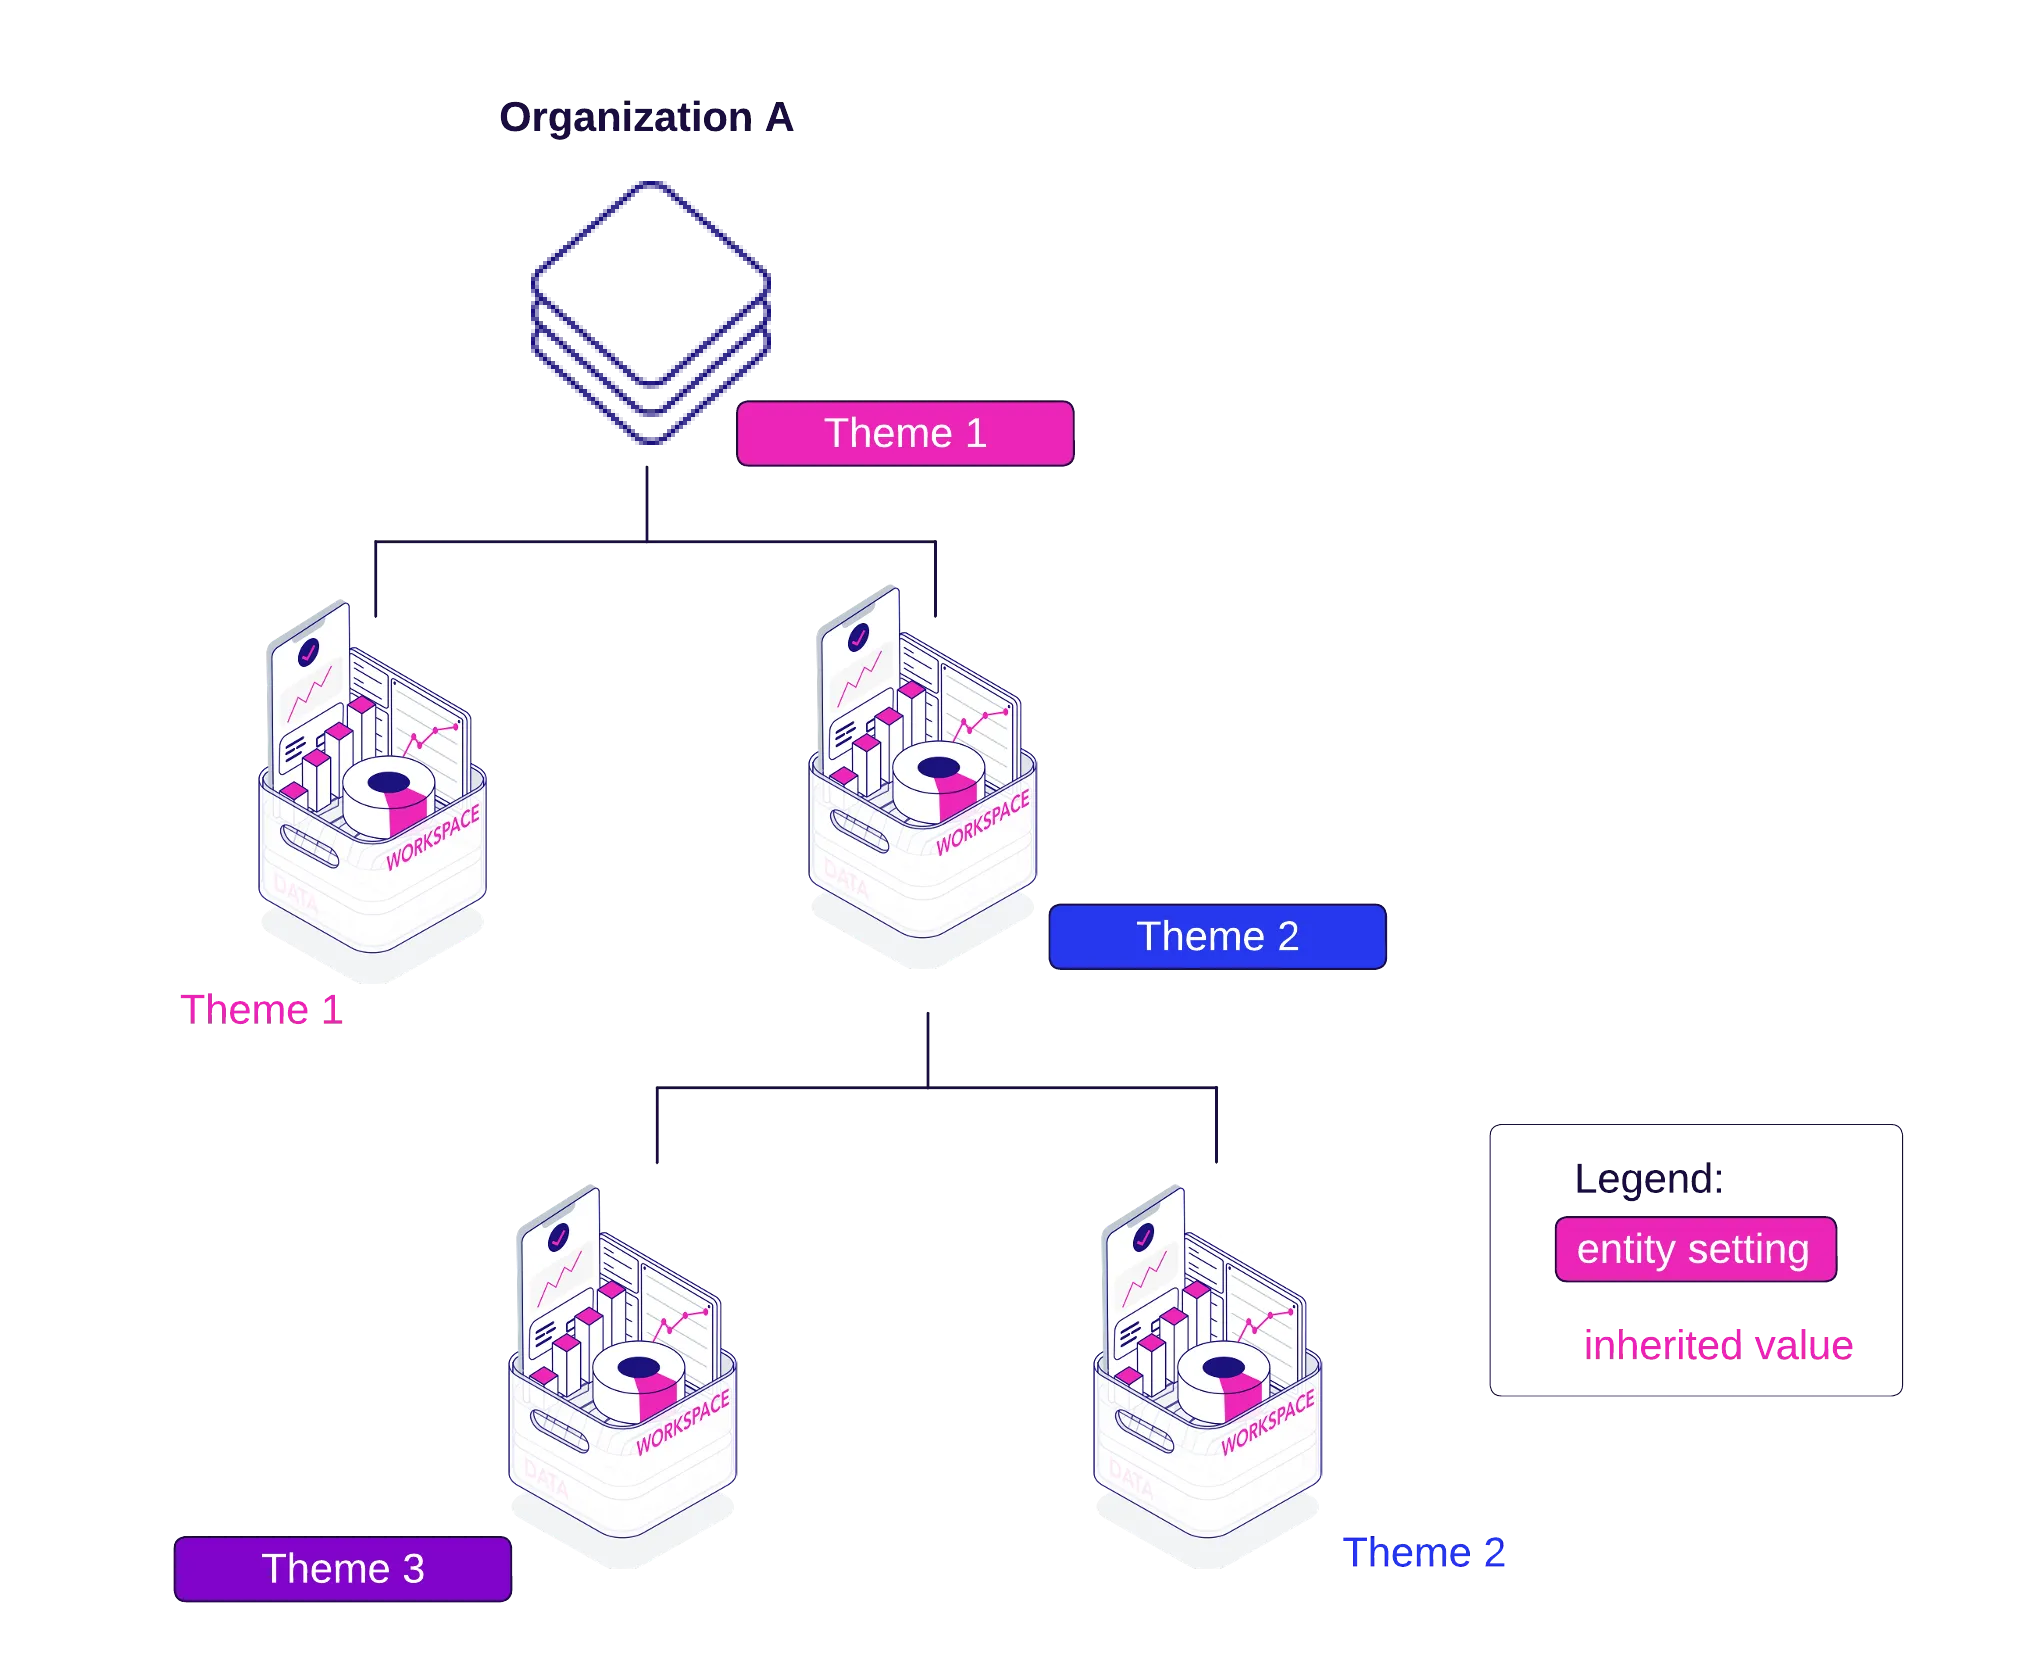
Whole Organization
To apply a theme to the entire organization:
- Select your theme in Appearance.
- Click Apply.
- Confirm your choice.
All workspaces in your organization will now use this theme unless a different theme is set through the API.
Individual Workspaces
- Go to Workspaces and select your workspace.
- Open the Settings tab.
- Click Change in the Theme section.
- List themes:
GET $HOST_URL/api/v1/entities/themes?sort=name&size=250&page=0- Copy the theme ID you want.
- Apply the theme:
POST $HOST_URL/api/v1/entities/workspaces/{workspaceId}/workspaceSettings{
"data": {
"type": "workspaceSetting",
"id": "{settingsId}",
"attributes": {
"content": {
"id": "{themeId}",
"type": "theme"
},
"type": "ACTIVE_THEME"
}
}
}Individual Users
To set a theme for a specific user:
- List themes:
GET $HOST_URL/api/v1/entities/themes?sort=name&size=250&page=0- Copy the theme ID you want.
- Create the user theme settings:
POST $HOST_URL/api/v1/entities/users/{userId}/userSettings{
"data": {
"type": "userSetting",
"id": "{settingId}",
"attributes": {
"content": {
"id": "{themeId}",
"type": "theme"
},
"type": "ACTIVE_THEME"
}
}
}Edit Themes
- In Appearance, click the three dots next to your theme.
- Select Edit.
- Modify the JSON definition.
- Click Save.
Delete Themes
You can only delete themes not applied at the organization level.
- Click the three dots next to the theme in Appearance.
- Select Delete.
- Confirm your choice.