Create a Logical Data Model Manually
Creating the LDM manually is suitable for the following situations:
- Your database contains the complex analytical scenarios.
- Your database stores only a part of the metadata (for example, relations are handled by application logic and not by foreign keys in the database).
- You want to first create the LDM and then define your analytic use cases based on it.
- You want to build your analytic experience iteratively, customize, and evolve your LDM. In this case, consider the following:
- If you make custom changes to the LDM and then automatically generate the LDM later, the custom changes will be overwritten.
- If you regularly update the relational model of your database, maintaining the LDM manually can be very costly and even not possible in some cases.
To create the LDM manually, follow these steps:
- Create datasets.
- Set the primary key in datasets.
- Create relationships between datasets.
- Add Date datasets.
- Save the LDM.
Create Datasets
You can create datasets in two ways:
Create Datasets From Pre-generated Datasets
Even if you do not generate the LDM automatically, you can still use the automatically pre-generated datasets in combination with any datasets you may create from scratch. This is the recommended way of creating datasets in your LDM.
Steps:
To add a dataset, drag a table from the left panel and drop it in the blank canvas area.
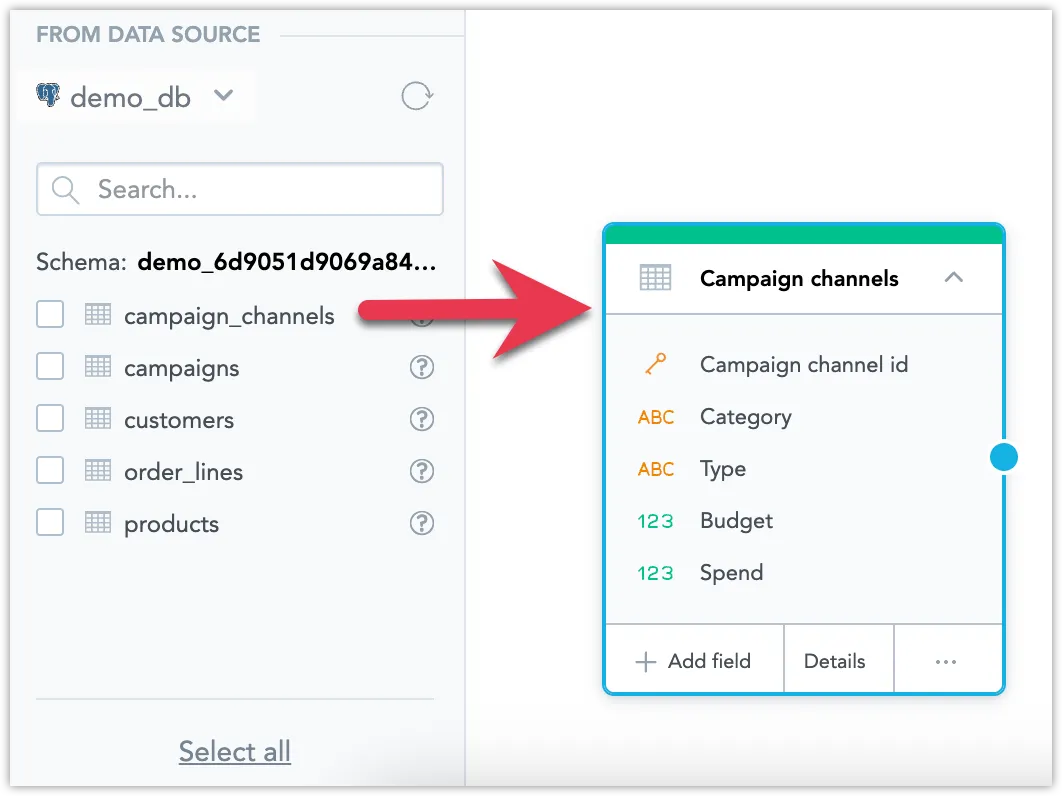
This action creates a dataset from your table. It guesses the field types (fact/attribute) based on the database types and it creates mapping between the database table and the LDM.
Repeat the previous step for all the tables you want to use.
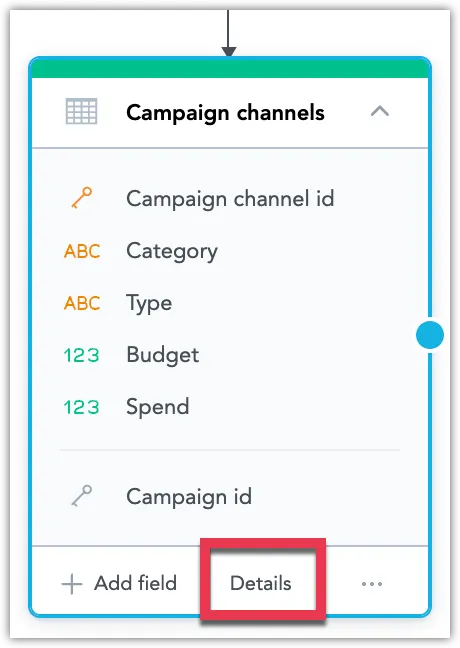
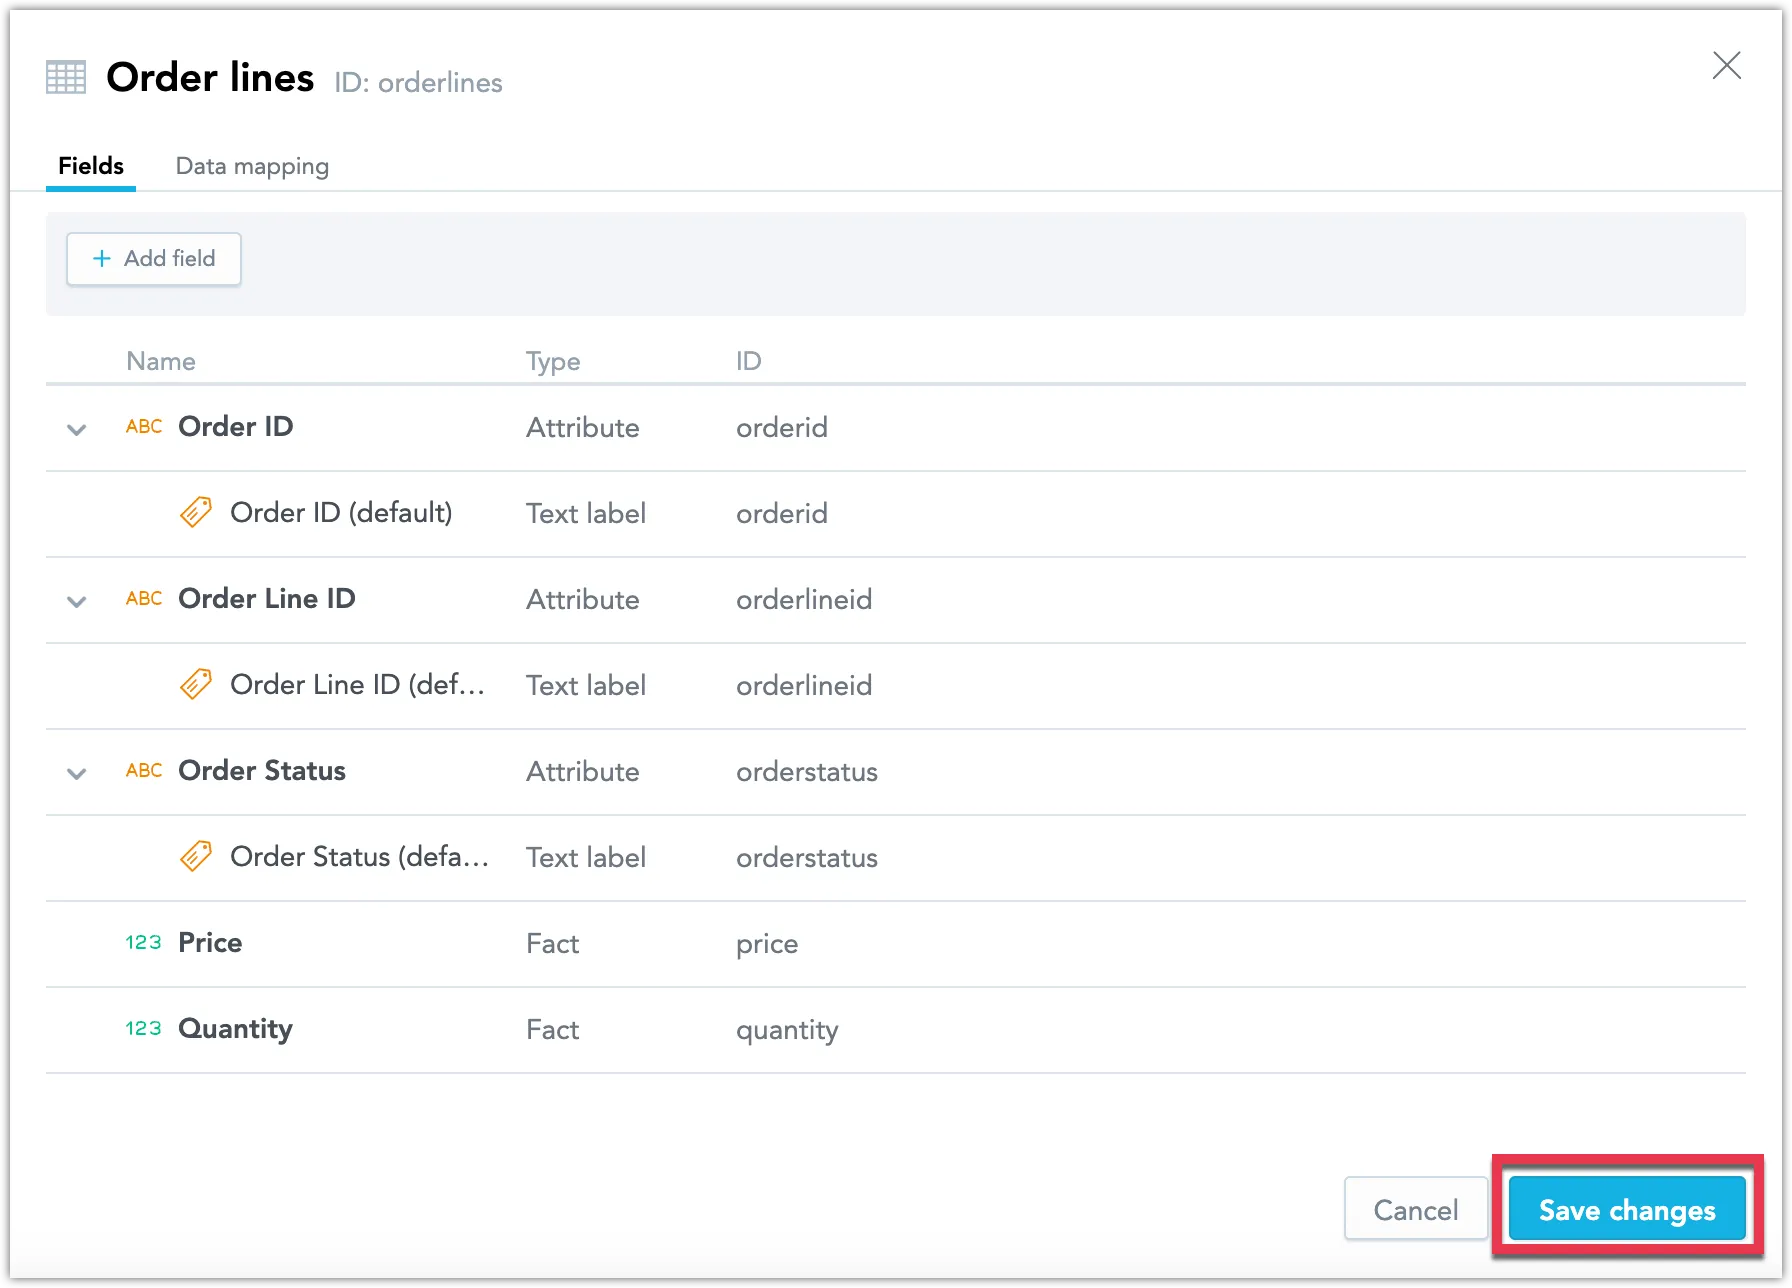
Hover over the dataset and click Details.
Review the Fields and Data mapping tabs and ensure the data is mapped correctly according to your needs. Change the field types or reconfigure the data mapping if necessary.
Create Datasets From Scratch
Follow these steps to create a dataset manually.
Steps:
Open your workspace.
Click the Data tab.
The LDM Modeler opens in view mode.
Click Create model, or if you are editing a preexisting model, click Edit.
The LDM Modeler is switched to edit mode. You can see the registered data sources in the left panel.

To add a dataset, drag Empty dataset from the left panel and drop it in the blank canvas area.
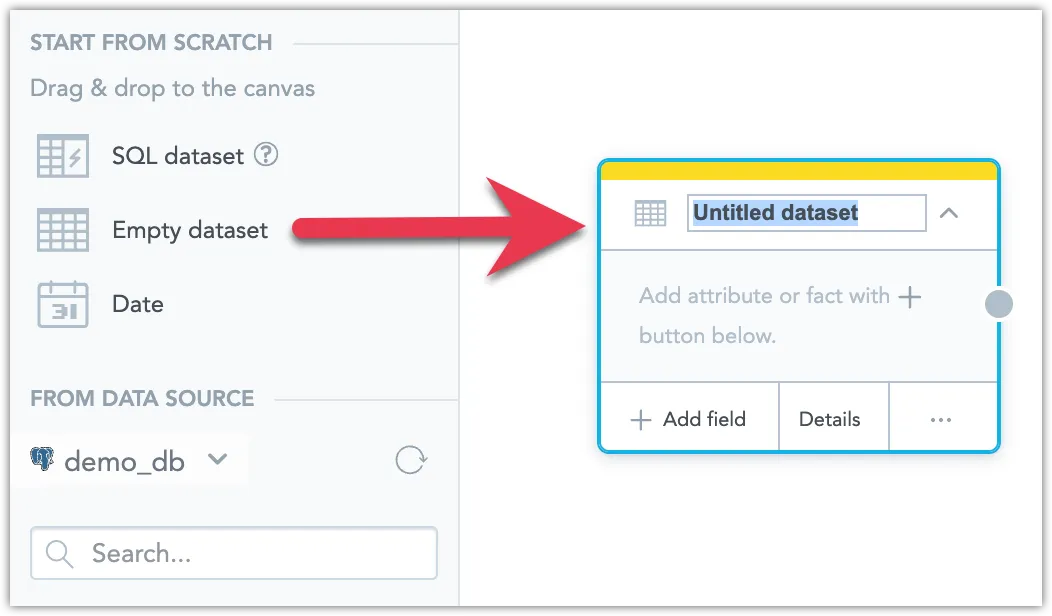
Don’t forget to give it an appropriate name.
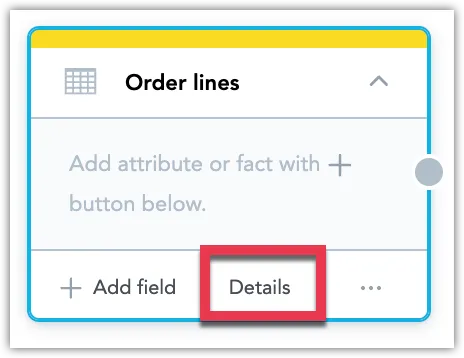
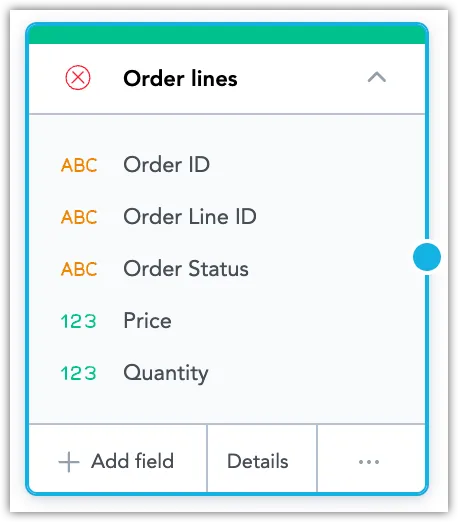
Select the newly added dataset, click Details.
Click Add field to map invididual table columns to the dataset:

Click Save changes.
You have prototyped the dataset, but it still needs to be mapped onto a source table:
Repeat these steps to create as many datasets as you need.
Once you have created one or more datasets in the LDM, the next step will be to map the datasets to the database.
Map the LDM to the Database
Set up mapping for all the datasets in your LDM. Mapping your LDM to the database allows you to use data from your database in GoodData.
Steps:
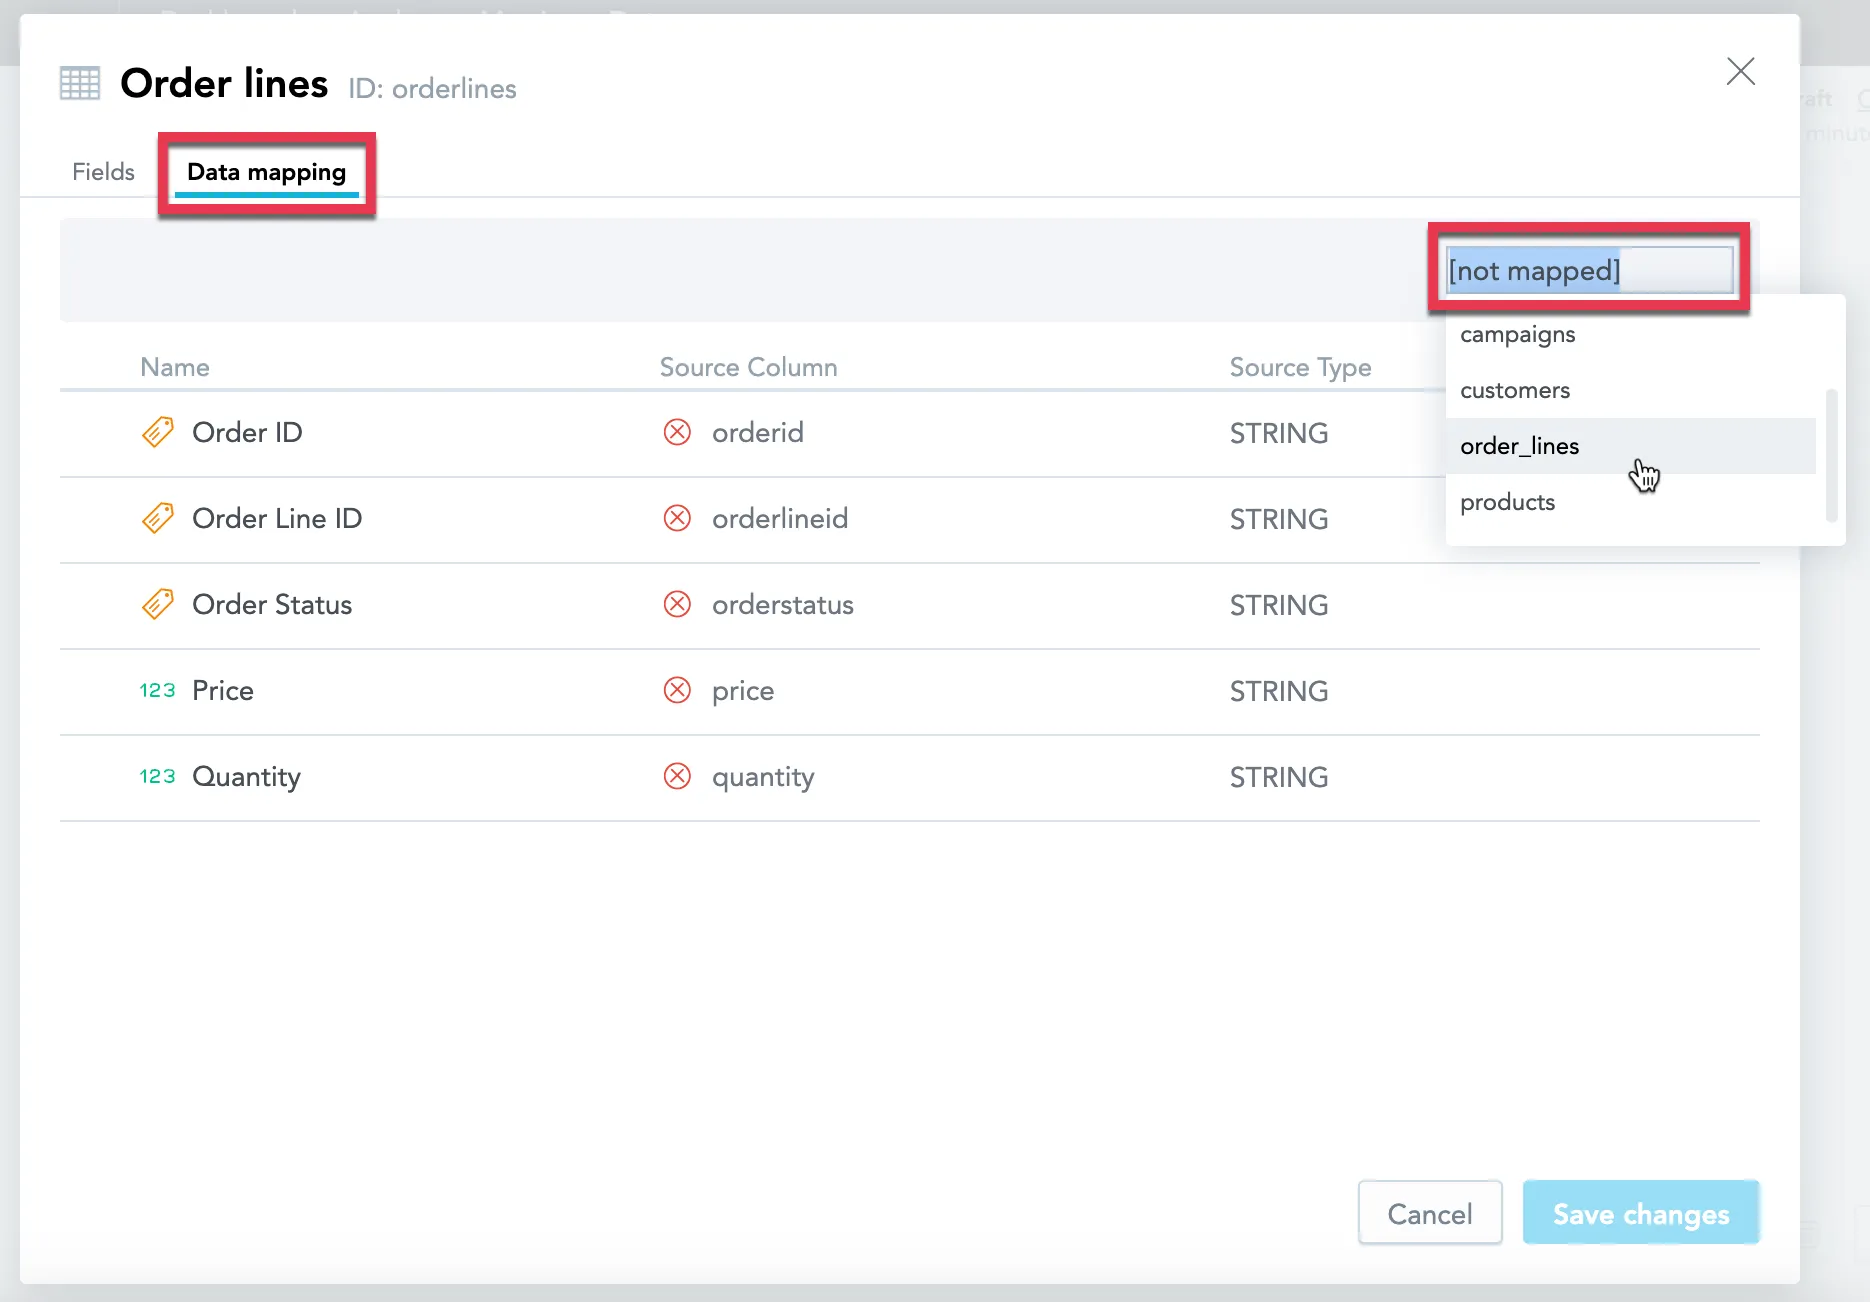
Select a dataset, click Details.
Click the Data mapping tab.
Map the dataset to a particular table in your database.
Map each field in the dataset to a specific column in this table.
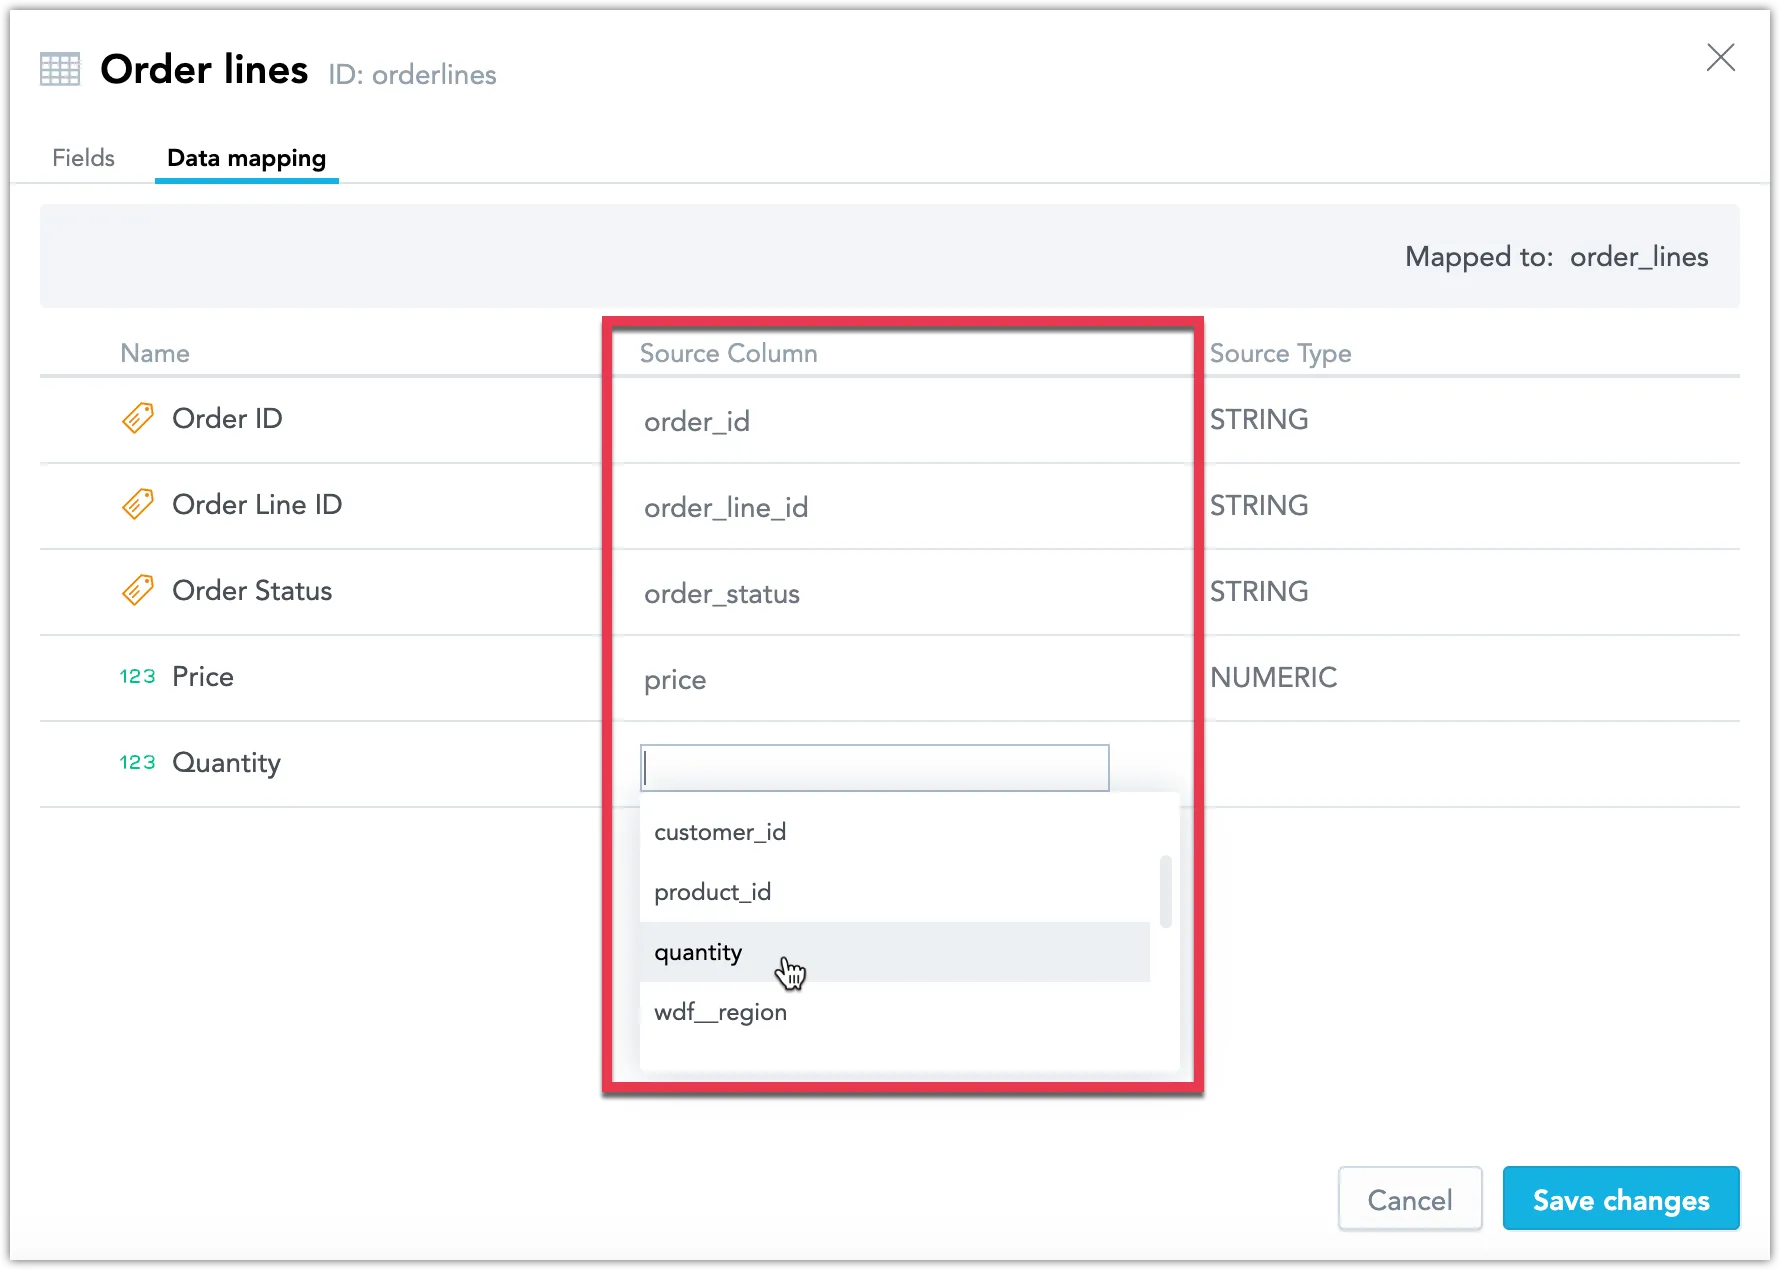
Click Save changes.
Repeat these steps for every dataset in your LDM.
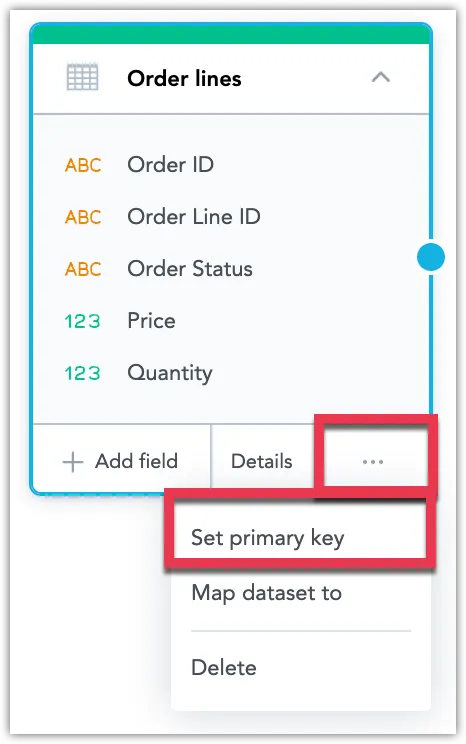
Set the Primary Key in Datasets
Set the primary key (grain) for datasets in your LDM.
Steps:
Select a dataset, and click … (ellipsis) -> Set primary key.
Select one or more attributes that should become the primary key, and click Set key.
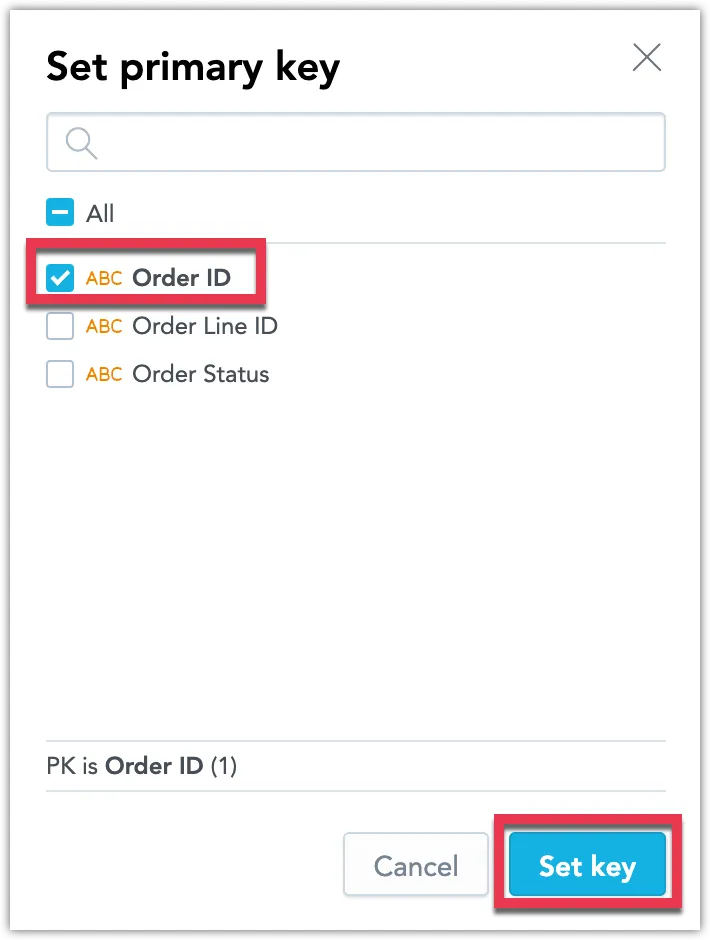
The dialog closes, and the primary key is set.
Repeat these steps for every dataset in your LDM.
Create Relationships between Datasets
A relationship between two datasets allows you to use information from one dataset to slice the data in the other dataset. Creating relationships allows you to discover new analytical scenarios when creating visualizations.
Steps:
Locate the datasets that you want to create a relationship between.
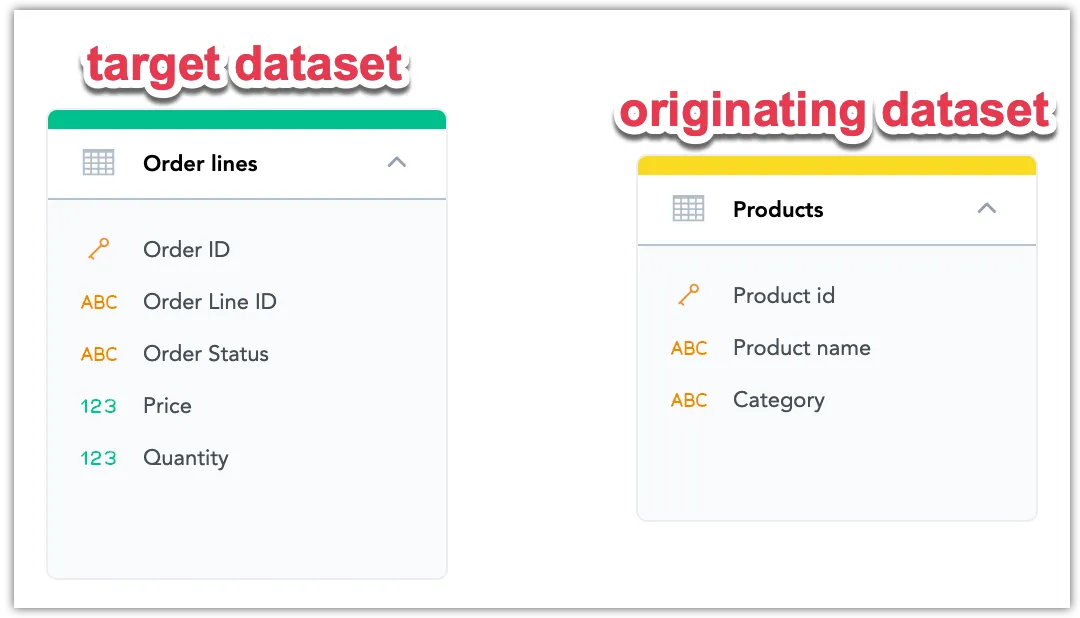
In this example you want to be able to use the information from the
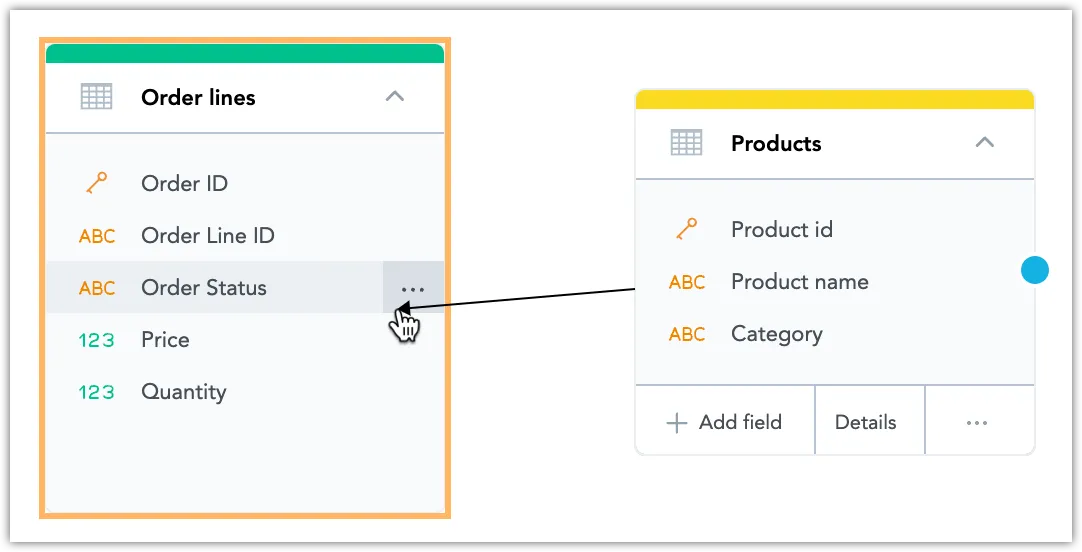
Products(originating) dataset in theOrder lines(target) dataset.Select the originating dataset. Click the blue dot on the right border of the originating dataset and drag the arrow to connect it to the target dataset.
The following dialog opens:
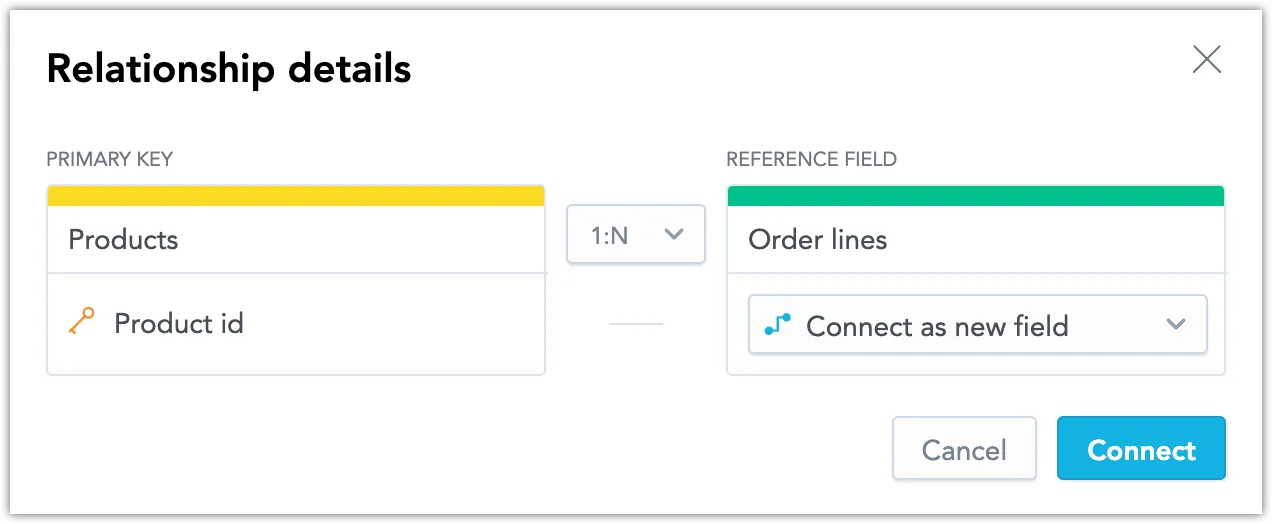
Customize the relationship as required.
In the target dataset, the primary key defines the unique identifier for a row of data from the originating dataset. If the originating dataset does not contain a primary key, select an attribute from the Primary Key drop down list to set it as the primary key.
We recommend you use the default 1:N relationship type.
In the Reference Field drop down list you can choose from one of the following options:
Connect as new field: Add the primary key of the originating dataset as a new attribute (foreign key) to the target dataset. The foreign key serves as a reference to the originating dataset.
Existing dataset fields: Reuse an existing attribute from the target dataset, and make it a reference (foreign key) to the originating dataset.
Click Connect.
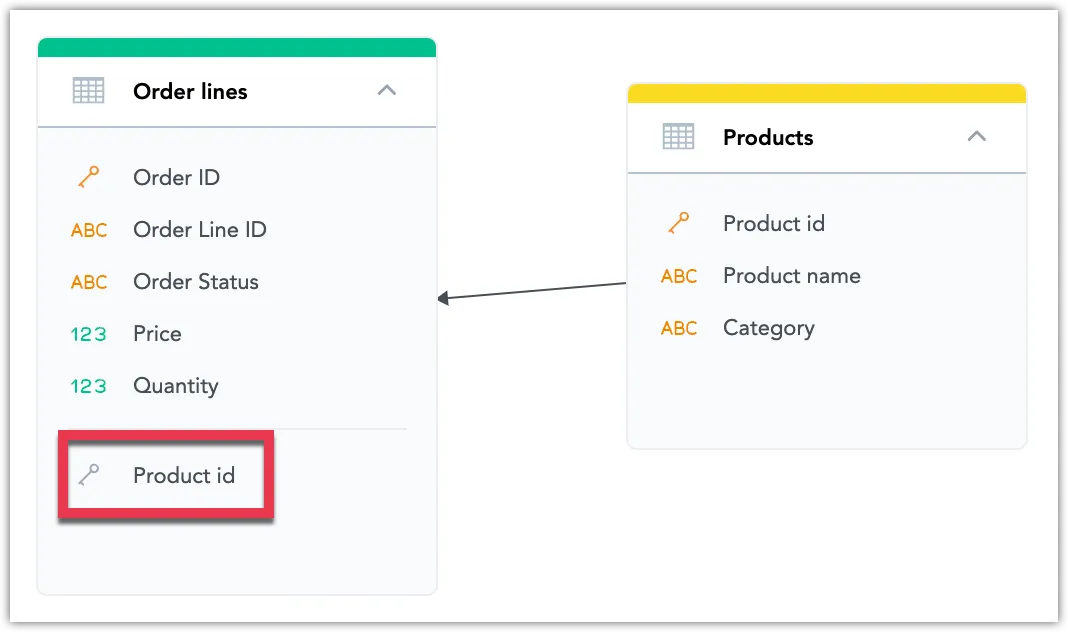
Notice that the target dataset has been extended by the foreign key from the originating dataset.
Repeat these steps for all the datasets in your LDM that you want to connect.
Add Date Datasets
A Date dataset is a dataset that represents DATE / TIMESTAMP columns in your database. The Date dataset helps you manage time-based data and enables aggregation at the day, week, month, quarter, and year level.
Steps:
Drag Date from the left panel and drop it in the blank canvas area.
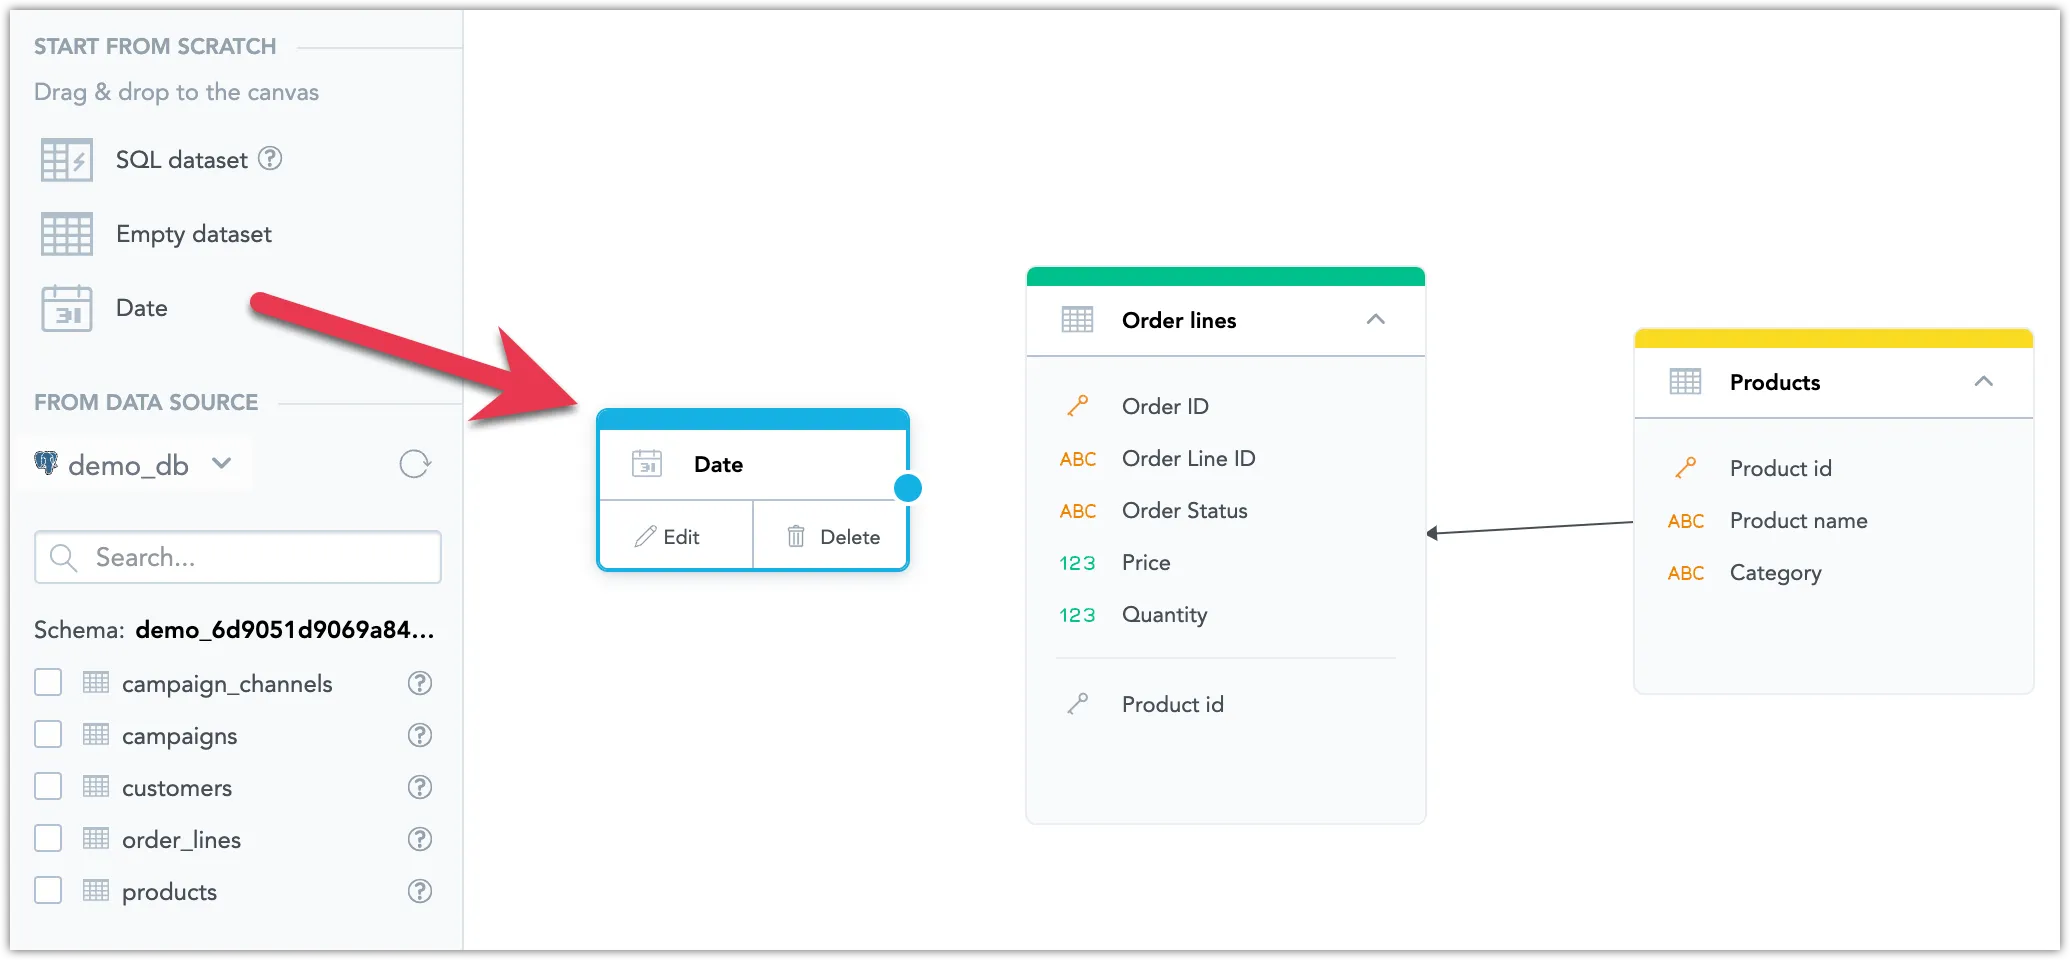
Create a relationship between the new Date dataset and a dataset that contains a date/timestamp column.
In the following image, the dataset with a date/timestamp column is the
Order linesdataset.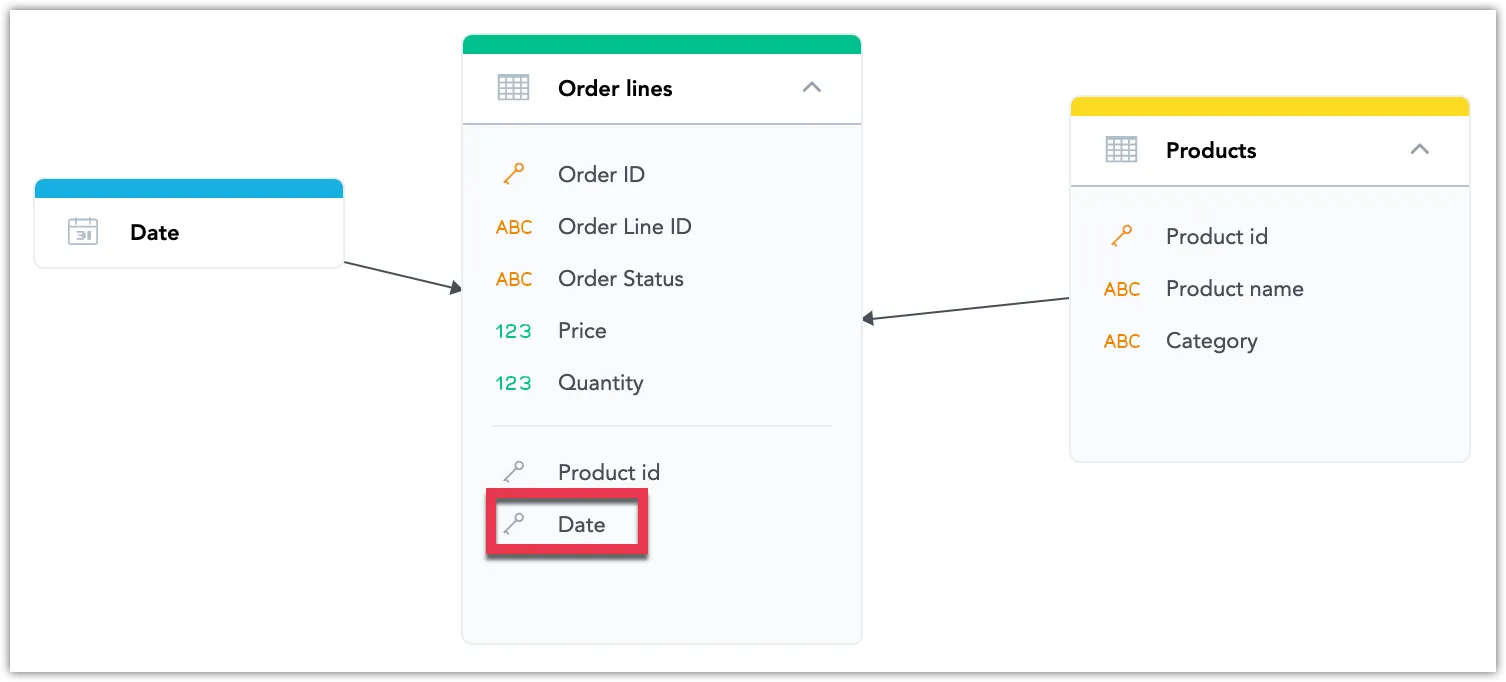
Notice that the
Order linesdataset has been extended by theDateforeign key.(Optional) Configure the Date dataset.
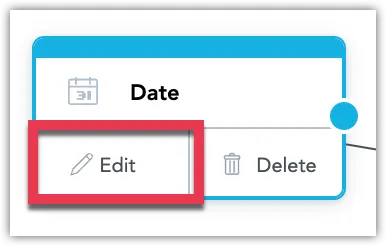
Select the dataset, and click Edit.
In the configuration dialog, configure the dataset as needed:
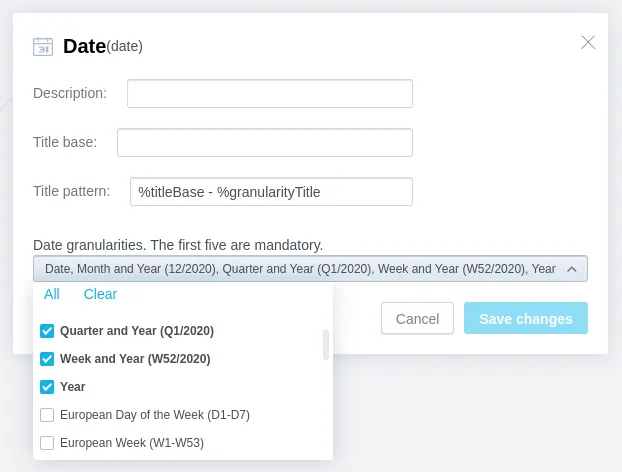
Add a description to the dataset.
Configure how the name of the included date/time granularity levels will be displayed.
The
Title patternfield defines the general format for the titles of all included granularity levels. Use the%titleBaseand%granularityTitleplaceholders to define the order in which the value from theTitle basefield and the default granularity title will be used in the title. IfTitle baseis not specified, the default name of the Date dataset (Date) will be used (for example,Date - Year,Date - Hour, and so on).Select the date/time granularity levels that you want to include in the Date dataset.
Some date granularity levels are selected by default and cannot be excluded from the Date dataset.