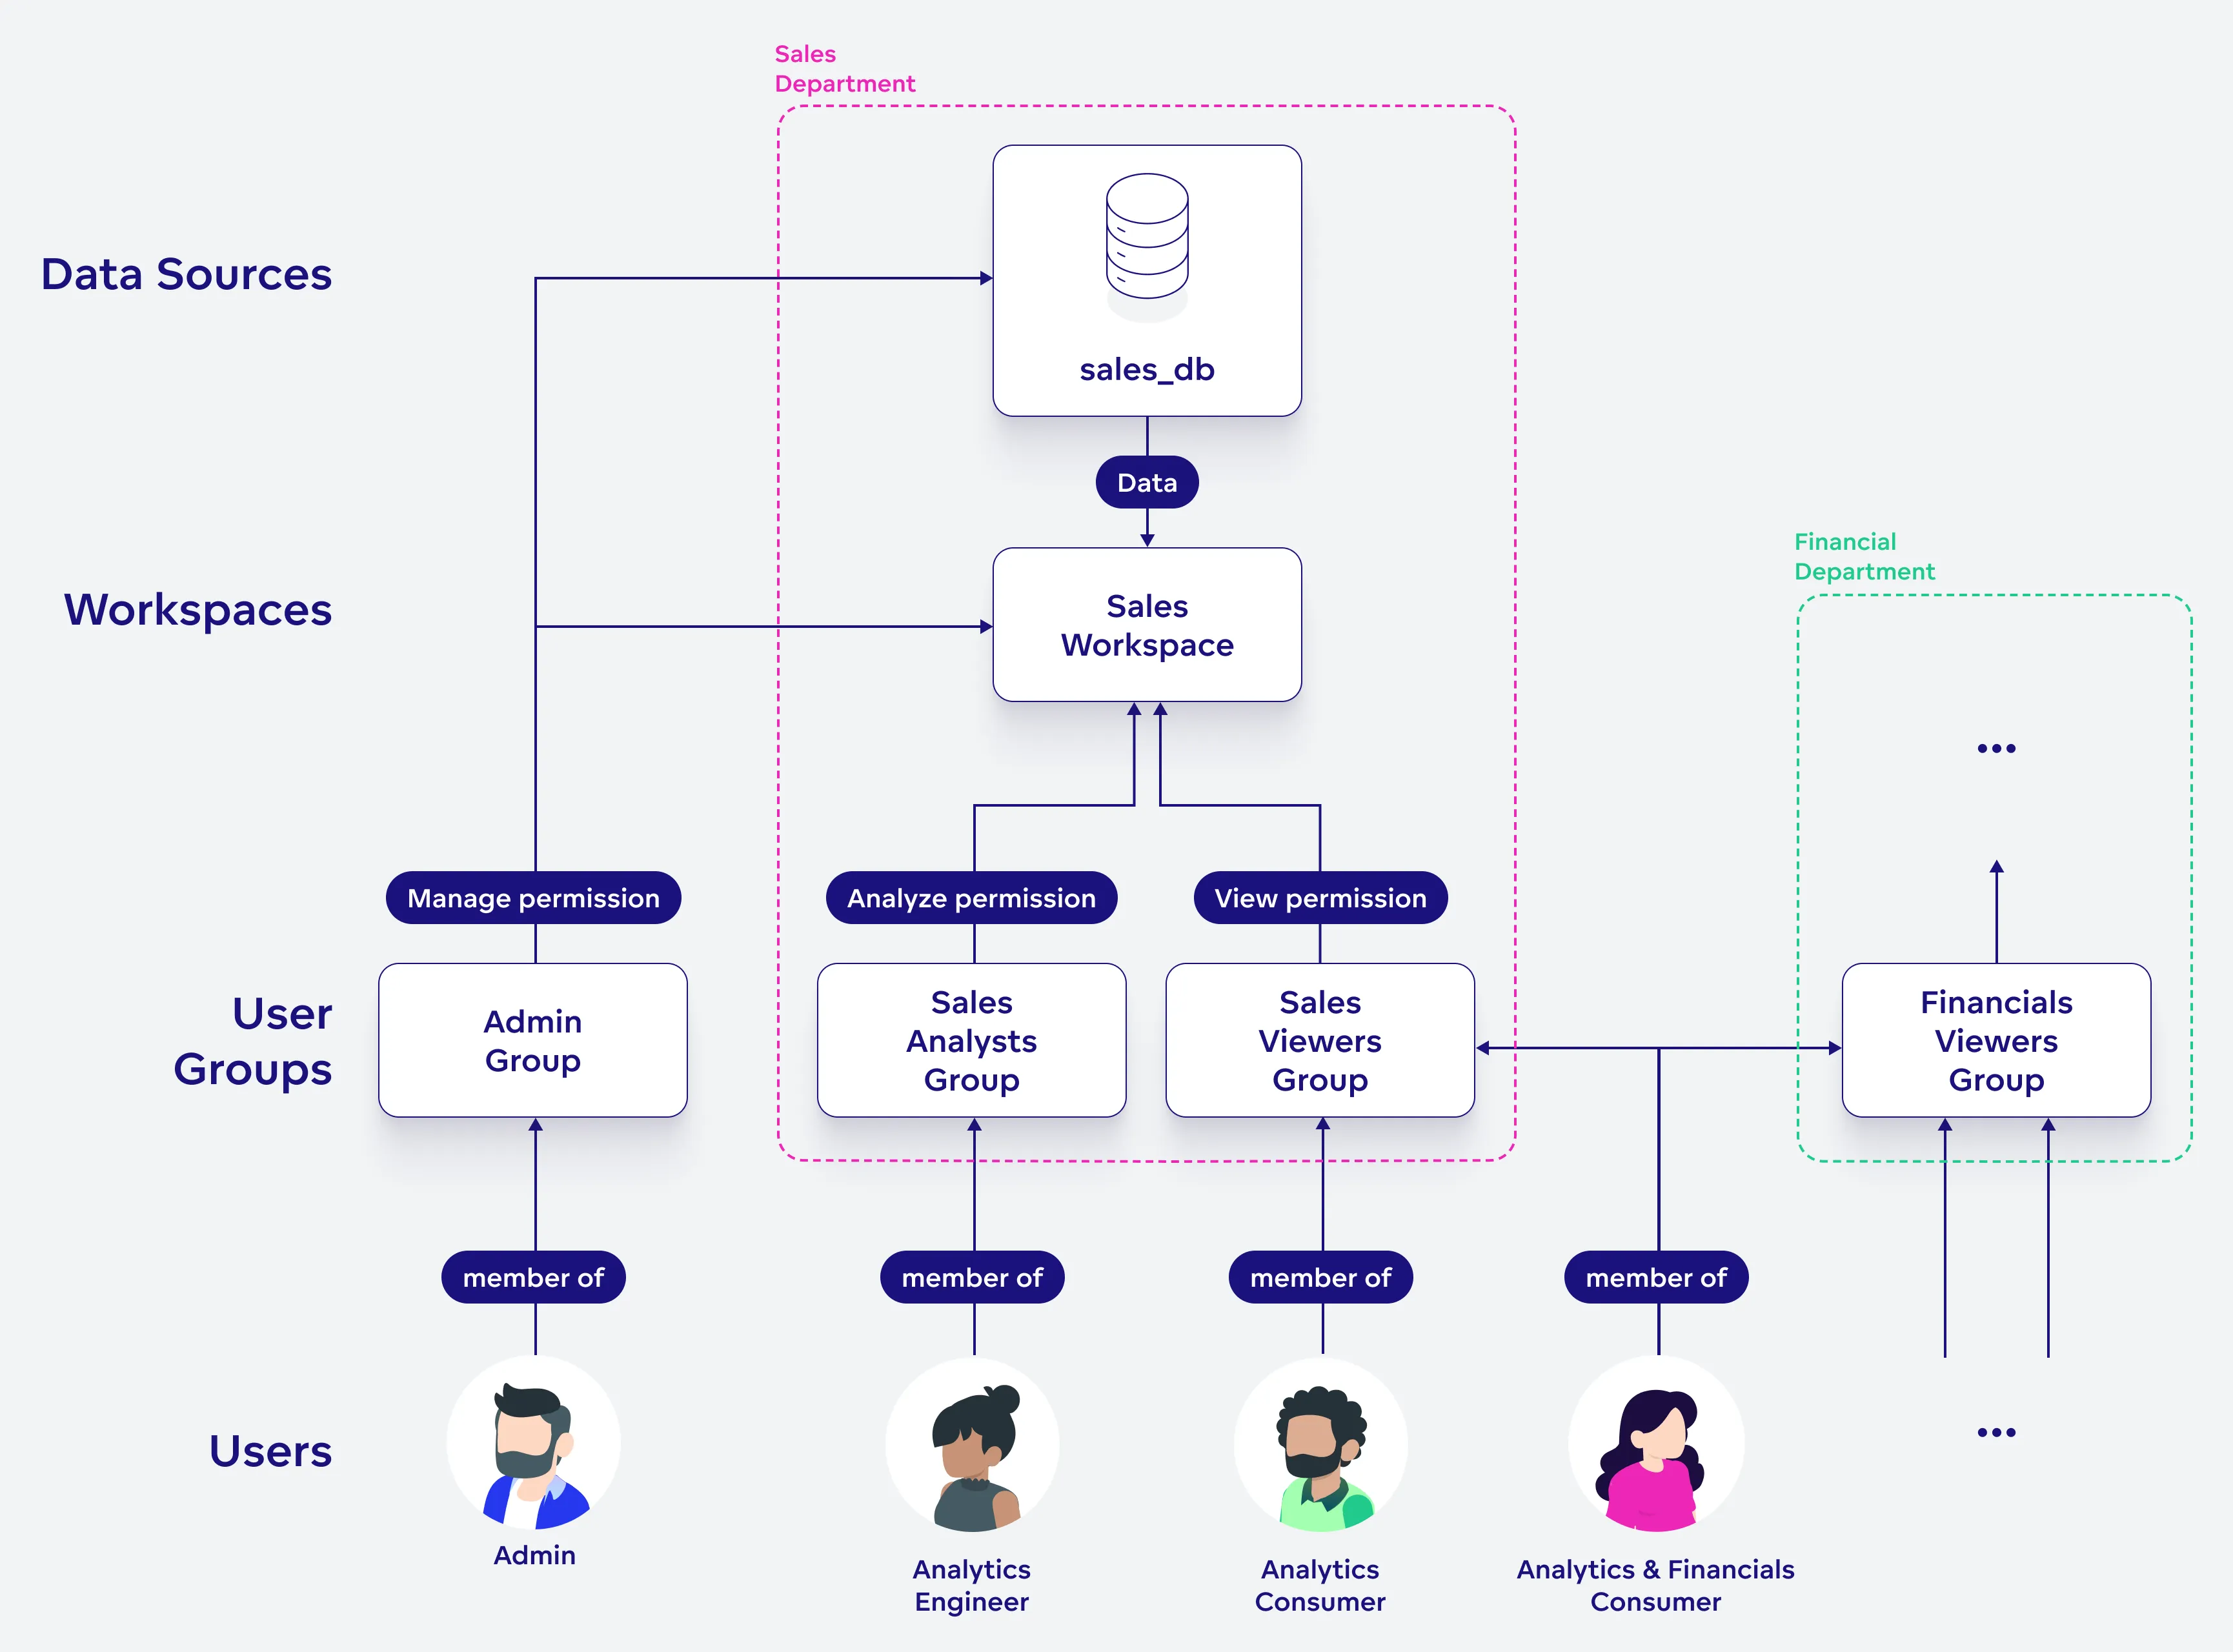
Manage Users
After mapping your users from your OpenID Connect (OIDC) identity provider using either Just-In-Time (JIT) User Provisioning or the web UI / API process as described in the Create a User section, you can leverage user groups for efficient access control management.
User groups, organized by roles, departments, or other relevant criteria, enable streamlined permissions assignment. This not only simplifies user onboarding and role adjustments but also enhances data security.
Create a User
To create a new user in GoodData, the user must already exist in your OIDC identity provider and you must know the user’s sub claim - the value of a user’s sub claim is provided by your OIDC identity provider.
In general, we recommend you automate the creation of users either through the use of JIT user provisioning or by creating an automated pipeline using the API call described below. Creating users manually using the web UI is best reserved for test scenarios or to address specific edge cases.
Steps:
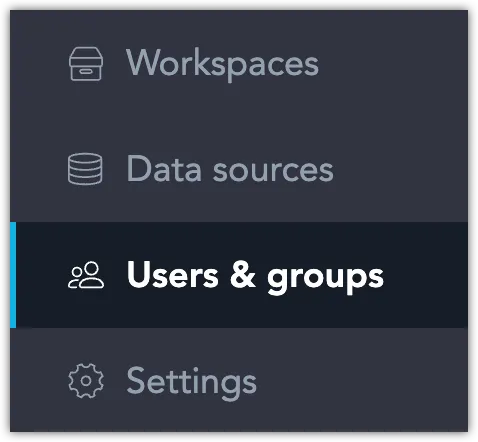
On the home page, switch to the Users & groups tab.
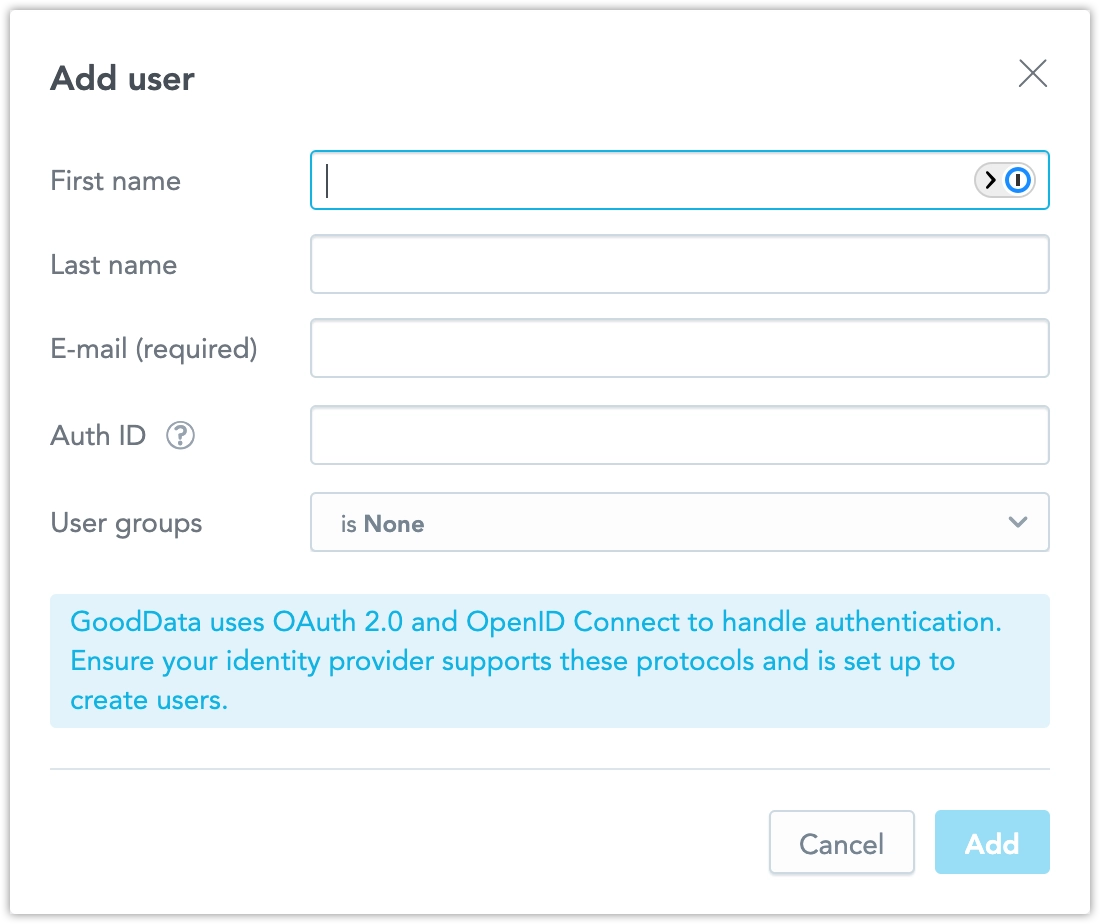
Click Add user.

Fill in the user’s name, email (optional) and their sub claim. You can also assign them to user groups.
Avoid Assigning the Same AuthenticationId to Multiple Users
Although GoodData lets you map multiple users to the same authenticationId, only the alphabetically first userId will be able to log in.
Click Create.
The user is created.
The process depends on the identity provider (IdP) you are using:
Using Your Own IdP: The user creates their account first. After that, you can update their permissions.
Using GoodData’s Hosted IdP: When an invitation is sent to the user’s email, an account with its metadata is created in GoodData at the same time. This lets admins set permissions for the account before the user logs in for the first time.
Note: If the invitation is not accepted within 21 days, it expires automatically. After this period, the pending user is removed from the organization. This behavior is expected and ensures that inactive or unconfirmed accounts do not remain in a pending state indefinitely. If needed, you can invite the user again by creating a new invitation.
Next we recommend you assign the user to one or more user groups. See Create a User Group below if you did not create any yet.
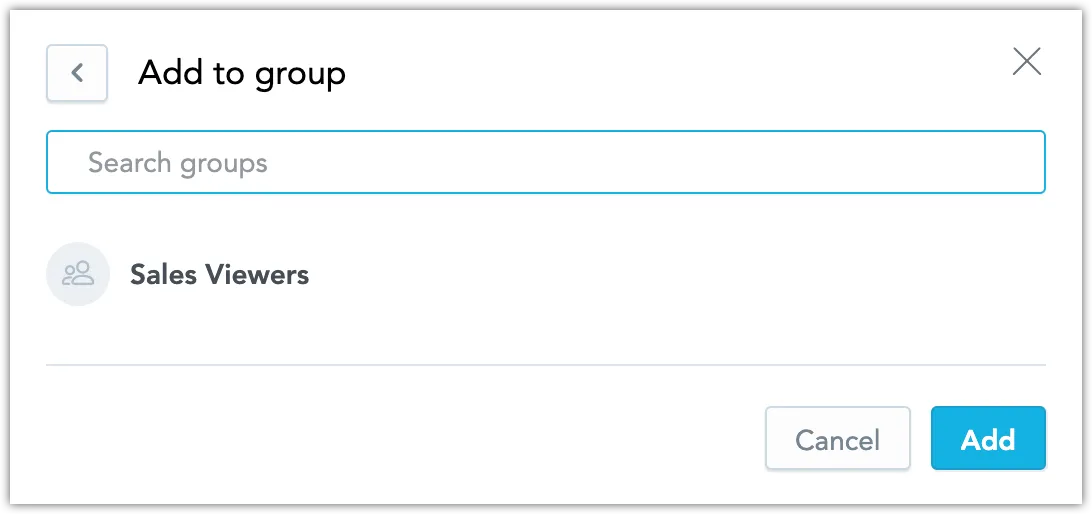
Click on the user to open the user’s setting dialog, switch to the Groups tab and click on Add to group.
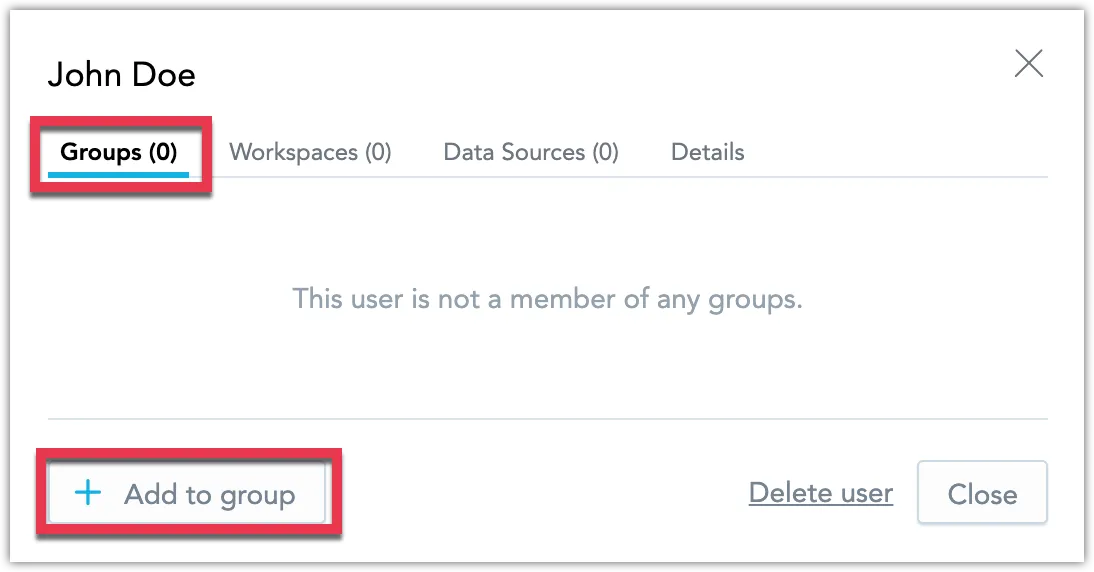
Add one or more groups and Add the user to them
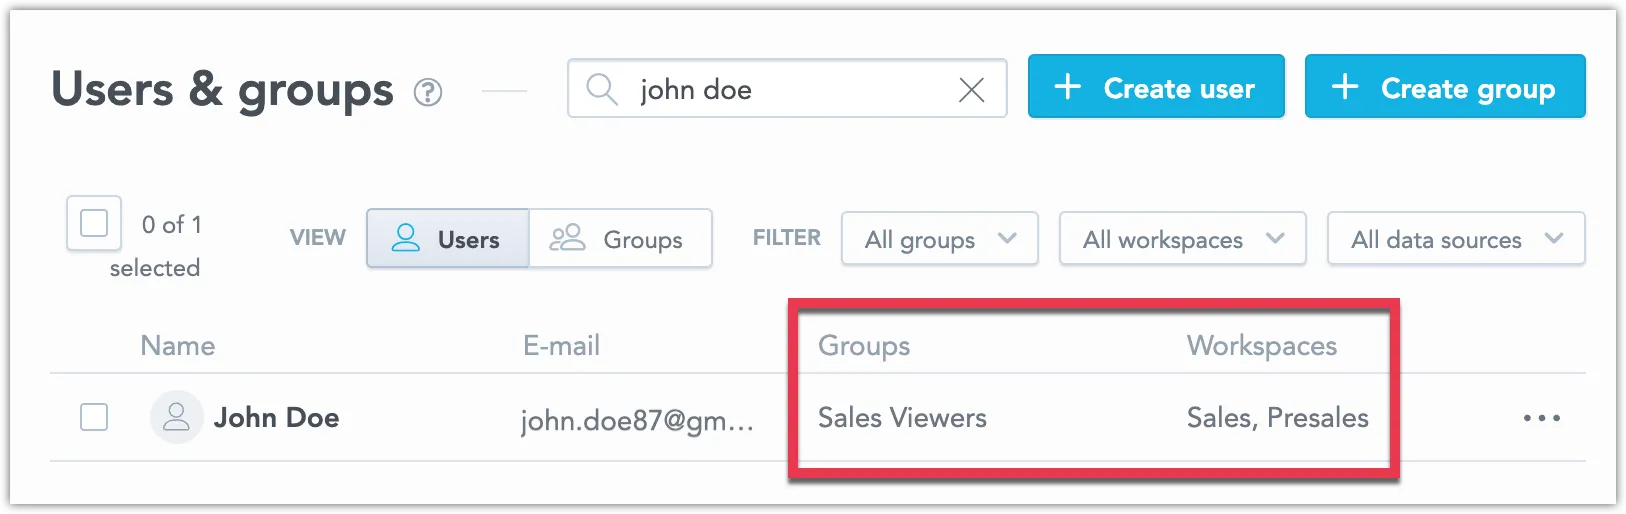
The user now has access to all workspaces (and data sources) that are assigned to the user groups.
Create a user by making a POST call to the API endpoint /api/v1/entities/users/ with the user definition in its payload:
curl $HOST_URL/api/v1/entities/users \
-H "Authorization: Bearer $API_TOKEN" \
-H "Content-Type: application/vnd.gooddata.api+json" \
-X POST \
-d '{
    "data": {
        "id": "<userId>",
        "type": "user",
        "attributes": {
        "authenticationId": "<subClaim>",
        "email": "<email>",
        "firstname": "<firstName>",
        "lastname": "<lastName>"
        },
        "relationships": {
        "userGroups": {
            "data": [{
            "id": "<userGroupId>",
            "type": "userGroup"
            }]
        }
        }
    }
}'
Create a User Group
All users should be assigned to one or more user groups. Permissions may be allocated to user groups, and these permissions then extend to all users within the group.
Steps:
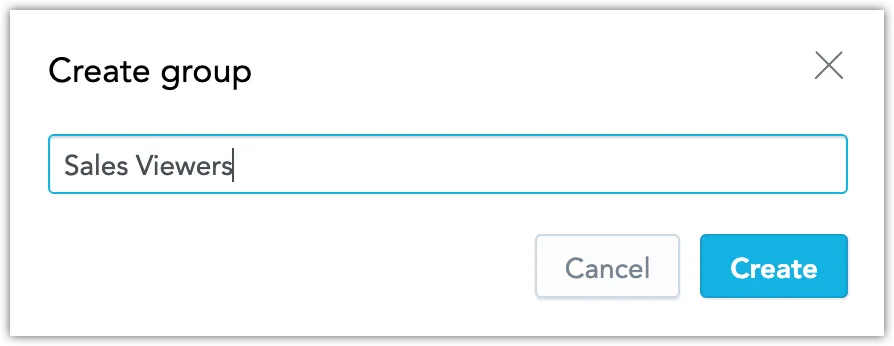
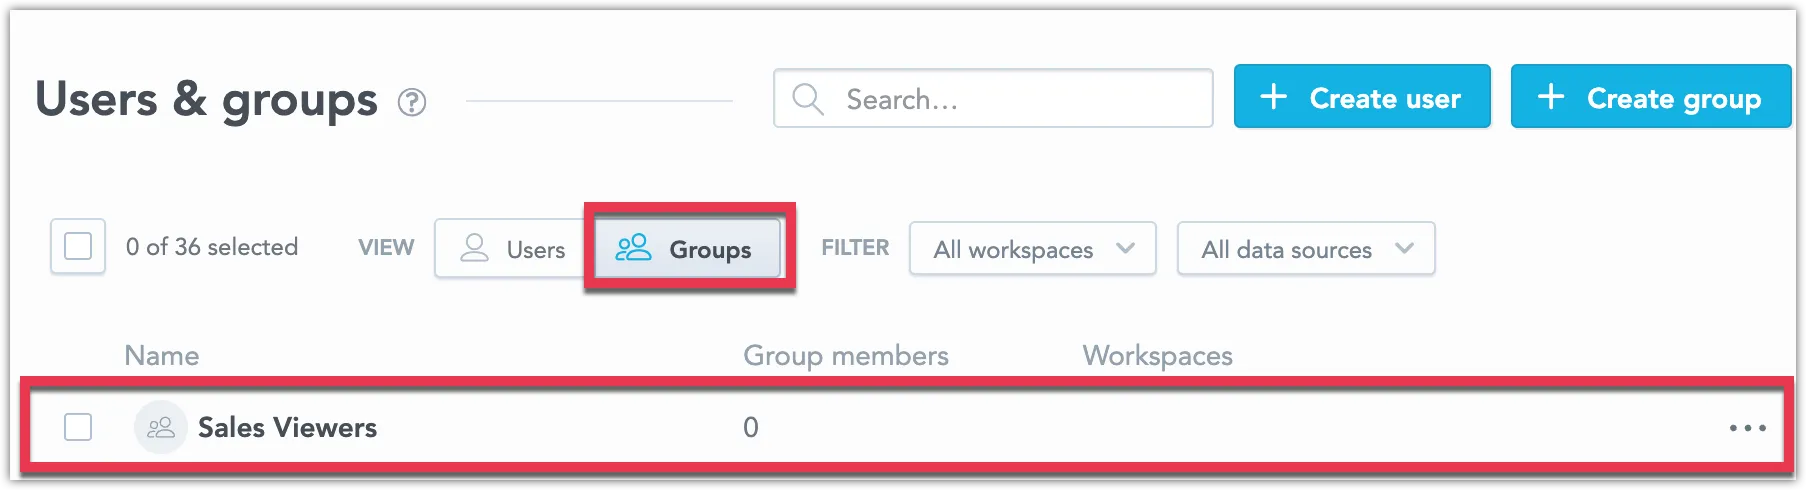
On the home page, switch to the Users & groups tab.
Click on Create group.

Assign a descriptive name to the group and Create it.
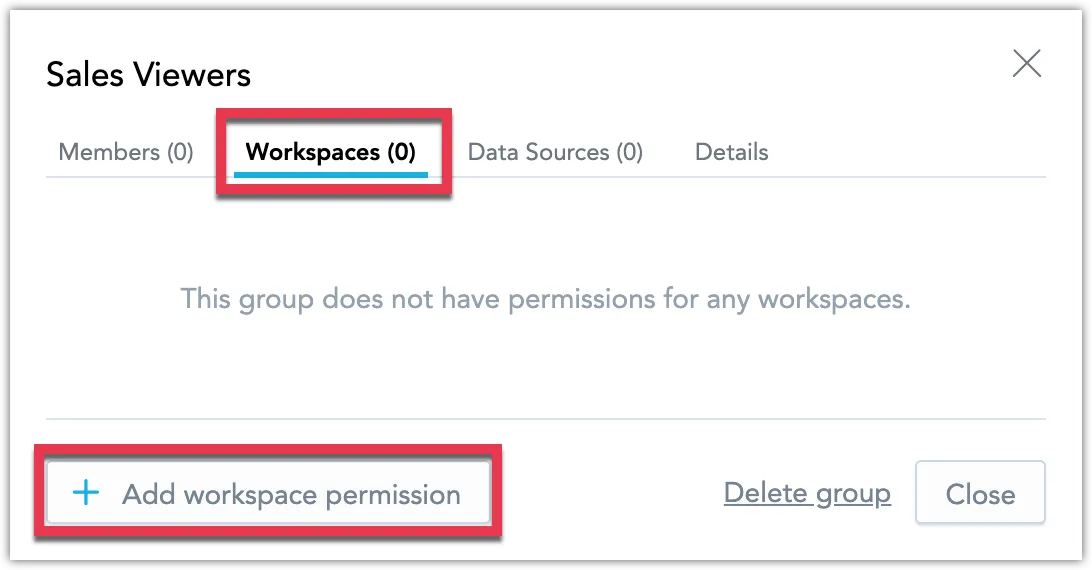
The user group has been created. In the following steps you will assign workspace permissions to this group to let its members access the designated workspaces.
Locate the newly created user group in the Groups tab and click on it.
Switch to the Workspaces tab and click Add workspace permission.
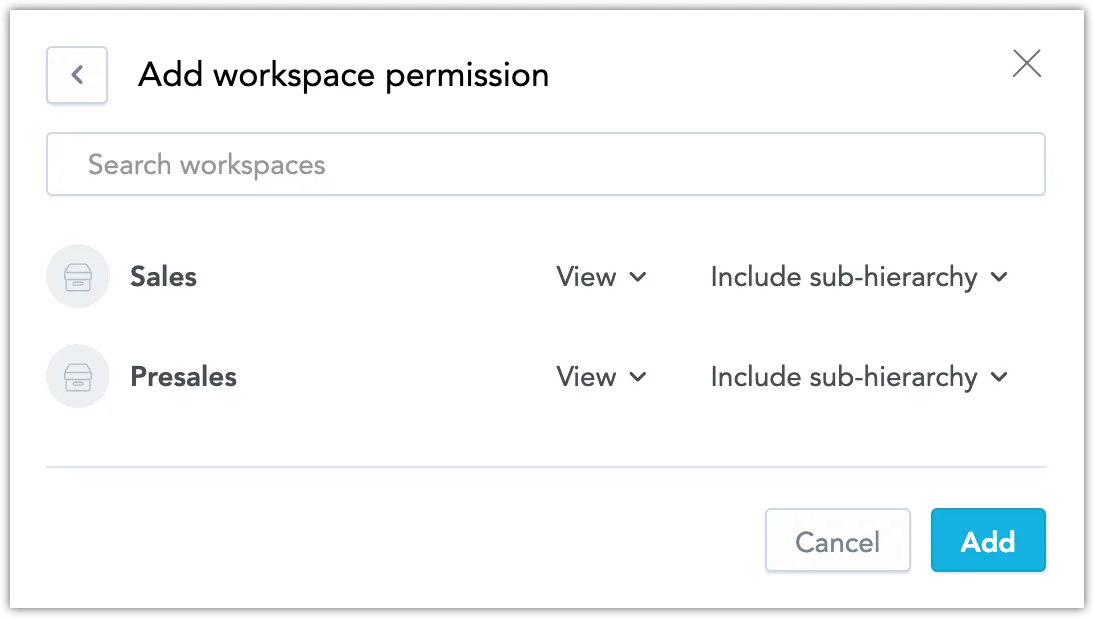
Select workspaces you want the members of this group to get access to, and specify the level of their access rights.
Workspace Permissions and Dashboards
Giving users VIEW permission to a workspace does not guarantee that they will be able to access dashboards contained in the workspace. Individual dashboards need to be explicitly shared with the user group. See Share Dashboards.
Click Add.
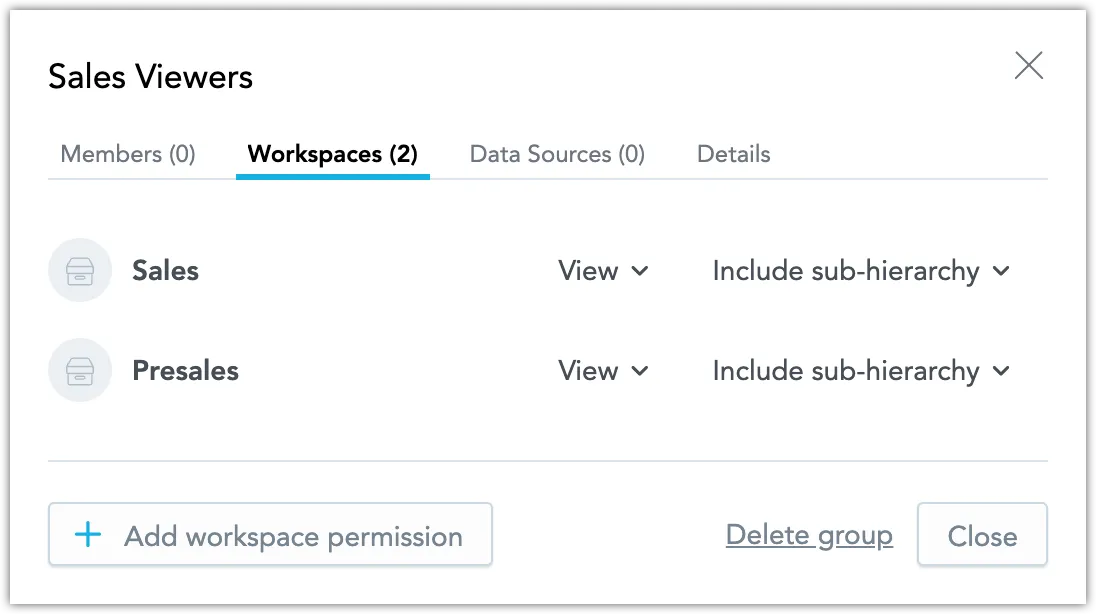
You can now see the workspaces you have assigned to this group:
Switch to the Members tab and click Add members.
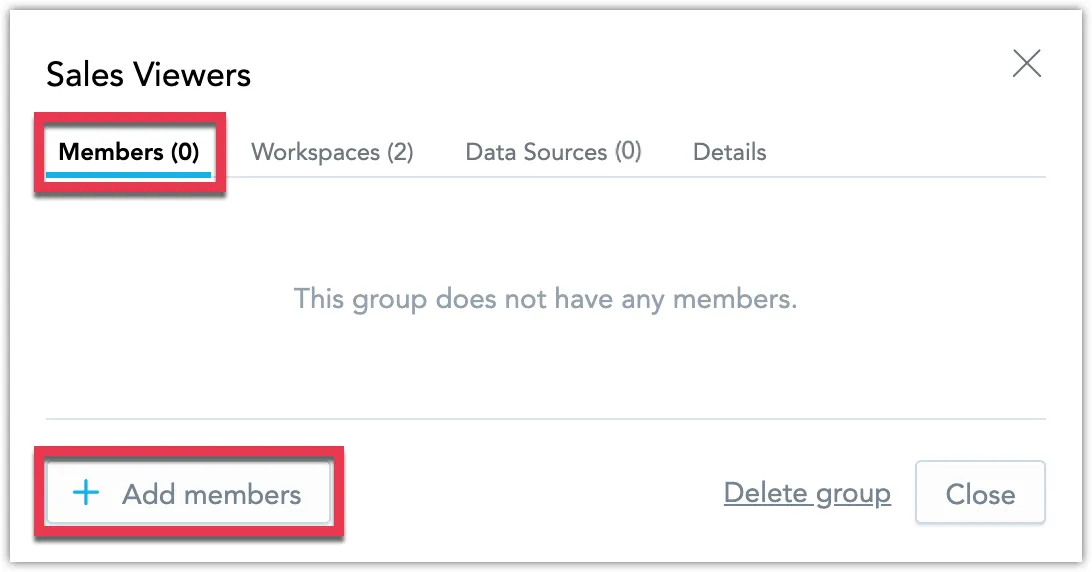
Select users you want to add as members of this group.
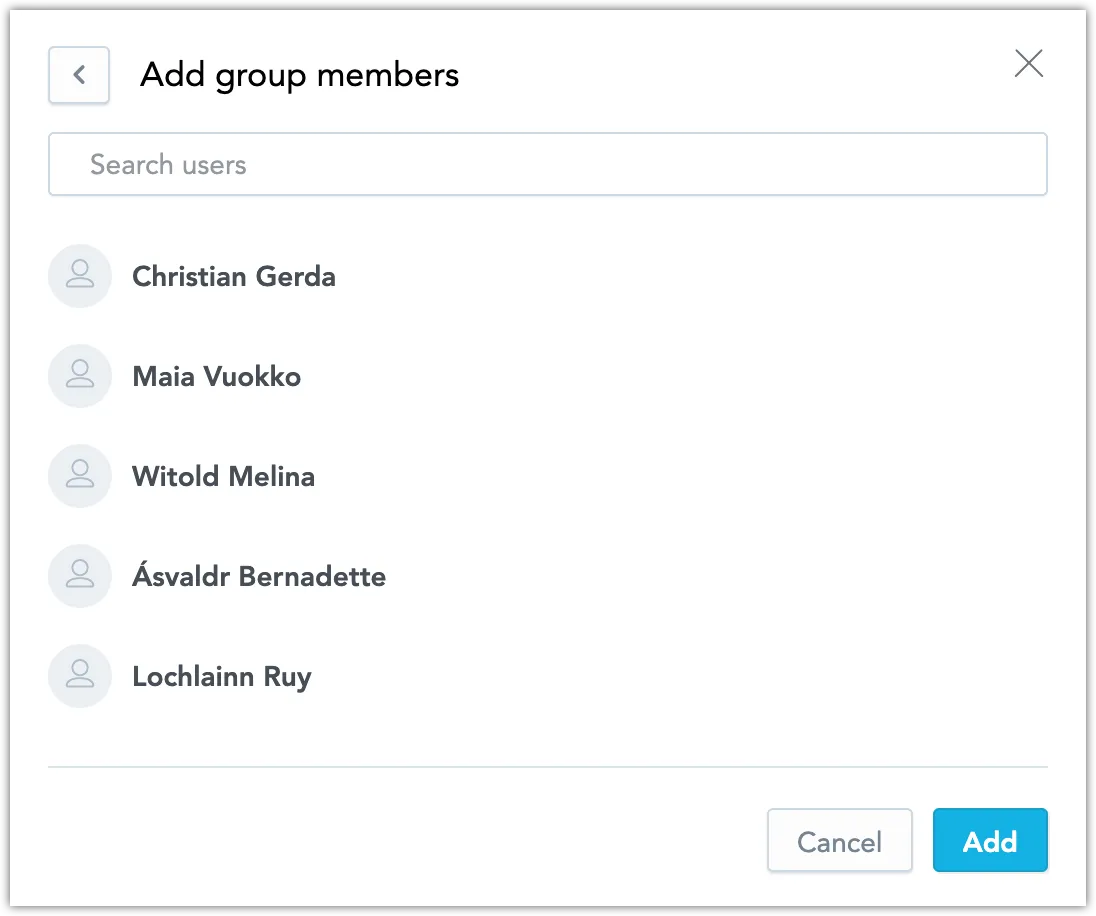
Click Add.
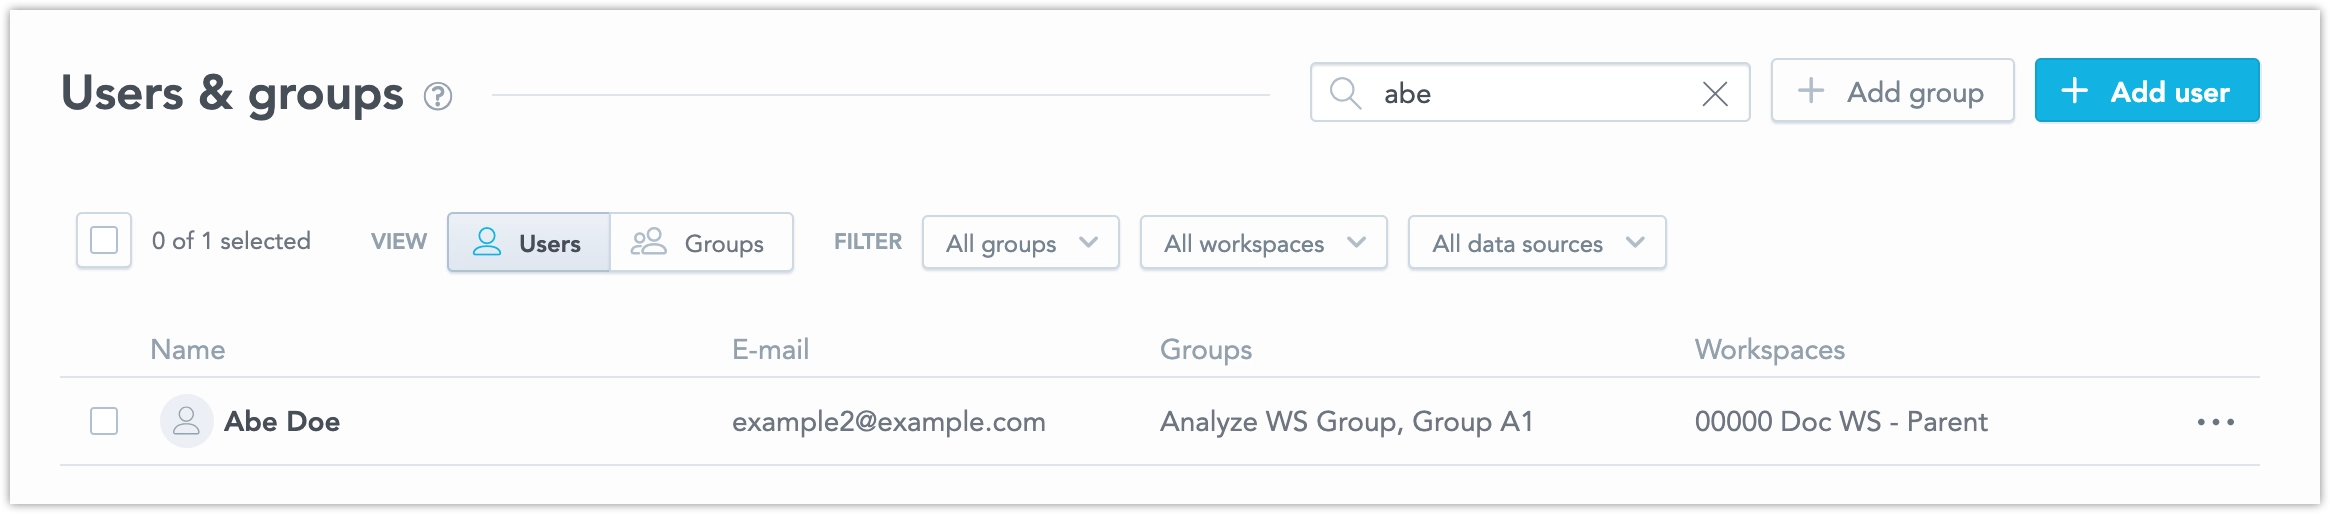
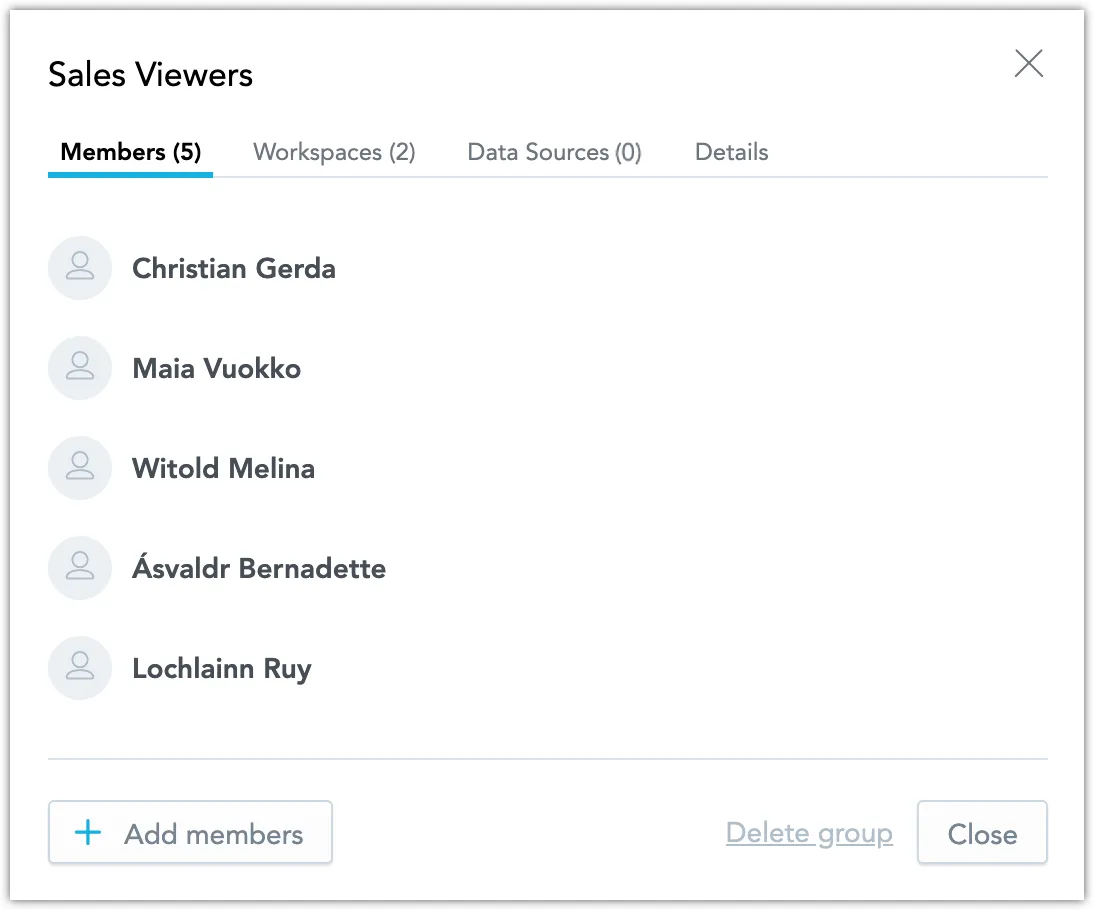
You can now see the users you have assigned to this group:
Your user group is all set up!

When Do You Need a Data Source Permission?
Grant data source permissions to a user group only if its members require modification rights to the logical data model. These permissions are unnecessary for viewing, creating, or editing dashboards and visualizations.
Using the API to manage user groups involves a few steps due to how permissions are structured. Permissions are directly linked to their respective objects, such as workspaces. Therefore, to effectively set up a user group through the API, you’ll need to complete three key actions:
- Create a new user group.
- Link the user group to the desired workspaces.
- Add users to the user group.
Steps:
Create a new empty user group by making a POST call to the API endpoint /api/v1/entities/userGroups with the user group definition in its payload:
curl $HOST_URL/api/v1/entities/userGroups \
-H "Content-Type: application/vnd.gooddata.api+json" \
-H "Accept: application/vnd.gooddata.api+json" \
-H "Authorization: Bearer $API_TOKEN" \
-X POST \
-d '{
    "data": {
        "type": "userGroup",
        "id": "<userGroupId>",
        "attributes": {
        "name": "<userGroupDisplayName>"
        }
    }
}'
Assign the user group to a workspace by making a POST call to the API endpoint /api/v1/actions/workspaces/<workspaceId>/managePermissions/ with an array of user groups that you want to assign permissions to access this workspace:
curl $HOST_URL/api/v1/actions/workspaces/<workspaceId>/managePermissions/ \
    -H "Authorization: Bearer $API_TOKEN" \
    -H "Content-Type: application/json" \
    -X POST \
    -d '[
    {
        "assigneeIdentifier": {
            "id": "<userGroupId>",
            "type": "userGroup"
        },
        "permissions": ["VIEW"]
    }
]'
Repeat this step for all workspaces that you want this user group to have access to.
Note that you can use either
permissionsorhierarchyPermissions, see Manage Workspace Permissions for the difference between them.Add members to your user group by making a POST call to the API endpoint /api/v1/actions/userManagement/userGroups/<userGroupId>/addMembers with an array of users to be added:
curl $HOST_URL/api/v1/actions/userManagement/userGroups/<userGroupId>/addMembers \
-H "Authorization: Bearer $API_TOKEN" \
-H "Content-Type: application/vnd.gooddata.api+json" \
-X POST \
-d '{
    "data": {
        "members": [
            {
                "id": "<userId>"
            }
        ]
    }
}'
Your user group is all set up!